PrF UG projects all
Projects
This section of the Protege-Frames User's Guide covers the concepts of understanding, creating, and using Protege-Frames projects.
Note: Before you create and use projects, you should be confident with the basic Protege-Frames interface.
To return to the main table of contents, click the Protege-Frames User's Guide link (located at the top of the table of contents on the right-hand side of this page).
Creating a Project
There are two ways to create a new Protege project:
create a completely new project
create a Protege-Frames project from existing text files or from a table in a JDBC database
To create a project:
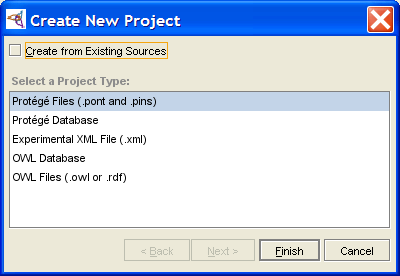
Create a new project:
The following project types support the Protege-Frames format:
Experimental XML Normally, unless you have a need for a specific structure (e.g., for exporting files), you would select Protege Files. If you wish to help the development of the XML backend, you can select Experimental XML.
To import a project from existing files, select Create from Existing Sources. You can create a project from existing files in Protege Files or Protege Database format.
To create a new, empty Protege-Frames project, leave this unchecked (the default).
Click Finish. The Protege-Frames window will open and the standard tabs will become visible. An initialized knowledge base will be created, containing the system classes rooted in :THING. No instances will be created. You can now structure your project by creating your classes and slots. (See Creating a New Class and Creating a Slot for more information.)
To save the project to disk, select Save from the File menu.
Enter a name for your project in the Project line of the dialog box. This is the name of your project (.pprj) file. Protege-Frames also creates internal files for its own use. By default, these files are given the same name, with a different extension.
Opening a Project
You can open an existing Protege-Frames project when you start Protege, from within the Protege window, or from a list of recent projects. No matter what format your project is in, you can create, open, and save your projects directly via the .pprj file. You do not need to name or access other file types unless you wish to build a project. To save the open project to disk after you have edited it, select Save Project from the File menu.
Opening a Project When You Start Protege
To open an existing project when you first start Protege:
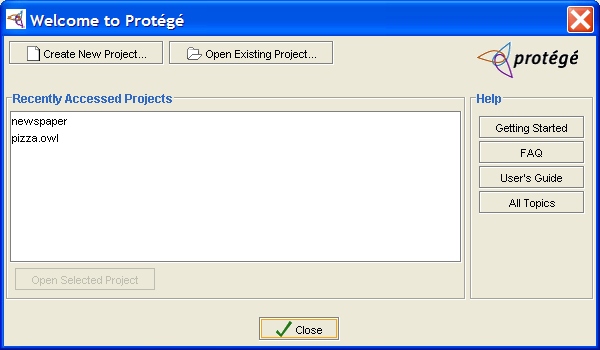
Start Protege. A dialog box will appear, allowing you to create a new project, open a recent project, or get help.
To open a project in the list of Recently Accessed Projects, highlight its name and click OK.
To open a project that is not listed, click Open Existing Project. Locate the .pprj project you wish to open and click OK.
Opening a Project within Protege
Select Open Project... from the File menu, click the Open Project (
 ) button
or type Ctrl-O (Cmd-O).
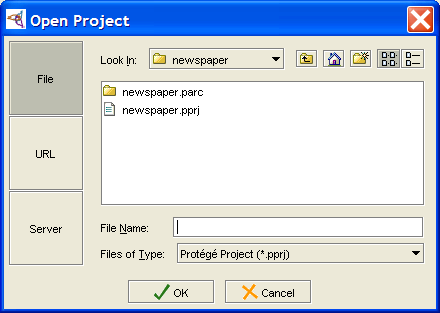
A Project dialog box will appear,
allowing you to select the project.
Select the .pprj project you wish to open.
Click OK.
For Windows systems, you can also open a project by double-clicking on the .pprj file in Windows Explorer.
Opening a Recent Project within Protege
Protege maintains a list of recently opened projects. To open a recent project:
Select Open Recent Project from the File menu.
Select the project you want.
Importing a Project
Importing a project creates a new Protege-Frames project and .pprj file, based on files which contain your ontology information in one of the supported formats. When you import a project, a .pprj file is built, based on the information in your existing files.
To do this, create a new project and make sure that Create from Existing Sources is checked in the Create New Project dialog box.
You can import a project from the following project types:
Text Files: You can import a project from a pair of text files describing the class/slot (e.g., abc.pont) and instance (e.g., abc.pins) information. Importing a text project can be used, for example, for updating from Protege-Frames/Win to Protege.
Database Table: You can import a project from a single table in a JDBC database.
You can not import an XML file into Protege using the Protege XML backend.
Protege-Frames will generate default forms for all classes in the imported project.
Saving a Project
To save a Protege-Frames project:
Select File | Save Project, click the Save Project (
 ) button,
or type Ctrl-S (Cmd-S).
If this is a new project, you will be prompted for the name and location. Choose a name and location for the .pprj file; the other files will be created automatically. If you do not specify a location for the project, by default, the project will be saved in the directory where Protege is installed. If you are saving a database project, you will need to supply additional information; see Protege Database Format.
Click OK.
For more information, see the following topics:
See Archiving a Project for information on how to archive a version of the current project.
See Renaming a Project for information on how to save the current project with a new name.
See Project Formats for information on how to convert or export the project to a different format.
Converting a Project to Another Project Type
You can convert a Protege-Frames project from one backend format (project type) to another. You will see no difference in the Protege interface when you work with your project, but all changes to to the project are stored in the new format. See Understanding Project Types for more information.
You can convert between the following Protege-Frames formats:
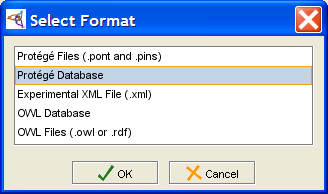
Protege Files (the default) creates two text files in Protege-Frames format. See Protege Files.
Protege Database creates the project as a table in a JDBC database. To do this, you must have a database installed and configured on your system. See Protege Database Format.
Experimental XML saves the project in XML format. See Experimental XML Format.
Note: You can also convert a Protege-Frames file to Protege-OWL format and vice versa. In this case, however, you will see a significant difference, because of the differences between the Protege-Frames and Protege-OWL capabilities and interfaces.
To convert a Protege-Frames file to a different format:
Select File | Convert Project to Format...
Select the format you want in the Select Format dialog box.
Fill out any required information when requested; see the specific formats for more information.
Click OK.
Exporting a Project
Exporting a project creates a snapshot of the current version in the selected format, while leaving the Protege-Frames project itself unchanged.
To export a project:
Select File | Export Project... and select the desired format from the cascading menu.
Fill out any necessary information:
For CLIPS files, select the name and location for your files. See Exporting to CLIPS for more information.
For HTML format, fill in the Export HTML Configuration Options. See Saving an HTML View for more information.
Click OK.
Renaming a Project
To save a Protege project under a new name:
Select File | Save Project As....
Navigate to the location where you want to save the file and enter the new name for the .pprj file in the Project line of the window.
By default, the new names are entered automatically for any additional files in the project (for example, .pont and .pins files for standard text format). However, you can choose to give a different name to these files. You might want to do this, for example, if you are creating a new .pprj file which still accesses the old .pont and .pins file names. In this case, enter the names you want for the .pont and .pins files.
Click OK.
For more information, see the following topics:
See Archiving a Project for information on how to archive a version of the current project.
See Project Formats for information on how to convert or export the project to a different format.
Setting Preferences
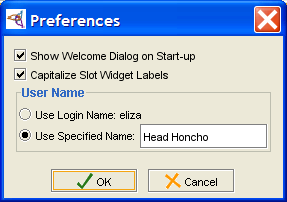
You can set some basic preferences for the Protege-Frames interface, using the Preferences dialog box.
Note: You can set additional configuration options by choosing Project | Configuration. Preferences apply to all Protege projects, while Configuration applies to the current project.
To use the Preferences dialog:
Select File Preferences...
You can set the following preferences:
Show Welcome Dialog on Start-up: You can choose whether or not to see the Welcome dialog box each time you start Protege-Frames. This dialog asks you to open, import, or create a new project. If you choose to disable the Welcome dialog box, you can perform these actions from the menus.
Capitalize Slot Widget Names: This controls an aspect of the Forms interface. To distinguish slot names from class names, a recommended convention is to make internal slot names lowercase. If this option is selected, Protege-Frames automatically capitalizes the names of slots on the forms it creates.
User Name: The user name is shown on sticky notes. The default name is the login name you use to access your computer system. If you wish to customize the displayed name, select Use Specified Name and enter your desired name in the entry box.
Once you have set the Preferences to your satisfaction, click OK to implement your changes.
Archiving a Project
You can archive the current version of a project. Archiving saves a time-stamped copy of the project in a subfolder of your project folder. You can revert to a previously archived project at any time. This provides a form of version control for Protege.
To archive the current version of a project:
Select Project | Archive or click the Archive Current Version (
 ) button
near the top of the Protege window.
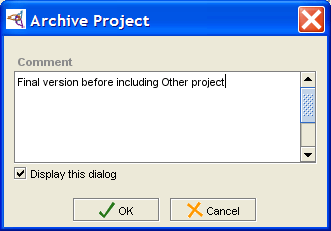
If you wish, enter a comment:
Click OK.
Reverting to an Archived Version of a Project
You can revert to any archived version of your project.
Select Project | Revert to a Previous Version or click the Revert to a Previous Version (
 ) button
at the top of the Protege window.
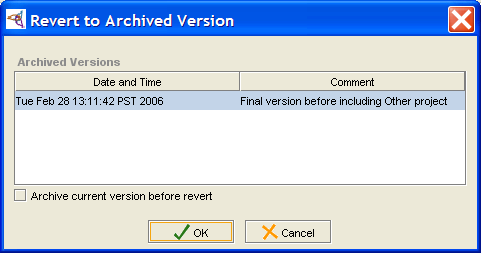
All archived versions are displayed in the Revert to Archived Version dialog:
Select the version you wish to revert to. If you wish, you can select to archive the current version before reverting.
Click OK.
Including a Project
You can include an existing project in your current Protege-Frames project. An included project stays as a separate project which you can open and edit separately; edits made in the file for the included project will appear in the including project the next time it is loaded. This allows you to build a single large project from one or more smaller projects.
With an included project:
you can
view and refer to the frames of the included project, e.g., you can create a subclass of an included class or associate an included slot to a class
edit instances from the included project and create new instances for included classes
edit included forms
edit and override included slots
you cannot
make edits that would affect classes in the included project, e.g., you cannot edit or delete an included class
Including a project
To include a project into an existing Protege-Frames project:
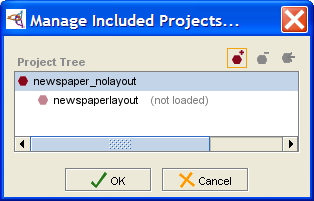
Select Manage Included Projects from the Project menu. The current project, and its included projects, if any, will be shown in a project hierarchy.
Click the Add Project (
 ) button,
at the top right of the Manage Included Projects dialog box.
In the Select Project dialog box, browse to the location of the project you want to include and select the .pprj file of the desired project.
Click Open.
The included project will be shown in the dialog box, with "(not loaded)" after it to indicate that the actual inclusion process has not yet taken place. If the included project already includes any other projects, they will also be added to the hierarchy.
To include additional projects, repeat steps 2-6.
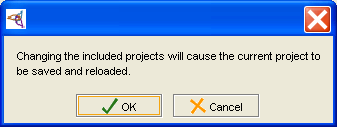
Click OK. You will see a warning:
Click OK.
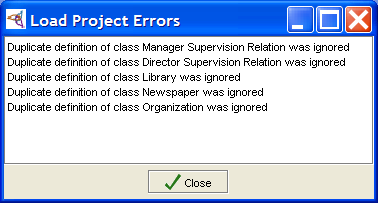
If there are any classes that are duplicated in your project, you will see a warning:
Click Close to continue. Protege-Frames will include your files at this time.
The project is included into your current project.
Frames in the included project appear with pale icons
(e.g., ![]() ,
,
![]() )
to show they cannot be edited.
)
to show they cannot be edited.
Included Projects and Duplicate Class Names
If an included project defines a class that is already defined in the including project (i.e., has the same name), then one of the duplicate class definitions is ignored. (Usually the included definition is used, but there is no hard rule about this.) A warning is given at load time (Duplicate class definition was ignored") and the project is loaded. All references to the class work from both projects, because the reference mechanism uses the class name.
This feature allows you to exchange the included project - for example, with a different version. Ignoring duplicate classes also allows for the situation where one project (A) is included in two separate projects (B and C), which in turn are included in a final larger project (D):
Activating an Included Project
In a project that has included projects, you can choose which project to activate. This restricts the frames you can view in the Protege-Frames window to the ones from the project you have chosen. Note that you are still working with your including project and you cannot make edits which would affect the included project.
Activating an included project hides all projects at the same or higher level as that project.
Activating the current (top-level) project shows all frames and forms in the entire project hierarchy.
To activate an included project:
Select Manage Included Projects from the Project menu. The current project, and its included projects, if any, will be shown in a project hierarchy.
Select the project that you want to activate.
Click the Activate Selected Project button at the top right of the Manage Included Projects dialog box.
Unless you are activating the top-level project, you will receive a warning:
Click Yes to continue. Your project view will change.
Removing an Included Project
Removing an included project removes that project and any included projects it may have.
Select Manage Included Projects from the Project menu. The current project, and its included projects, if any, will be shown in a project hierarchy.
Highlight the project you want to remove.
Click the Remove Project (
 ) button,
at the top right of the Manage Included Projects dialog box.
To remove additional projects, repeat steps 2-3.
Click OK. You will see a warning:
Click OK to remove the project. You will see a number of warnings. Classes that were included from the project; any classes you created subordinate to those classes will still appear as subclasses of :UNDEFINED. For example:
Let's say you have a project A.
Then, you include project B in project A.
From project B, you get a class called X.
In project A, you make a bunch of subclasses of X.
Then, you remove project B from project A.
Protege keeps all the subclasses of X that were created in project A, but they are now subclasses of a class called :UNDEFINED, because when you removed included project B, you lost class X.
Merging an Included Project
Merging an included project takes all the frames of the included project and directly incorporates them into the current project. After this, you can edit these frames just like the other frames in your project.
After a merge, the dynamic link to the included project has been broken and any further changes to the project file for the included project will not appear in the current project. The included project no longer appears in the Manage Included Projects dialog box.
To merge an included project:
Select Project | Merge Included Projects.
In the Merge Included Projects dialog box, select the project you want to merge.
Click OK.
Configuring a Project
You can change the project configuration using the project Configure dialog box. This dialog box allows you to customize your project window.
Note: You can set additional preferences by choosing File | Preferences. Preferences apply to all Protege projects, while Configuration applies to the current project.
Configuring the Project Tab Widgets
To configure which tabs are displayed:
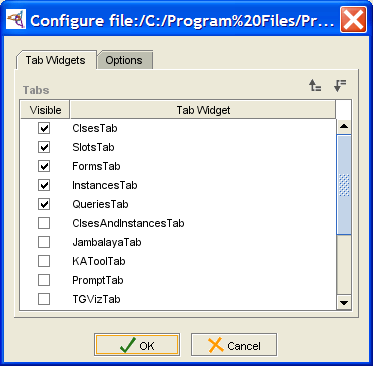
Select Configure... from the Project menu. The Configure dialog box will open.
Make sure that Tab Widgets is selected. It will show the tabs that are available for your project. Marked tabs are visible; others are hidden.
By default, a project displays the following tabs: Clses, Slot, Forms, Instances, and Queries.
A number of other tabs are available, such as the KAToolTab (Knowledge Acquisition Tool) and the ClsesandInstancesTab.
You may see additional tabs for plug-ins you have installed.
If you have installed OWL capability, but are not using an OWL project, you will see a list of possible tabs that are not loaded.
To hide a tab, remove the mark from in front of it. For example, if you are giving your project to someone to let them enter instances, you might wish to hide the other tabs. You can also hide the current tab by selecting Window | Close Current View from the Protege project window.
If you wish to display a tab, add a mark in front of it. For example, you might want to display the Classes and Instances tab for a unified view of your classes and instances.
To change the order in which the tabs appear in the Protege project window, highlight the tab you want to move and use the up (
 )
and down (
 ) icons
to move the tab up or down in the list.
A tab's position (left to right) in the Protege window
is correlated with its position (top to bottom) in the Configure dialog.
For example, to have the Classes and Instances tab appear
at the far left of the Protege window,
move it to the top of the list in the Configure dialog.
Click OK to close the dialog box and see your new configuration.
Configuring Project Options
To change project options:
Select Project | Configure...
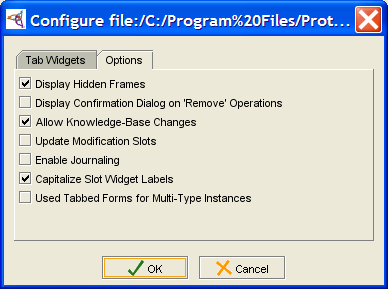
Select the Options tab in the Configure dialog box.
This tab provides the following options:
Display Hidden Frames: Allows you to toggle whether or not you can see any frames you have hidden. (You can hide a frame by selecting it, clicking the right mouse button, and choosing Hide from the menu.)
Display Confirmation Dialog on 'Remove' Operations: Allows you to add a warning when you perform a remove, such as removing a slot from a class. Recall that when you remove a slot, the slot remains in the project, but is simply removed from the current class. Regardless of the setting in this dialog box, you always receive a warning when you delete a frame from the project.
Allow Knowledge-Base Changes: Deselecting this item locks the knowledge base so that it cannot be changed by the viewer.
Update Modification Slots: Four system slots (attached to the :INSTANCE-ANNOTATION system class) keep track of the creator, modifier, and timestamps for any frame modification. The system will record this information automatically if you put these slots on the instance (attach them as template slots to the class) and check the box.
Enable Journaling: Allows you to keep a record of all the changes that you make to a project. Changes are stored in an ASCII (text) file, with one line for each change you make. The journaling file is created in the same directory as the project, with a .pjrn extension. It can be read using any text editor.
Capitalize Slot Widget Labels: This controls an aspect of the Forms interface. To distinguish slot names from class names, a recommended convention is to make internal slot names lowercase. If you use this convention and still want the names on your forms to be capitalized, select this option.
Use Tabbed Forms for Multi-Type Instances: Controls the display of the Instance Editor for multi-type instances.
If you wish to select an option, click to mark it.
If you wish to remove an option, click to remove the mark.
Click OK to close the dialog box and see your new configuration.
Project Metrics
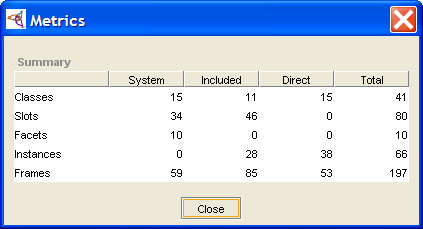
Project metrics provide information about the number of frames in the current project. This information can be useful in analyzing performance issues.
Viewing Project Metrics
To view project metrics, select Project | Metrics:
Scalability and Tuning
Protege-Frames has successfully handled "simulated" knowledge bases (generated by a program) as large as 5M frames (classes & instances). Actual knowledge bases as large as 100K frames give acceptable UI performance if supported by the database backend.
For file-based projects, the primary impact of increasing the number of frames is that the project takes longer to load (load time is roughly proportional to the number of frames). For database projects, slow operations include expanding a class with a lot of direct subclasses and displaying the instances for a class with many instances.
Aside from limiting the size of the knowledge base, the most important thing to tune is the heap size. For more information, see Scalability and Tuning.
Using Undo
You can undo your actions using the Undo command on the Edit menu
or by clicking the Undo
(![]() ) button
at the top of the Protege-Frames window.
) button
at the top of the Protege-Frames window.
To redo a command, use Edit | Redo or click the Redo
(![]() ) button.
) button.
Protege-Frames allows multiple levels of undo and redo.
When you use Undo, your project will be restored to its previous state. In most cases, you will not see any difference. However, while Protege-Frames always creates a state that is logically identical to the initial state you were in, in some cases internal state will be represented in a slightly different way. For example, classes or instances might appear in a different order in the .pont or .pins files.
When you use certain advanced features, you may see a minor difference in the user interface. For example, if you are using the Graph Widget, some elements on the graph may appear in a slightly different location. The project has not been affected in any other way.
