PrF UG inst entry field instance
The Instance Fields
When an instance is created for a class with a slot of Value Type Instance, the entry field corresponding to the slot is an Instance entry field. It contains values which are direct or indirect instances of the classes specified as allowed classes for the slot. (Direct instances are instances of the class; indirect instances are instances of a class subordinate to the class, e.g., a subclass.)
Single Cardinality
An instance with an Instance/Single slot shows a display field and four buttons that let you edit, create, add, and remove instances. The value of this slot is a single instance:

Multiple Cardinality
An instance with an Instance/Multiple slot shows a display list. The value of this slot is a list of instances:

Note the following for fields of multiple cardinality:
To select multiple instances to view or remove, use Ctrl (Cmd); use Shift to select a range.
Adding an instance does not replace a previous one.
If the at most value is set in the Cardinality field for the slot, there is a limit on the number of instances you can enter.
Editing an Instance
To edit an existing instance:
Click the View Instance (
 ) button
to open the Instance Editor
for the instance that is displayed or selected.
If no instance is currently displayed,
the View Instance button will be grayed out.
) button
to open the Instance Editor
for the instance that is displayed or selected.
If no instance is currently displayed,
the View Instance button will be grayed out.
Enter the updated information directly in the Instance Editor.
Note that any edits you make to this instance will appear in all locations where this instance occurs. You should be sure that you want the change to be global before editing an existing instance. In some cases, it may be more appropriate to create a new instance, instead.
Creating an Instance
To create a new instance:
Click the Create Instance (
 ) button.
If there is more than one allowed class, or if the allowed class has subclasses, a dialog box will appear, asking you to select a Concrete class, displayed with a solid icon (
 ).
Select a class and click OK.
).
Select a class and click OK.
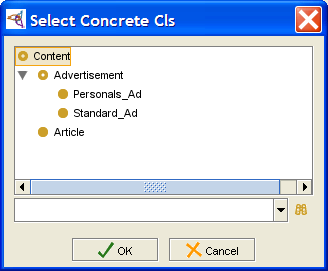 Select Concrete Cls dialog, "Content" selected
A direct instance of the selected class will be created and a blank Instance Editor will be displayed. Fill in the editor for the new instance, as desired.

Adding an Instance
To add an existing instance to the value of the field:
Click the Add Instance (
 ) button.
A Select Instance dialog box will be displayed.
) button.
A Select Instance dialog box will be displayed.
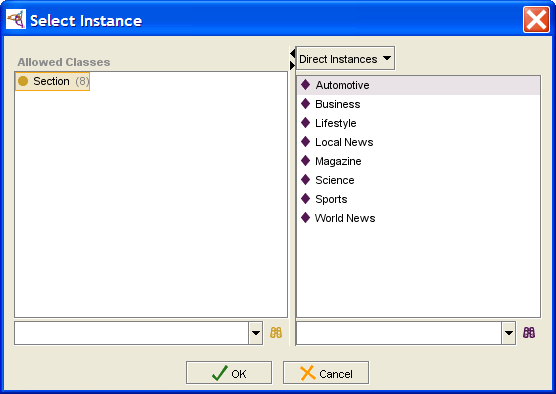 Select Instance dialog, "Section" selected
In the Allowed Classes pane, select the class where the instance you want is located.
If the class has subclasses, use the menu at the top of the Instances pane to choose the instances you want to see:
Direct Instances limits the display to direct instances of the class
All Instances displays the instances of the class and all of its descendants (subclasses, subsubclasses, etc.)
Select a single instance.
Click OK. The instance you selected will be displayed. If another instance was displayed previously, it will now be gone.

This selects a pre-existing instance as the value of the field. This instance can also be viewed in the Instance Browser and may also appear as a value for other instances. Note that any edits you make to this instance will appear in all locations where this instance occurs. You should be sure that you want the change to be global before editing an existing instance. In some cases, it may be more appropriate to create a new instance instead.
Removing an Instance
To remove an instance:
Click the Remove Instance (
 ) button.
The instance will be removed.
) button.
The instance will be removed.
This removes the instance as a value of the current field,
but does not remove it from the project.
The instance can still be viewed
via the Instance Browser
for the correct class,
and still appears in any other field where it has been selected.
To delete
an instance from the knowledge base,
use the Delete Instance
(![]() ) button
in the Instance Browser.
) button
in the Instance Browser.