Difference between revisions of "PrF UG inst set display slot"
(→Setting the Display Slot at the Instance Browser) |
|||
| (2 intermediate revisions by the same user not shown) | |||
| Line 2: | Line 2: | ||
== Setting the Display Slot == | == Setting the Display Slot == | ||
| − | {{PrF_UG_TOC_inst}}<div id='prf_ug'> | + | <noinclude>{{PrF_UG_TOC_inst}}<div id='prf_ug'><noinclude> |
When you begin to create instances for a class, | When you begin to create instances for a class, | ||
| Line 27: | Line 27: | ||
<ol class='a'> | <ol class='a'> | ||
<li><p> | <li><p> | ||
| − | At the Instances | + | At the Instances tab, |
click on the class for which you want to set the display slot. | click on the class for which you want to set the display slot. | ||
</p> | </p> | ||
<li><p> | <li><p> | ||
| − | Click the Instance | + | Click the Instance menu icon at the top right of the Instance Browser. |
</p> | </p> | ||
<div>[[Image:PrF_UG_inst_instance_menu_context.png|frame|none| | <div>[[Image:PrF_UG_inst_instance_menu_context.png|frame|none| | ||
| − | Instance Browser, Instance | + | Instance Browser, Instance menu icon]]</div> |
<li><p> | <li><p> | ||
| Line 41: | Line 41: | ||
</p> | </p> | ||
<div>[[Image:PrF_UG_inst_display_slot_menu_intermediate.png|frame|none| | <div>[[Image:PrF_UG_inst_display_slot_menu_intermediate.png|frame|none| | ||
| − | Instance | + | Instance menu]]</div> |
<li><p> | <li><p> | ||
| Line 55: | Line 55: | ||
</p> | </p> | ||
<div>[[Image:PrF_UG_inst_display_slot_browser.png|frame|none| | <div>[[Image:PrF_UG_inst_display_slot_browser.png|frame|none| | ||
| − | Instance Browser]]</div> | + | Instance Browser, "06/25/97" selected]]</div> |
</ol> | </ol> | ||
| Line 149: | Line 149: | ||
| − | </div> | + | <noinclude></div></noinclude> |
Latest revision as of 17:15, November 13, 2008
Setting the Display Slot
When you begin to create instances for a class, you may see that the names used in the Instance Browser are not very useful. You can change the display so that the instances are listed by the values of one (or more) fields; for example, a "Name" field or a "Headline" field. To do this, you set the display slot.
The display slot can be set in two locations: the Instance Browser and the Form Editor. You can also choose multiple slots for the display slot. If you do not set the display slot, Protege-Frames uses a default internal slot. If you set a display slot for a class, it is inherited by its subclasses.
Setting the Display Slot at the Instance Browser
To set the display slot at the Instance Browser:
At the Instances tab, click on the class for which you want to set the display slot.
Click the Instance menu icon at the top right of the Instance Browser.
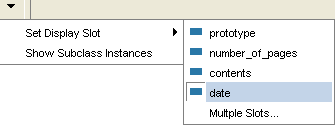
Select Set Display Slot from the menu.
You will see a list of all the slots for the class. Click the one you want as the display slot.
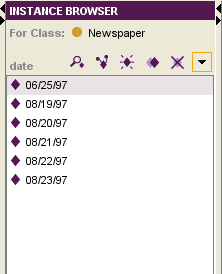
The Instance Browser changes to reflect the slot you have chosen. Slots are displayed by alphabetical or numerical order.
Setting the Display Slot in the Form Editor
To set the display slot in the Form Editor:
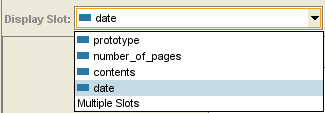
Click on the Display Slot menu at the top of the Form Editor.
You will see a list of all the slots for the class. Click the one you want as the display slot.
Setting Multiple Display Slots
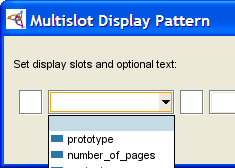
You can list instances by multiple slots in the Instance Browser. This can give you additional information about the instances. To do this:
In the Instance Browser or Form Editor, select Multiple Slots from the menu.
Enter any leading text you want for each instance. For example, you might want to enter the name of the first slot.
Select the first display slot from the first menu.
Enter any text you want to appear between slots. For example, you might want to use spaces, a dash (-), or a slash (/) to separate items.
Continue until you have set up the slots and text you want. You can choose up to five display slots.
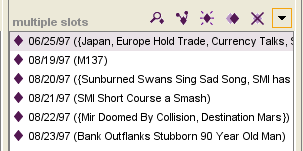
Click OK. The slots you have chosen are displayed in the Instance Browser, along with any additional text:
Clearing the Display Slot
To clear the display slot and revert to Protege-Frames default:
In the Instance Browser or Form Editor, select Multiple Slots from the menu.
For each menu where a slot name appears, select the blank value at the top of the menu.
Delete any text in the text boxes.
Click OK.

