PrF UG forms changing form characteristics
Changing Global Characteristics
You can change global properties of a form, including the display slot and the layout.
Setting the Display Slot
The display slot identifies the different instances when they are displayed in a list. For example, the form for Prototype_Newspaper has the display slot set to weekday. This means that, in the Instance Browser, the different instances are listed by the value in the weekday field.
If you do not select a slot to use as a display slot, Protege-Frames uses a default key, <instance name>, such as newspaper_0017. It is usually helpful to set a display slot.
To set a display slot for a class:
In the Form Browser, at the left of the Forms tab, select the name of the class whose form you wish to edit.
Click the Display Slot menu. A list of slots will be displayed.
Select the slot you wish to use as a display slot.
You can also set multiple display slots and/or set the display slot at the Instances tab. See Setting the Display Slot for more information.
Selecting a Widget that Expands with the Form
You can choose a widget that will expand as the form expands whenever the Protege-Frames window is resized. This can be useful, for example, when you have a complex table widget that you wish to have take up most of the form. To do this:
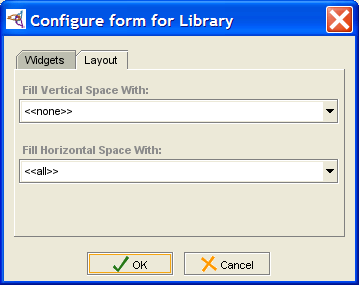
Double-click anywhere on the background of the form, that is, on an area that does not contain a widget. The Form Configuration dialog box will be displayed.
Click on the Layout tab.
To select a widget that will take up most of the vertical room when the form expands, select the widget name from the Fill Vertical Space With: menu. Selecting <<all>> means each widget will expand equally.
To select a widget that will take up most of the horizontal room when the form expands, select the widget name from the Fill Horizontal Space With: menu. You can select the same widget or a different one. Selecting <<all>> means each widget will expand equally.
To reset the form so that no widget expands more than the others, make sure that <<all>> is selected in both menus.
Note: For additional tasks that change a form's appearance, such as resizing, moving, changing, or hiding a widget, see the Forms Table of Contents.
