Difference between revisions of "PrF UG windows all"
| Line 1: | Line 1: | ||
| − | {{PrF_UG}} | + | <noinclude>{{PrF_UG}}__TOC__<div id='prf_ug'></noinclude> |
| − | |||
| − | <div id='prf_ug'> | ||
{{:PrF_UG_windows}} | {{:PrF_UG_windows}} | ||
{{:PrF_UG_windows_cascading_open_forms}} | {{:PrF_UG_windows_cascading_open_forms}} | ||
| Line 10: | Line 8: | ||
{{:PrF_UG_windows_synchronize_trees}} | {{:PrF_UG_windows_synchronize_trees}} | ||
{{:PrF_UG_windows_yellow_stickies}} | {{:PrF_UG_windows_yellow_stickies}} | ||
| − | </div> | + | <noinclude></div> |
| − | + | [[Category:Protege-Frames 3.x User's Guide]]</noinclude> | |
| − | [[Category:Protege-Frames 3.x User's Guide]] | ||
Latest revision as of 12:50, November 14, 2008
Contents
Window Management
This section of the User's Guide covers the concepts of managing Protege-Frames windows.
Note: Before you create and use project types, you should be confident with the basic Protege-Frames interface. You should also be comfortable with Protege-Frames projects and project types.
To return to the main table of contents, click the Protege-Frames User's Guide link (located at the top of the table of contents on the right-hand side of this page).
Cascading All Editor Windows
Protege allows you to have multiple free-standing Editor windows open at a time. Each Editor displays the information for a class, instance, or slot. In addition, you may choose to detach one or more of the Protege tabs. As you continue to work with a project, you may find that these windows get hidden, or that the screen gets cluttered.
To cascade all open Editor windows, select
Windows | ![]() Cascade Windows.
All open Editor windows will be brought to the front and cascaded.
Cascade Windows.
All open Editor windows will be brought to the front and cascaded.
Closing All Windows
To close all open Editor windows, select the Window | Close All Windows menu item. All open Editor windows will be closed. The main Protege window will remain open. If you have detached a tab, it will be re-attached to the main window.
Detaching the Current View
You can detach one or more of the Protege-Frames tabs (Classes, Slots, etc.) and display them in free-standing windows. This allows you to view multiple tabs at the same time. For example, you could detach the Classes tab and display it in a separate window.
Detaching
To detach a tab:
Click on the tab that you want to detach, making sure that it is the current view displayed in the Protege-Frames window.
Select Window | Detach Current View. The tab you have selected will be detached.
Re-attaching
To restore a detached view and reincorporate it as a tab:
Click on the standard Close button at the top right. Instead of closing the tab completely, this will close the detached window and redisplay the information as a tab.
To completely remove a tab from view, close the view using Window | Close Current View.
Closing the Current Tab
You can choose not to display a Protege-Frames tab by closing it. For example, if you do not wish to edit Forms, you might choose to close the Forms tab. You might also close a tab for a plugin you are not planning to use in this project. A closed tab will no longer display in your project, but will display in other Protege-Frames projects.
Closing
To close a tab:
Click on the tab that you want to close, making sure that it is the current view displayed in the Protege-Frames window.
Select Window | Close Current View. The selected tab will no longer display.
You can also close a tab using the Configure dialog box.
Restoring a Closed Tab
To restore a closed tab, you can use the Configure dialog box:
Select Project | Configure....
Make sure Tab Widgets is selected.
To display a hidden tab, make sure the box is checked.
Click OK.
Working With a Small Window
Protege-Frames displays a lot of information in many of its windows. In some cases, if your window is sized to fit on a smaller screen, not all of the information will appear. In this case, you might have trouble finding some of the following:
the Superclasses pane at the Classes tab
the Classes pane at the Slots tab
the Query Library pane and the Search Results pane at the Queries tab
To view or enlarge these areas, try any of the following:
Enlarge the Protege window by dragging it. A hidden section will usually appear if the window becomes large enough.
Drag the slider bar to the position where the hidden section should be. For example, to view the Search Results pane, place the cursor over the slider bar at the right of the window, and drag the bar to the left. To view the Superclasses pane, Query Library pane, or Classes pane, place the cursor over the slider bar at the bottom left of the window and drag the bar up.
If your window is very small, you can toggle between two panes by clicking on the arrows on the slider bar. For example, to toggle between the Query Editor and the Query Library pane, click the up arrow on the slider bar to display only the Query Library pane; click the down arrow to display only the Query Editor.
You can also customize the distance between any of the panes, using the slider bars in the same way.
Synchronizing Class Trees
Often, when you switch between tabs in Protege-Frames, you wish to see the same class highlighted at either tab - or synchronized. You can synchronize between the Classes, Forms, and Instances tabs in two ways:
auto-synchronize (default)
synchronize manually
Automatically Synchronizing Class Trees
To turn the automatic synchronizing option on or off:
Select Window | Automatically Synchronize Class Trees.
When synchronizing is enabled (the default), this option shows a check mark.
Synchronizing Manually
If the Automatically Synchronize Class Trees setting is turned off, you can still synchronize a Classes, Forms, or Instances tab with the last one of these tabs you visited. To do this:
Select Window | Synchronize Class Trees.
Working With Notes
Protege-Frames allows you add a note to the Editor for any frame; that is, a class, instance, or slot. These notes, which are not part of the ontology structure, float over the Editor for that frame.
The buttons for working with a note are located at the top right of the Editor. This picture shows them in the Class Editor:
These buttons allow you to add, delete, display, or hide a note.
Adding a Note
To add a note to a frame:
Click the Create Note (
 ,
,
 ,
,
 ) icon
at the top right of the Editor
(e.g., Class Editor,
Instance Editor, etc.)
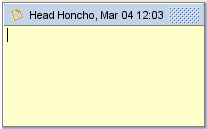
A yellow note will be created.
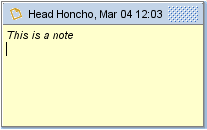
Click in the note and type the desired text.
As always, you can resize or reposition the note by dragging. However, you cannot move it out of the Editor window.
Deleting a Note
To remove a note:
Click the Delete Note (
 ,
,
 ,
,
 ) button
at the top right of the Editor.
If there is only one note, you will be prompted to confirm the deletion. Click OK.
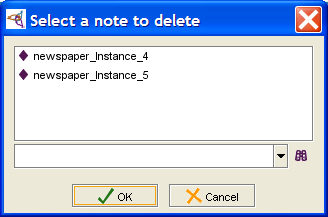
If there is more than one note, a list of notes will be displayed. Select the note you wish to delete and click OK.
Hiding Existing Notes
You can hide all existing notes for the current tab. When you do this:
Only the notes for the current tab (Classes, Slots, or Instances) are hidden.
New notes that you create after hiding will display. To hide additional notes, first display all notes and then hide them again.
To hide all existing notes for the current tab:
Click the Hide Notes (
 ,
,
 ,
,
 ) button
at the top right of the Editor.
The button will change to show that notes have been hidden.
Displaying Hidden Notes
When notes have been hidden, the Hide Notes button changes to show it has been selected:
To display all notes for the current tab:
Click the Hide Notes icon.


