PrF UG projects including a project
Including a Project
You can include an existing project in your current Protege-Frames project. An included project stays as a separate project which you can open and edit separately; edits made in the file for the included project will appear in the including project the next time it is loaded. This allows you to build a single large project from one or more smaller projects.
With an included project:
you can
view and refer to the frames of the included project, e.g., you can create a subclass of an included class or associate an included slot to a class
edit instances from the included project and create new instances for included classes
edit included forms
edit and override included slots
you cannot
make edits that would affect classes in the included project, e.g., you cannot edit or delete an included class
Including a project
To include a project into an existing Protege-Frames project:
Select Manage Included Projects from the Project menu. The current project, and its included projects, if any, will be shown in a project hierarchy.
Click the Add Project (
 ) button,
at the top right of the Manage Included Projects dialog box.
In the Select Project dialog box, browse to the location of the project you want to include and select the .pprj file of the desired project.
Click Open.
The included project will be shown in the dialog box, with "(not loaded)" after it to indicate that the actual inclusion process has not yet taken place. If the included project already includes any other projects, they will also be added to the hierarchy.
To include additional projects, repeat steps 2-6.
Click OK. You will see a warning:
Click OK.
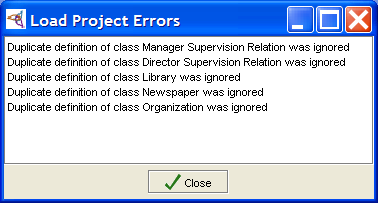
If there are any classes that are duplicated in your project, you will see a warning:
Click Close to continue. Protege-Frames will include your files at this time.
The project is included into your current project.
Frames in the included project appear with pale icons
(e.g., ![]() ,
,
![]() )
to show they cannot be edited.
)
to show they cannot be edited.
Included Projects and Duplicate Class Names
If an included project defines a class that is already defined in the including project (i.e., has the same name), then one of the duplicate class definitions is ignored. (Usually the included definition is used, but there is no hard rule about this.) A warning is given at load time (Duplicate class definition was ignored") and the project is loaded. All references to the class work from both projects, because the reference mechanism uses the class name.
This feature allows you to exchange the included project - for example, with a different version. Ignoring duplicate classes also allows for the situation where one project (A) is included in two separate projects (B and C), which in turn are included in a final larger project (D):


