PrF UG files all
Contents
Project Types
This section of the User's Guide covers the concepts of understanding, creating, and using Protege-Frames project types.
Note: Before you create and use project types, you should be confident with the basic Protege-Frames interface. You should also be comfortable with Protege-Frames projects.
To return to the main table of contents, click the Protege-Frames User's Guide link (located at the top of the table of contents on the right-hand side of this page).
Understanding Project Types
Every Protege-Frames project stores two kinds of information:
Protege-specific information, stored in a .pprj (Protégé project) file
Information about the project ontology (classes, slots, etc.) and project instances, stored in one or more additional files.
No matter which format you choose, the information specific to the Protege-Frames interface is saved in a .pprj file. You can create, open, and save your projects directly via the .pprj file. You do not need to name or access any other files unless you wish to import a project.
Choosing the project type, or backend, determines how the project ontology and instances are stored. Protege-Frames supports three file formats:
Protege Files (the default) creates two text files in Protege-Frames format. See Protege Files.
Protege Database creates the project as a table in a JDBC database. To do this, you must have a database installed and configured on your system. See Protege Database Format.
Experimental XML saves the project in XML format. See Experimental XML Format.
Normally, for a Protege-Frames project, you would select Protege Files or Experimental XML. If you have installed support for additional backends, e.g., if you selected BASIC + OWL as your installation, you will see additional file formats.
If you decide you wish to change your project type, e.g., from Protege Files to Experimental XML, you can convert your project. This changes the format of the backend, while leaving the .pprj file unchanged. Protege still uses the .pprj file to access the project. You should not see a difference within Protege.
You can also export a project to CLIPS or HTML formats. In this case, the project itself stays the same, but a snapshot of the current version is created in the selected format.
Protege Files
You can save the ontology-related information for a Protege-Frames project in Protege Files format, a CLIPS-based text format that has been the default file format for Protege-Frames for many years.
In a Protege project, information specific to the Protege user interface is stored in a dedicated Protege project (.pprj) file. Internally, Protege-Frames maintains two files in addition to the .pprj file; these files contain further information about the ontology and instances of the project. When you open a .pprj file, Protege-Frames automatically loads these files. By default, the additional files are saved in the following format:
A text file with the extension pont (Protege ontology) contains the class and slot information.
A text file the extension pins (Protege instances) contains the instance information.
See Understanding Project Types for more information about project types.
Importing Protege Files
If you have an ontology that is stored in two text files, but do not have a .pprj file, you can import those files and create a new project file. To create a Protege-Frames project from text files:
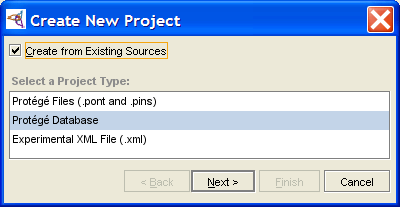
Select New Project from the File menu. The Create New Project dialog box will open.
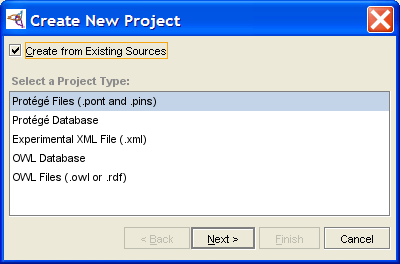 Create New Project dialog, "Protege Files ..." selected
To import a project from text files, select Create from Existing Sources.
 Create from Existing Sources checkbox (checked)
Select Protege Files as the project type.
Click Next.
Locate the files you want to use as the ontology (.pont) and instances (.pins) files:
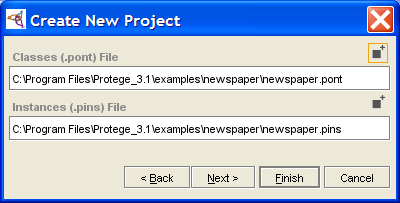 Create New Project dialog
If you are finished, click Finish.
If you wish to include any existing Protege-Frames projects in the project you are building, click Next. Then click the Add (
 ) button,
locate the project you want to include, and click OK.
You can include multiple projects by repeating this step.
Click Finish when you are done including.
) button,
locate the project you want to include, and click OK.
You can include multiple projects by repeating this step.
Click Finish when you are done including.


Protege-Frames will create a project file from your class and instance information. To save your project and give it a name, select Save from the Project menu.
Converting a Protege-Frames Project to Protege Files
Select File | Convert Project to Format...
Select Protege Files in the Select Format dialog box.
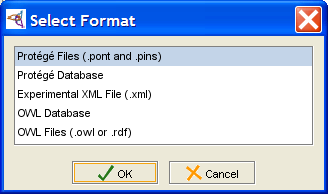 Select Format dialog, "Protege Files ..." selected
Click OK.

Protege Database Format
You can save the ontology-related information for a Protege-Frames project as a single table in a JDBC database. Note that this is a "flat" table that does not use any special database constructs to represent the information. Information specific to the Protege-Frames user interface is stored in a separate Protege project (.pprj) file. See Understanding Project Types for more information about these files.
Requirements
Before you create a Protege Database project, you will need to do the following:
Make sure you have a database program installed on your system.
Make sure you have a JDBC driver that is compatible with your database and the version of the Java VM that you are using.
If you are using Microsoft Access, you don't need to acquire a JDBC driver; it's already bundled into the JDK. (not recommended option due to slow performance)
Otherwise, acquire a driver and rename it to "driver.jar" (or "driver1.jar" or "driver2.jar", if you have several). Add this driver to the Protege installation directory (not the plugins directory).
You can store multiple projects in the same database by giving their tables different names.
Note: When a project is saved in a JDBC database, backend changes to the database (for example, changes to slots, classes, and instances) are committed as soon as they are made. However, changes to the User Interface (stored in the .pprj file) are not committed until you save the project, for example by clicking Save.
Creating or Importing a Database Project
Select New Project from the File menu. The Create New Project dialog box will open.
 Create New Project dialog box, "Protege Database" selected
To import a project from existing files, select Create from Existing Sources. To create a new, empty Protege-Frames project, leave this blank (the default).
Create from Existing Sources checkbox (checked)Select Protege Database as the project type.
Click Next.
A Protege Database dialog box will be displayed.
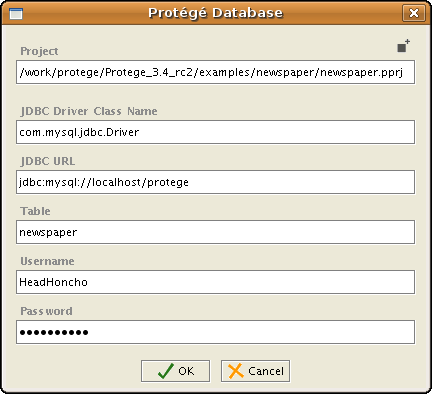 Protege Database dialog box
Enter the class name of your JDBC driver in the JDBC Driver line of the dialog box. The class name can be found in the documentation provided with your particular driver. (For Microsoft Access, use: sun.jdbc.odbc.JdbcOdbcDriver)
Enter the URL for your database in the JDBC URL line.
Note: For Microsoft Access, navigate to the "ODBC Data Source Administrator" dialog via the Control Panel and add a User DSN for your Access database. If you're unfamiliar with how to find this dialog or how to add a User DSN, please refer to Microsoft Windows Help. Your URL will look like: jdbc:odbc:<User DSN name>
Enter the name for the database table where you will be storing the information. If you are importing a file, enter the name of the table that contains the information you wish to import. This field is required.
If your database requires a username and/or password, enter these in the appropriate lines of the dialog box.
Click Finish.


To save your project and give it a name, select Save from the File menu. See Saving a Project for more information.
Converting a Protege-Frames Project to a Database
Select File | Convert Project to Format...
Select Protege Database in the Select Format dialog box.
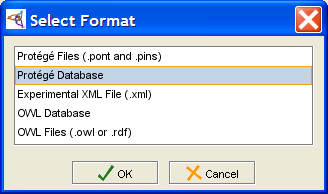 Select Format dialog, "Protege Database" selected
In the Protege Database dialog box, fill out the required information, as described above.

Experimental XML Format
Currently, the XML backend for Protege-Frames is still under development. The intent is to eventually make this the default backend for Protege-Frames, once it has become stable and supports the full feature set.
You can create a new XML project by selecting File | Create Project and then selecting Experimental XML File in the Create New Project dialog:

You can also convert an existing project to XML by selecting File | Convert Project and then selecting Experimental XML File in the Convert Project dialog box.
Note: The XML backend uses its own Schema and will not let you import an arbitrary XML file into Protege.
The first time you save an XML project, Protege creates the following files:
a .pprj file, which contains Protege-specific UI information
a .xml file, which contains XML-encoded ontology information for the knowledge base\
Protege-Frames uses a single XML Schema file that is optimized to work with the Protege model. All information in the knowledge base is treated as "instances". The format of these instances, described in the Schema file, is designed to be simple, readable, and easily processible by XSLT in straightforward ways. The Schema is available at:
http://protege.stanford.edu/xml/schema/protege.xsd
Feedback on the Schema is strongly solicited. The schema should not be considered fixed at this point and users should not rely on this backend functioning correctly or upon the schema remaining fixed from build to build. We do encourage you to try it out and report any problems that you see.
Note: This backend cannot be used to generate XML Schema files. For example, it does not turn classes in Protege-Frames into XML Schema complex types. An export mechanism that does this may eventually be developed separately.
Protege-OWL
Note: This User's Guide describes how to use the Protege-Frames interface. If you wish to use the OWL extension to Protege, see the CO-ODE website for documentation and examples.
In addition to the Protege-Frames editor, which these help topics document, Protege supplies a separate Protege-OWL editor, which enables users to build ontologies for the Semantic Web, in particular in the W3C's Web Ontology Language (OWL). See the Protege-OWL overview for a description of Protege-OWL and see the CO-ODE website for documentation, sample ontologies, and additional OWL plug-ins.
"An OWL ontology may include descriptions of classes, properties, and their instances. Given such an ontology, the OWL formal semantics specifies how to derive its logical consequences, i.e., facts not literally present in the ontology, but entailed by the semantics. These entailments may be based on a single document or multiple distributed documents that have been combined using defined OWL mechanisms." (see the OWL Web Ontology Language Guide)
Although Protege-OWL uses the Protege engine to display and manage projects, the logic and user interface of Protege-OWL and Protege-Frames are substantially different. You should determine which model suits your project and do all your project creation and editing in either Protege-OWL or Protege-Frames, rather than attempting to switch between modes. Although there is substantial overlap between the two models, both Protege-Frames and Protege-OWL have features which are not supported by the other.
Following are some of the differences between Protege-Frames and Protege-OWL.
Protege-Frames:
primarily object-oriented (frame-based) with classes and slots
builds classes and adds or creates attributes
supports frames-specific constructs, such as Abstract classes
Protege-OWL:
based on Description Logic
defines classes by their logical characteristics
supports advanced OWL features
To install Protege-OWL:
Download the Full version of Protege from the Protege website.
Once the installer has downloaded, double-click to start the installation.
During the installation wizard, select "Basic + OWL". This will install Protege, the OWL Plugin, and selected other plugins that are suited for OWL.
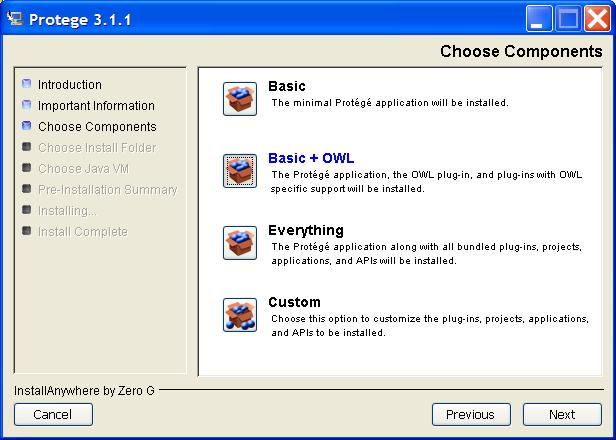 Choose Components dialog

If your installation has been successful, you should see the entries "OWL Files" and "OWL Database" in the listing of project formats at Protege's start-up screen.
If you do not see a Project Type called OWL Files when you attempt to create a new project, there may have been something wrong with the way Protege was installed.
Check that a folder named plugins/edu.stanford.smi.protegex.owl is present in your Protege installation directory. Make sure that this folder is not empty (you should see some .jar files and other things). If the folder and its contents are not present, they can be downloaded and unzipped into the plugins folder by hand.
If you cannot get OWL projects to load, try re-installing Protege. Make sure that you select Basic+OWL as your installation type.
Finally, refer to the OWL Plugin web pages to see if any changes have been made to the installation or running process.
RDF(S) Support in Protege
Protege allows you to create and edit Resource Description Framework (RDF) schema and instance data. (For more information about RDF, see http://www.w3.org/RDF.) Protege provides the following types of RDF (Schema) support:
Protege-OWL (recommended)
an RDF backend for Protege-Frames
additional RDF(S) plug-ins for Protege-Frames, including Sesame and Joseki support
Protege-OWL and RDF(S)
OWL is an extension of RDF, so any RDF project can also be regarded as an OWL project which simply does not use the advanced OWL features. Although the focus of the OWL Plugin is on OWL ontologies, it can also be used to edit RDF ontologies and RDF Schema files or databases. However, we don't recommend mixing pure RDF(S) elements with OWL elements in OWL ontologies.
The following steps show how to:
import or create a file in RDF(S) format using Protege-OWL
add RDF(S) support to an existing OWL project
These steps address the file format only; for additional information, see the Protege-OWL resources page.
Please note the following limitations:
Although you may see the full OWL interface when editing an RDF(S) project, it is your responsibility to avoid using OWL-specific elements in your project.
Currently, when you go to import (open from an existing) RDF(S) file, there is no separate RDF format option. You need to select OWL Files (.owl or .rdf) and later select RDF Schema or Pure RDF Schema without OWL.
When you save your RDF(S) project, the interface currently does not save separate RDFS and RDF files; instead, it combines everything in a single file that is given a .owl extension. This may be fixed in future versions.
Note that the use of RDF in Protege-OWL is not necessarily compatible with the RDF Backend for Protege-Frames, which was initially developed prior to the existence of OWL. Overall, the RDF support in Protege-OWL provides cleaner semantics and a richer set of modeling elements.
Importing or Creating an RDF(S) Project with Protege-OWL
Create a new project, either by selecting Create New Project from the start-up dialog or File | Create New in the Protege window.
Select OWL Files (.owl or .rdf) as the Project Type.
 Create New Project dialog, "OWL Files ..." selected
If you are importing an existing file, make sure to check Create from Existing Sources, located at the top of the dialog box. If you are creating a new RDF file, leave it unchecked (default).
Create from Existing Sources checkbox (checked)Click Next.
Specify any common ontologies to use and click Next.
Specify your default RDF namespace and click Next.
You can now choose your language profile. For an RDF project, select RDF Schema or Pure RDF Schema without OWL.
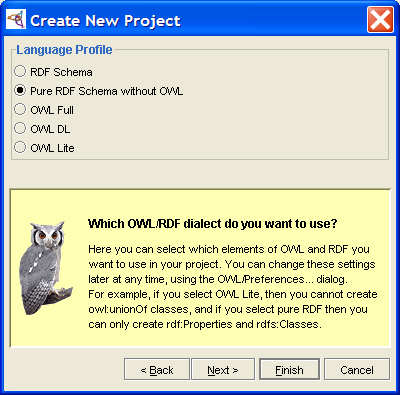 Create New Project dialog, "Pure RDF ..." selected


Activating RDF(S) Support in an OWL Project
To activate RDF(S) support in an existing Protege-OWL project:
Select the OWL | Preferences menu option.
In the OWL Preferences dialog, activate an RDF profile by changing the Language Profile to RDF Schema or Pure RDF Schema without OWL.
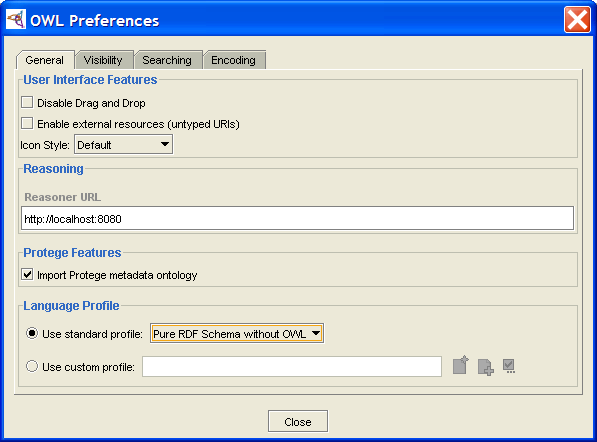 OWL Preferences dialog, General tab, "Pure RDF ..." selected
Click Close.
The Protege-OWL window will display buttons to create pure RDFS classes and RDF properties. In particular:

If you chose RDF Schema, there will be an additional button on the Properties tab, which can be used to create RDF properties:
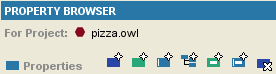 Property tab with extra buttons
You can also decide whether new classes shall be RDFS classes or OWL classes using "Create class using metaclass", or you can make rdfs:Class the default metaclass (both with a right-click on the classes tree in the OWLClasses tab).
If you chose Pure RDF Schema without OWL, the buttons on the Properties tab will be restricted to RDF properties:
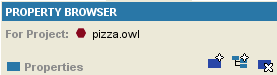 Property tab


RDF Backend for Protege-Frames
You can use Protege-Frames to design RDF schema and create the corresponding instance data. You can also view and edit your existing RDF files in Protege-Frames. The RDF backend for Protege-Frames was developed prior to the development of the Protege OWL interface and is not necessarily compatible with Protege-OWL. With the advent of Protege-OWL, it is no longer under active development, but some support is still available.
Note: This backend is actually an RDFS/RDF backend which saves a schema file (RDFS) and an instance file (RDF).
This interface has a number of limitations:
The backend uses the standard Protege-Frames GUI, which is not RDF(S) -specific. It is not clear how you can enter RDF specific elements. You see exactly the same GUI as for "normal" Protege-Frames.
Only the RDF Schema namespace (http://www.w3.org/TR/1999/PR-rdf-schema-19990303) is supported when saving (on import, the new namespace is also recognized).
Namespace abbreviations cannot be edited (they are automatically generated).
rdfs:seeAlso, rdfs:isDefinedBy, rdfs:label, container, and reified statements are not supported.
Multiple types for a single resource were not supported, prior to the 3.3 release.
You cannot make changes to the standard meta classes. (i.e., rdf:Resource, rdf:Property, rdfs:Class, etc.)
XML Schema data types are not recognized as rdfs:Literal (but it is unclear that they should be).
Additional RDF Plug-ins
The Protege community has written additional RDF plug-ins to support other RDF frameworks:
Protege RDF(s)-DB Backend Plugin: Store/retrieve RDFS ontologies in the Sesame RDF framework.
Protege2Joseki: Import/export Protege ontologies from/to Joseki RDF Server.
Using the Protege-Frames RDF Backend
Although it is recommended to use Protege-OWL for RDF(S) projects, Protege-Frames also has an RDF backend you can use for Protege-Frames projects. The backend does not work with Protege-OWL.
Creating an RDF(S) Project with the Protege-Frames Backend
Create a new project, either by selecting Create New Project from the start-up dialog or File | Create New in the Protege window.
Select Resource Description Framework (RDF) as the Project Type.
If you are importing an existing file, make sure to check Create from Existing Sources, located at the top of the dialog box. If you are creating a new RDF file, leave it unchecked (default).
Create from Existing Sources checkbox (checked)To select or change the name or location of the .pprj file, enter the information you want in the Project line of the dialog box. Be sure to give the file a .pprj extension. If you do not specify a location for the project, by default, the project is saved in the directory where Protege is installed.
Protege-Frames will create two files: one for the schema (classes and slots) and the other for the instances. By default, these use the name of the existing .pprj file. If you wish to change the name of the schema file, type the new name in the Classes file name line of the dialog box. Make sure to give the file an .rdfs extension.
If you wish to change the name of the instances file, type the new name in the Instances file name line of the dialog box. Make sure to give the file an .rdf extension.
Click OK.
Note: You should create new RDF classes as subclasses of rdfs:Resource.
Converting a Protege-Frames Project to RDF Format
Note: Subclasses of :THING from a non-RDF project will become subclasses of rdfs:Resource when you save as RDF.
After you have chosen your format, choose the name and location for the project, as follows:
Select Convert to Format... from the File menu.
Select Resource Description Framework (RDF) in the Select Format dialog box.
When you have selected Resource Description Framework (RDF), the RDF dialog box will be displayed.
To select or change the name or location of the .pprj file, enter the information you want in the Project line of the dialog box. Be sure to give the file a .pprj extension. To browse for a new location, click the Add (
) button.
If you do not specify a location for the project, by default,
the project is saved in the directory where Protege is installed.
Protege-Frames will create two files: one for the schema (classes and slots) and the other for the instances. By default, these use the name of the existing .pprj file. If you wish to change the name of the schema file, type the new name in the Classes file name line of the dialog box. Make sure to give the file an .rdfs extension.
If you wish to change the name of the instances file, type the new name in the Instances file name line of the dialog box. Make sure to give the file an .rdf extension.
Click OK.
Exporting a Project to CLIPS
The current version of Protege-Frames uses CLIPS (C Language Integrated Production System) as its internal file format. However, in order to support advanced Protege features, the CLIPS generated by Protege-Frames may not conform to the CLIPS standard.
You can export a conformant CLIPS view of your Protege project. This will not affect the format of your project; it simply produces a CLIPS file that reflects the project's current state. Note, however, that because of the limitations of CLIPS with respect to Protege, you may lose information during exporting. This means, for example, that if you re-import an exported file, it may not fully recapture the original project.
To export your project to CLIPS text files:
Select Export to Format from the File menu and select CLIPS from the submenu. The Clips Files to Export dialog box will be displayed.
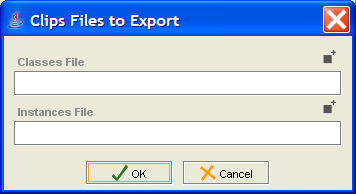 Clips Files to Export dialog box
Enter the names for your classes and instances files. If you want to save the file(s) in a different location from the default, type the new location in the Output Directory line or click the Add (
) button
to navigate to the desired location.
Click OK. The CLIPS files will be created in the selected location.

Exporting a Project to HTML
You can generate an HTML view of a project. This allows you to view all or part of the class hierarchy and, optionally, all the instances. The output consists of an index page, which gives the class hierarchy for the project, including links to individual pages for each the class. Class pages include slot descriptions and optional instances. If instances are selected, they have individual pages and appear in the index hierarchy and under each class.
You can generate HTML pages for the entire project, or restrict the output to a subset of the project.
Generating HTML Output
To generate HTML for a project:
Select File | Export to Format and select HTML from the submenu. The Export HTML Configuration Options dialog box will be displayed.
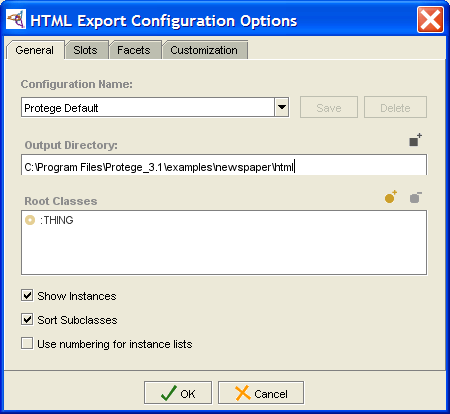 Export HTML Configuration Options dialog box, General tab
Change your settings, if desired. The effect of the different settings is described below. (We recommend changing the output directory; otherwise, the files will be saved directly in the Protege application directory.)
Click OK.

Output Format
Using the default options produces the following HTML output:
an index page, showing the class hierarchy; the example shown is for a subset of the newspaper project, with Layout_info selected as the root class
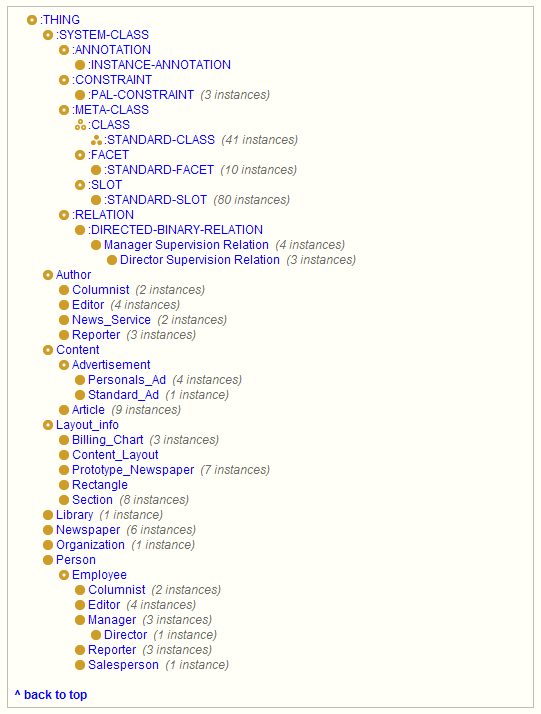 index page, "Layout_info" selected
a page for each class, showing its superclasses, subclasses, slots, and instances; the selection of classes is customizable
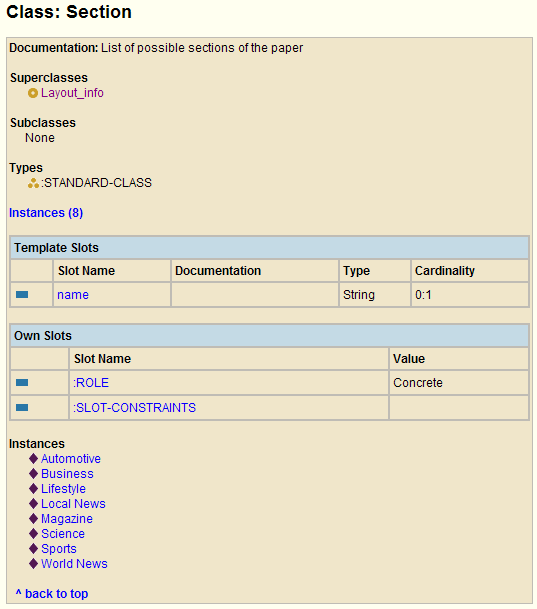 page for "Section" Class
a page for each slot, showing its facets and their values; the list of slots is customizable
a page for each instance of the chosen classes; you can choose to omit instances from the HTML web


Output Options
The effect of the different settings is described below.
General Tab
Configuration Name: Allows you to name and save the current settings in the dialog box. A saved setting is added to the menu; you can reload it by selecting it from the menu. To save your settings, enter a name and then click Save. This will save the current state of the HTML Export Configuration Options dialog box. Note that if you do not click Save, your settings will not be changed. Also, if you make additional changes without clicking Save, they will not be saved.
Output Directory: (recommended) Allows you to choose a directory where the HTML files will be saved. By default, they are saved directly in the Protege application directory. You can type a pathname directly in the entry bar or use the button to navigate to the desired directory.
Root Classes: Restricts the HTML output to the chosen classes and all their subordinate classes. By default, the root class is :THING, which will generate output for all classes in the hierarchy, including hidden system classes. To restrict your view to a smaller section of the project, first delete the :THING class using the Delete Class button, then add one or more classes by clicking the Add Class button and selecting the classes you want in the dialog box. Any class you choose will be included in the tree, along with all of its subclasses.
Show Instances: Select this option to generate a page for each instance subordinate to your chosen root classes. If you do not wish to include instance pages in your output, deselect this option.
Sort Subclasses: Users can reorder classes manually in the Protege class tree and Protege will remember the order. To ensure that the project to be exported in alphabetical order, you'll need to use this option.
Use numbering for instance lists: Numbers the instance lists shown for each class.
Slots Tab
This tab allows you to select which slots are displayed. A selected slot is shown at each class where it occurs and a page is generated for that slot.

Facets Tab
This tab allows you to select which slot facets are displayed. A selected facet, and its value, is shown for each slot where it appears.

Customization Tab
This tab allows you to customize the header, footer, and stylesheet of the output. Note that the default style sheet displays the icons for you.
