PrF UG files protege files
Files
You can save the ontology-related information for a Protege-Frames project in Protege Files format, a CLIPS-based text format that has been the default file format for Protege-Frames for many years.
In a Protege project, information specific to the Protege user interface is stored in a dedicated Protege project (.pprj) file. Internally, Protege-Frames maintains two files in addition to the .pprj file; these files contain further information about the ontology and instances of the project. When you open a .pprj file, Protege-Frames automatically loads these files. By default, the additional files are saved in the following format:
A text file with the extension pont (Protege ontology) contains the class and slot information.
A text file the extension pins (Protege instances) contains the instance information.
See Understanding Project Types for more information about project types.
Importing Protege Files
If you have an ontology that is stored in two text files, but do not have a .pprj file, you can import those files and create a new project file. To create a Protege-Frames project from text files:
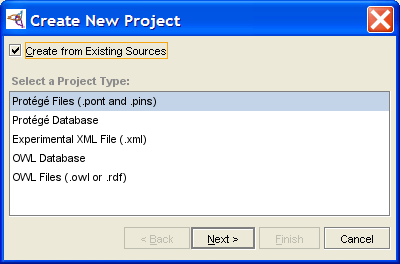
Select New Project from the File menu. The Create New Project dialog box will open.
To import a project from text files, select Create from Existing Sources.
Select Protege Files as the project type.
Click Next.
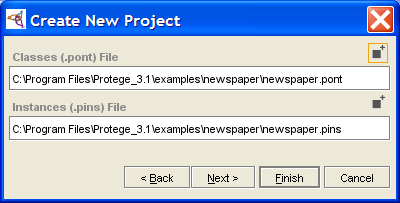
Locate the files you want to use as the ontology (.pont) and instances (.pins) files:
If you are finished, click Finish.
If you wish to include any existing Protege-Frames projects in the project you are building, click Next. Then click the Add (
 ) button,
locate the project you want to include, and click OK.
You can include multiple projects by repeating this step.
Click Finish when you are done including.
Protege-Frames will create a project file from your class and instance information. To save your project and give it a name, select Save from the Project menu.
Converting a Protege-Frames Project to Protege Files
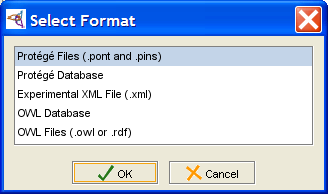
Select File | Convert Project to Format...
Select Protege Files in the Select Format dialog box.
Click OK.


