PrF UG all
Contents
- 1 Protege-Frames User's Guide
- 2 Introductory Topics
- 3 Projects
- 3.1 Creating a Project
- 3.2 Opening a Project
- 3.3 Importing a Project
- 3.4 Saving a Project
- 3.5 Converting a Project to Another Project Type
- 3.6 Exporting a Project
- 3.7 Renaming a Project
- 3.8 Setting Preferences
- 3.9 Archiving a Project
- 3.10 Reverting to an Archived Version of a Project
- 3.11 Including a Project
- 3.12 Activating an Included Project
- 3.13 Removing an Included Project
- 3.14 Merging an Included Project
- 3.15 Configuring a Project
- 3.16 Project Metrics
- 3.17 Using Undo
- 4 Project Types
- 5 Window Management
- 6 Classes
- 6.1 The Classes Tab
- 6.2 The Class Browser
- 6.3 The Class Buttons
- 6.4 The Class Hierarchy Window
- 6.5 The Class Icons
- 6.6 The Class Menu
- 6.7 The Class Search Bar
- 6.8 The Superclasses Pane
- 6.9 The Class Editor
- 6.10 Constraints
- 6.11 The Template Slots Pane
- 6.12 The Template Slot Buttons
- 6.13 The References Window
- 6.14 Creating a New Class
- 6.15 Creating Multiple Subclasses
- 6.16 Deleting a Class
- 6.17 Displaying the Class Editor
- 6.18 Editing a Class
- 6.19 Editing Template Slots
- 6.20 Finding a Class
- 6.21 Hiding a Class
- 6.22 Replacing a Superclass
- 6.23 Adding a Superclass
- 6.24 Jumping to a Superclass
- 6.25 Removing a Superclass
- 6.26 Viewing Class Relations
- 6.27 The Classes & Instances Tab
- 6.28 Viewing References
- 7 Slots
- 7.1 The Slots Tab
- 7.2 The Slot Browser
- 7.3 The Slot Buttons
- 7.4 The Slot Menu
- 7.5 The Slot Editor
- 7.6 The Value Type Menu
- 7.7 The Any Value Type
- 7.8 The Boolean Value Type
- 7.9 The Class Value Type
- 7.10 The Float Value Type
- 7.11 The Instance Value Type
- 7.12 The Integer Value Type
- 7.13 The String Value Type
- 7.14 The Symbol Value Type
- 7.15 Creating a New Slot
- 7.16 Viewing a Slot
- 7.17 Editing a Top-Level Slot
- 7.18 Overriding Slot Properties at a Class
- 7.19 Editing Slot Properties
- 7.20 Removing a Slot from a Class
- 7.21 Deleting a Slot from the Project
- 7.22 Adding a Slot to a Class
- 7.23 Removing Overrides From a Slot
- 7.24 Understanding Inverse Slots
- 7.25 Creating an Inverse Slot Relationship
- 7.26 Working with Subslots
- 7.27 Finding a Slot
- 7.28 The Slot Hierarchy Window
- 7.29 The Slot Icons
- 7.30 The Superslots Pane
- 8 Forms
- 8.1 Understanding Forms
- 8.2 The Forms Tab
- 8.3 The Form Browser
- 8.4 The Form Buttons
- 8.5 The Form Editor
- 8.6 The Display Slot Menu
- 8.7 The Selected Widget Type Menu
- 8.8 The Widget Configuration Dialog
- 8.9 The Form Configuration Dialog Box
- 8.10 Default Widget Types
- 8.11 Additional String Widgets
- 8.12 InstanceRowWidget and InstanceTableWidget
- 8.13 ContainsWidget
- 8.14 DirectInstancesWidget
- 8.15 Changing Global Characteristics
- 8.16 Moving or Resizing a Widget
- 8.17 Changing Widget Configuration Properties
- 8.18 Selecting a Widget Display
- 8.19 Hiding a Widget
- 8.20 Customizing an InstanceRowWidget or InstanceTableWidget
- 8.21 Customizing a ContainsWidget
- 8.22 Using a ResourceListWidget
- 8.23 Additional Widget Types
- 9 Instances
- 9.1 The Instances Tab
- 9.2 The Class Browser at the Instances Tab
- 9.3 The Instance Browser
- 9.4 The Instances Window
- 9.5 The Instance Buttons
- 9.6 The Instance Menu
- 9.7 The Types Pane
- 9.8 The Instance Editor
- 9.9 The Standard Field Types
- 9.10 Fields with Multiple Cardinality
- 9.11 The Boolean Fields
- 9.12 The Class Fields
- 9.13 The Float Fields
- 9.14 The Instance Fields
- 9.15 The Integer Fields
- 9.16 The String Fields
- 9.17 The Symbol Fields
- 9.18 Creating an Instance
- 9.19 Creating Multiple Instances
- 9.20 Displaying the Instance Editor
- 9.21 Setting the Display Slot
- 9.22 Showing Subclass Instances
- 9.23 Editing an Instance
- 9.24 Copying an Instance
- 9.25 Deleting an Instance
- 9.26 Finding an Instance
- 9.27 Changing the Class of an Instance
- 9.28 Working with Instance Types
- 9.29 The Instance Icons
- 10 Queries
- 10.1 The Queries Tab
- 10.2 The Query Editor
- 10.3 The Search Results Pane
- 10.4 The Query Library Pane
- 10.5 Creating a Single Query
- 10.6 Combining Multiple Queries
- 10.7 Chaining Multiple Queries
- 10.8 Running a Query
- 10.9 Saving a Query
- 10.10 Retrieving a Query
- 10.11 Clearing a Query
- 10.12 Exporting Query Results
- 11 Metaclasses
- 11.1 Understanding Metaclasses
- 11.2 Example: Creating and Using a Metaclass
- 11.3 Looking at :STANDARD-CLASS
- 11.4 Creating a Slot Metaclass
- 11.5 Creating a Class Using a Metaclass
- 11.6 Changing the Metaclass of a Class
- 11.7 Changing the Metaclass of Subclasses
- 11.8 Setting the Default Metaclass
- 11.9 Customizing the Class or Slot Editor
- 11.10 Understanding Slot Metaclasses
- 11.11 Creating a Metaclass
- 11.12 Changing the Slot Metaclass of a Slot
- 11.13 Creating a Subslot Using a Slot Metaclass
- 11.14 Changing the Slot Metaclass of Subslots
- 11.15 Setting the Default Slot Metaclass
- 12 Glossary
- 12.1 Abstract Class
- 12.2 Allowed Classes
- 12.3 Application
- 12.4 Boolean
- 12.5 Browser Key
- 12.6 Cardinality
- 12.7 Class
- 12.8 Classes Tab
- 12.9 Concrete Class
- 12.10 Direct Slot
- 12.11 Domain
- 12.12 Facet
- 12.13 Float
- 12.14 Forms Tab
- 12.15 Frame
- 12.16 Inheritance
- 12.17 Inherited Slot
- 12.18 Instance (KB value)
- 12.19 Instance (slot type)
- 12.20 Instances Tab
- 12.21 Integer
- 12.22 Knowledge-acquisition tool
- 12.23 Knowledge base (KB)
- 12.24 Knowledge-based system
- 12.25 Metaclass
- 12.26 Ontology
- 12.27 PAL (Protege Axiom Language)
- 12.28 .pins file
- 12.29 .pont file
- 12.30 .pprj file
- 12.31 Problem-solving method (PSM)
- 12.32 Slot
- 12.33 Slot Type
- 12.34 Slots Tab
- 12.35 Symbol
Protege-Frames User's Guide
This user's guide describes how to use the Protege-Frames editor. If you are unfamiliar with Protege or the Protege-Frames editor, please click "Introductory Topics" in the table of contents on the right-hand side of this page to find detailed explanations of both.
Please use the navigation bars on the right-hand side of pages to navigate this user's guide.

Questions about Protege-Frames?
Please post questions and comments about this guide and/or the Protege-Frames editor on the protege-discussion mailing list.
Interested in making edits to the guide?
If you are interested in contributing edits to the Protege-Frames User's Guide, please refer to our help topics section, which has important details about editing and the structure of this guide.
See Also
- Protege website
- Getting Started with Protege-Frames tutorial: html, pdf
- Initial Protege Frames tutorial
- Getting Started with Protege-OWL 3.x
- Getting Started with Protege-OWL 4.x
- Protege-OWL Tutorial:
Introductory Topics
This section of the Protege-Frames User's Guide covers a variety of introductory topics.
To return to the main table of contents, click the Protege-Frames User's Guide link (located at the top of the table of contents on the right-hand side of this page).
Using this Guide
The Protege-Frames User's Guide documents how to use Protege-Frames, an integrated knowledge-base development and management system. These pages include descriptions of the user interface, along with step-by-step instructions for completing specific tasks. Screenshots of a Newspaper Example are used to illustrate the explanations through most of this guide's pages.
We assume that you are familiar with your operating-system platform and with using an Internet browser. You can navigate among topics by using your browser's Back and Forward buttons, or by using the list of top-level topics in the left-hand frame.
Each of the Guide's topics (e.g., Protege-Frames subsystems) has an initial "index" page that lists all pages associated with that topics. There is also a "global" index page.
At the bottom of every page, there is a Next link. By following these links, you can visit every page. On all but the initial page, there are Prev and Up links. Clicking on the Prev link will take you to the "previous" page in the document. Clicking on the Up link will take you to the relevant index page.
OS Conventions
In most cases where Microsoft Windows uses the Control key, Apple's Mac OS X uses the Command key. To help remind you of this fact, we use the wording "Ctrl (Cmd)".
What is Protege?
Protege is a free, open-source platform that provides a growing user community with a suite of tools to construct domain models and knowledge-based applications with ontologies. At its core, Protege implements a rich set of knowledge-modeling structures and actions that support the creation, visualization, and manipulation of ontologies in various representation formats. Protege can be customized to provide domain-friendly support for creating knowledge models and entering data. Further, Protege can be extended by way of a plug-in architecture and a Java-based Application Programming Interface (API) for building knowledge-based tools and applications.
An ontology describes the concepts and relationships that are important in a particular domain, providing a vocabulary for that domain as well as a computerized specification of the meaning of terms used in the vocabulary. Ontologies range from taxonomies and classifications, database schemas, to fully axiomatized theories. In recent years, ontologies have been adopted in many business and scientific communities as a way to share, reuse, and process domain knowledge. Ontologies are now central to many applications such as scientific knowledge portals, information management and integration systems, electronic commerce, and semantic web services.
The main assumption of Protege is that knowledge-based systems are usually very expensive to build and maintain. For example, the expectation is that knowledge-based system development is a team effort, including both developers and domain experts who may have less familiarity with computer software. Protege is designed to guide developers and domain experts through the process of system development. Protege is designed to allow developers to reuse domain ontologies and problem-solving methods, thereby shortening the time needed for development and program maintenance. Several applications can use the same domain ontology to solve different problems, and the same problem-solving method can be used with different ontologies. For more information about building knowledge-based systems and the Protege approach, see Planning a Protege-Frames Project.
The Protege platform supports two main ways of modeling ontologies:
The Protege-Frames editor enables users to build and populate ontologies that are frame-based, in accordance with the Open Knowledge Base Connectivity (OKBC) protocol. Specifically, it provides a full-fledged user interface and knowledge server to support users in constructing and storing frame-based domain ontologies, customizing data entry forms, and entering instance data.
The Protege-OWL editor enables users to build ontologies for the Semantic Web, in particular in the W3C's Web Ontology Language (OWL).
Note: This User's Guide describes how to use the Protege-Frames interface. If you wish to use the OWL extension to Protege, see the CO-ODE website for documentation and examples.
What is Protege-Frames?
Note: This User's Guide describes how to use the Protege-Frames interface. If you wish to use the OWL extension to Protege, see:
The Protege-Frames editor enables users to build and populate ontologies that are frame-based,
using a knowledge model which is compatible with the Open Knowledge Base Connectivity (OKBC) protocol.
In this model, an ontology consists of:
a set of classes, organized in a subsumption hierarchy to represent a domain's salient concepts
a set of slots, associated to classes to describe their properties and relationships
a set of instances of those classes - individual exemplars of the concepts that hold specific values for their properties
Features of Protege-Frames include:
A wide set of user interface elements that can be customized to enable users to model knowledge and enter data in domain-friendly forms.
A plug-in architecture that can be extended with custom-designed elements, such as:
graphical components (e.g., graphs and tables)
media (e.g., sound, images, and video)
various storage formats (e.g., RDF, XML, HTML, and database back-ends)
additional support tools (e.g., for ontology management, ontology visualization, inference and reasoning, etc.)
A Java-based Application Programming Interface (API) that makes it possible for plug-ins and other applications to access, use, and display ontologies created with Protege-Frames.
Planning a Protege-Frames Project
The development of a successful knowledge-based system, built with Protege-Frames, is more of an art than a science. Nonetheless, we can suggest a standard pattern of use that new users should follow to avoid some possible problems of systems development. Protege-Frames is designed to support iterative development, where there are cycles of revision to the ontologies and other components of the knowledge-based system.
Developers should not expect to "complete" ontology development without considering other aspects of the process. In particular, Knowledge Acquisition (KA) is critical to any knowledge-based system. For the development of a successful Protege-Frames project, we would recommend the following steps:
Plan for the application and expected uses of the knowledge base. This usually means working with domain experts that have a set of problems that could be solved with knowledge-base technology.
When you have built this ontology (and later, when you have extended it or opened it from a file), you can directly view forms for entering instance knowledge into the ontology, because Protege-Frames generates initial forms "on the fly", in its role as a KA-tool generator.
You use these forms for acquiring slot values of your test instances. At this point, it is usually appropriate to show the ontology and the filled-out instance forms to the domain experts or your expected users. This inevitably leads to a set of revisions, both to the ontology (2.) and to the forms (5.). Note that ontology modifications can be expensive; some changes could necessitate rebuilding some or all of the knowledge base.
Customize the forms to a refined knowledge-acquisition tool, as explained in the Forms strand. While constructing this customized version of the KA-subtool, further design problems in the original ontology may become apparent. If necessary, revise the ontology and repeat at 4.
With your domain experts, build a somewhat larger knowledge-base that can be tested with your application or problem-solving method.
Test the full application with your end-users. This step can lead to further revisions to the ontology and the KA-subtool.
The picture below shows the typical workflow for a Protege-Frames project. The large arrowheads indicate the forward progression through the process, while the small arrowheads show places where revisions are usually necessary (either to the ontology or the knowledge-acquisition tool).

At the heart of a successful Protege-Frames project is the design of the class and slot structure of the ontology. In particular, the model you use in building your ontology must balance the needs of the domain expert when building a knowledge base (at knowledge-acquisition time) against the requirements of your problem-solving method or application (at run-time). Hopefully, these are not too contradictory! Ontology developers should therefore both:
Model the domain with a set of problems and a problem-solving method in mind.
Design the ontology so that it can be used to generate and customize an appropriate KA-tool for a specific set of users.
A simple problem, taken from the Newspaper Example, could be finding all advertisements that are more expensive than some threshold. To handle this problem, one should create an "advertisements" class that includes prices and publication dates. Spreading this information across all publication issues would make it more difficult for the problem-solver to access all instances of advertisements and their prices.
A Newspaper Example
Throughout this guide, we provide examples and screenshots from a fictitious "newspaper" example. We designed this example to be intuitive. This example is distributed as part of the Protege installation and is located in the examples directory in the Protege application directory.
There are a variety of possible uses for a knowledge base of newspaper data. Our example knowledge base includes:
a list of all published articles, indicating when published, in what section, etc.
information about standard sections of the newspaper (Business, Lifestyle, Sports, etc.)
employee information
advertising information
There are a variety of applications that might use information in this knowledge base. For example, one could build:
a system for retrieving, organizing and answering queries about published articles
a system for analyzing advertisement revenues or pricing
a system for reviewing the organization of the employees, making sure that reporters are balanced appropriately among editors and that each section of the newspaper has a responsible editor
As this is an artificial example, we have not built any of these applications, but we hope this example will give a flavor of how knowledge bases, ontologies, and knowledge-acquisition tools can be designed with Protege-Frames.
Extending Protege
Protege includes an application programmer interface, the Protege API, that allows a Java programmer to extend the Protege system. The API provides the Java packages and classes for complex operations such as creating new widgets:
Tab widget - a user interface tab that appears in the main Protege window alongside system tabs such as the Classes tab. The Queries tab is an example of a tab-widget plug-in.
Slot widget - appears on a form and is used to view and acquire a value for a slot at an instance. The TextFieldWidget, used for acquiring and displaying strings, is an example of a slot-widget plug-in.
Back-end - specifies the mechanism that Protege will use for storage (either as text or in a database). The RDF back-end is an example of a back-end plug-in.
Createproject - takes a file in a source format produced by another program and creates the closest possible "natural" Protege knowledge-base.
Export - provides an extensible mechanism for exporting Protege knowledge-bases in a variety of formats, both file and database. This plug-in type is related to back-end plug-ins, but is much easier to develop and serves a somewhat different need.
Project - allows manipulation of a Protege project and Protege's project UI.
API documentation is available at:
http://protege.stanford.edu/doc/pdk/index.html
Starting with Protege 3.2 beta, you can programmatically add your own configuration tab to the project configuration panel. The tab will also appear in the Configure dialog box. Instructions for this can be found on the Protege Wiki at:
http://protege.cim3.net/cgi-bin/wiki.pl?AddingUserDefinedProjectConfigPanel
Projects
This section of the Protege-Frames User's Guide covers the concepts of understanding, creating, and using Protege-Frames projects.
Note: Before you create and use projects, you should be confident with the basic Protege-Frames interface.
To return to the main table of contents, click the Protege-Frames User's Guide link (located at the top of the table of contents on the right-hand side of this page).
Creating a Project
There are two ways to create a new Protege project:
create a completely new project
create a Protege-Frames project from existing text files or from a table in a JDBC database
To create a project:
Create a new project:
create a project on startup by selecting Create New Project from the start-up dialog
or create a new project from the Protege window by selecting File | Create New, clicking the New Project
 button,
or entering Ctrl-N (Cmd-N).
The Create New Project dialog box will open.
button,
or entering Ctrl-N (Cmd-N).
The Create New Project dialog box will open.
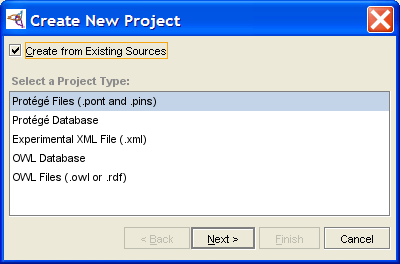
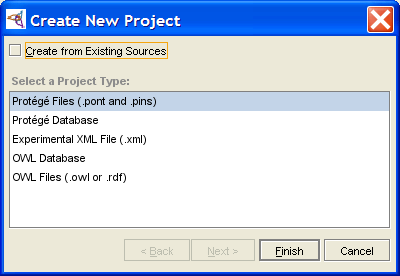 Create New Project dialog
The following project types support the Protege-Frames format:
Experimental XML Normally, unless you have a need for a specific structure (e.g., for exporting files), you would select Protege Files. If you wish to help the development of the XML backend, you can select Experimental XML.
To import a project from existing files, select Create from Existing Sources. You can create a project from existing files in Protege Files or Protege Database format.
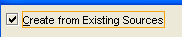 Create from Existing Sources checkbox (checked)
To create a new, empty Protege-Frames project, leave this unchecked (the default).
Click Finish. The Protege-Frames window will open and the standard tabs will become visible. An initialized knowledge base will be created, containing the system classes rooted in :THING. No instances will be created. You can now structure your project by creating your classes and slots. (See Creating a New Class and Creating a Slot for more information.)
To save the project to disk, select Save from the File menu.
Enter a name for your project in the Project line of the dialog box. This is the name of your project (.pprj) file. Protege-Frames also creates internal files for its own use. By default, these files are given the same name, with a different extension.

Opening a Project
You can open an existing Protege-Frames project when you start Protege, from within the Protege window, or from a list of recent projects. No matter what format your project is in, you can create, open, and save your projects directly via the .pprj file. You do not need to name or access other file types unless you wish to build a project. To save the open project to disk after you have edited it, select Save Project from the File menu.
Opening a Project When You Start Protege
To open an existing project when you first start Protege:
Start Protege. A dialog box will appear, allowing you to create a new project, open a recent project, or get help.
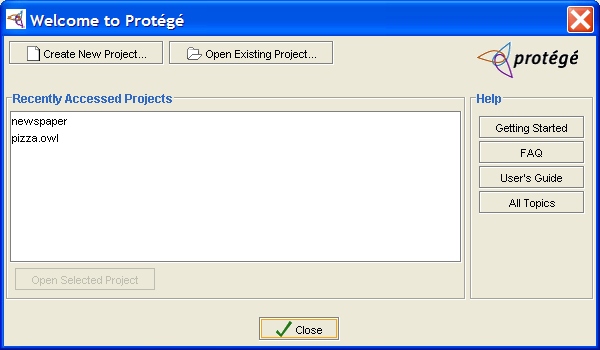 Welcome to Protege dialog
To open a project in the list of Recently Accessed Projects, highlight its name and click OK.
To open a project that is not listed, click Open Existing Project. Locate the .pprj project you wish to open and click OK.
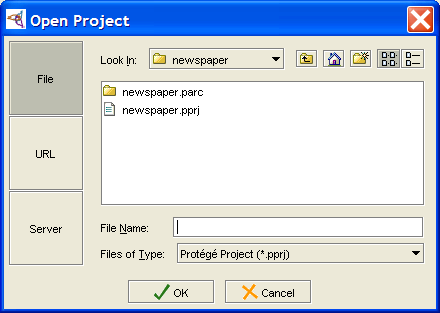 Open Project dialog


Opening a Project within Protege
Select Open Project... from the File menu, click the Open Project (
 ) button
or type Ctrl-O (Cmd-O).
A Project dialog box will appear,
allowing you to select the project.
) button
or type Ctrl-O (Cmd-O).
A Project dialog box will appear,
allowing you to select the project.
Select the .pprj project you wish to open.
Click OK.
For Windows systems, you can also open a project by double-clicking on the .pprj file in Windows Explorer.
Opening a Recent Project within Protege
Protege maintains a list of recently opened projects. To open a recent project:
Select Open Recent Project from the File menu.
Select the project you want.
Importing a Project
Importing a project creates a new Protege-Frames project and .pprj file, based on files which contain your ontology information in one of the supported formats. When you import a project, a .pprj file is built, based on the information in your existing files.
To do this, create a new project and make sure that Create from Existing Sources is checked in the Create New Project dialog box.
You can import a project from the following project types:
Text Files: You can import a project from a pair of text files describing the class/slot (e.g., abc.pont) and instance (e.g., abc.pins) information. Importing a text project can be used, for example, for updating from Protege-Frames/Win to Protege.
Database Table: You can import a project from a single table in a JDBC database.
You can not import an XML file into Protege using the Protege XML backend.
Protege-Frames will generate default forms for all classes in the imported project.
Saving a Project
To save a Protege-Frames project:
Select File | Save Project, click the Save Project (
 ) button,
or type Ctrl-S (Cmd-S).
) button,
or type Ctrl-S (Cmd-S).
If this is a new project, you will be prompted for the name and location. Choose a name and location for the .pprj file; the other files will be created automatically. If you do not specify a location for the project, by default, the project will be saved in the directory where Protege is installed. If you are saving a database project, you will need to supply additional information; see Protege Database Format.
Click OK.
For more information, see the following topics:
See Archiving a Project for information on how to archive a version of the current project.
See Renaming a Project for information on how to save the current project with a new name.
See Project Formats for information on how to convert or export the project to a different format.
Converting a Project to Another Project Type
You can convert a Protege-Frames project from one backend format (project type) to another. You will see no difference in the Protege interface when you work with your project, but all changes to to the project are stored in the new format. See Understanding Project Types for more information.
You can convert between the following Protege-Frames formats:
Protege Files (the default) creates two text files in Protege-Frames format. See Protege Files.
Protege Database creates the project as a table in a JDBC database. To do this, you must have a database installed and configured on your system. See Protege Database Format.
Experimental XML saves the project in XML format. See Experimental XML Format.
Note: You can also convert a Protege-Frames file to Protege-OWL format and vice versa. In this case, however, you will see a significant difference, because of the differences between the Protege-Frames and Protege-OWL capabilities and interfaces.
To convert a Protege-Frames file to a different format:
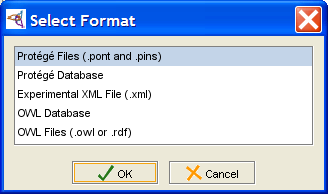
Select File | Convert Project to Format...
Select the format you want in the Select Format dialog box.
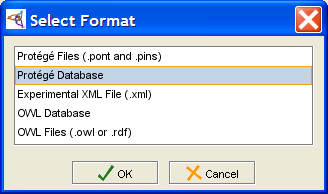 Select Format dialog
Fill out any required information when requested; see the specific formats for more information.
Click OK.

Exporting a Project
Exporting a project creates a snapshot of the current version in the selected format, while leaving the Protege-Frames project itself unchanged.
To export a project:
Select File | Export Project... and select the desired format from the cascading menu.
Fill out any necessary information:
For CLIPS files, select the name and location for your files. See Exporting to CLIPS for more information.
For HTML format, fill in the Export HTML Configuration Options. See Saving an HTML View for more information.
Click OK.
Renaming a Project
To save a Protege project under a new name:
Select File | Save Project As....
Navigate to the location where you want to save the file and enter the new name for the .pprj file in the Project line of the window.
By default, the new names are entered automatically for any additional files in the project (for example, .pont and .pins files for standard text format). However, you can choose to give a different name to these files. You might want to do this, for example, if you are creating a new .pprj file which still accesses the old .pont and .pins file names. In this case, enter the names you want for the .pont and .pins files.
Click OK.
For more information, see the following topics:
See Archiving a Project for information on how to archive a version of the current project.
See Project Formats for information on how to convert or export the project to a different format.
Setting Preferences
You can set some basic preferences for the Protege-Frames interface, using the Preferences dialog box.

Note: You can set additional configuration options by choosing Project | Configuration. Preferences apply to all Protege projects, while Configuration applies to the current project.
To use the Preferences dialog:
Select File Preferences...
You can set the following preferences:
Show Welcome Dialog on Start-up: You can choose whether or not to see the Welcome dialog box each time you start Protege-Frames. This dialog asks you to open, import, or create a new project. If you choose to disable the Welcome dialog box, you can perform these actions from the menus.
Capitalize Slot Widget Names: This controls an aspect of the Forms interface. To distinguish slot names from class names, a recommended convention is to make internal slot names lowercase. If this option is selected, Protege-Frames automatically capitalizes the names of slots on the forms it creates.
User Name: The user name is shown on sticky notes. The default name is the login name you use to access your computer system. If you wish to customize the displayed name, select Use Specified Name and enter your desired name in the entry box.
Once you have set the Preferences to your satisfaction, click OK to implement your changes.
Archiving a Project
You can archive the current version of a project. Archiving saves a time-stamped copy of the project in a subfolder of your project folder. You can revert to a previously archived project at any time. This provides a form of version control for Protege.
To archive the current version of a project:
Select Project | Archive or click the Archive Current Version (
 ) button
near the top of the Protege window.
) button
near the top of the Protege window.
If you wish, enter a comment:
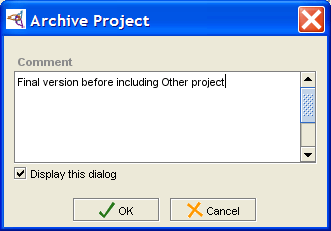 Archive Project dialog
Click OK.

Reverting to an Archived Version of a Project
You can revert to any archived version of your project.
Select Project | Revert to a Previous Version or click the Revert to a Previous Version (
 ) button
at the top of the Protege window.
) button
at the top of the Protege window.
All archived versions are displayed in the Revert to Archived Version dialog:
 Revert to Archived Version dialog
Select the version you wish to revert to. If you wish, you can select to archive the current version before reverting.
Click OK.

Including a Project
You can include an existing project in your current Protege-Frames project. An included project stays as a separate project which you can open and edit separately; edits made in the file for the included project will appear in the including project the next time it is loaded. This allows you to build a single large project from one or more smaller projects.
With an included project:
you can
view and refer to the frames of the included project, e.g., you can create a subclass of an included class or associate an included slot to a class
edit instances from the included project and create new instances for included classes
edit included forms
edit and override included slots
you cannot
make edits that would affect classes in the included project, e.g., you cannot edit or delete an included class
Including a project
To include a project into an existing Protege-Frames project:
Select Manage Included Projects from the Project menu. The current project, and its included projects, if any, will be shown in a project hierarchy.
Click the Add Project (
 ) button,
at the top right of the Manage Included Projects dialog box.
) button,
at the top right of the Manage Included Projects dialog box.
In the Select Project dialog box, browse to the location of the project you want to include and select the .pprj file of the desired project.
Click Open.
The included project will be shown in the dialog box, with "(not loaded)" after it to indicate that the actual inclusion process has not yet taken place. If the included project already includes any other projects, they will also be added to the hierarchy.
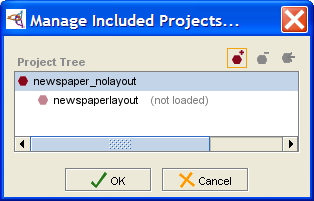 Manage Included Projects dialog
To include additional projects, repeat steps 2-6.
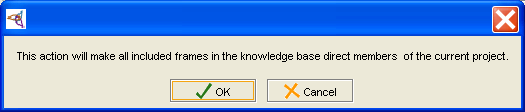
Click OK. You will see a warning:
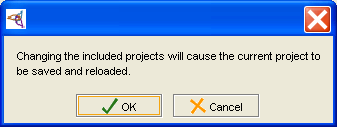 save/reload warning dialog
Click OK.
If there are any classes that are duplicated in your project, you will see a warning:
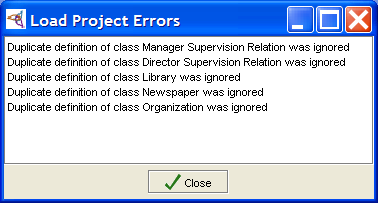 duplicated class warning dialog
Click Close to continue. Protege-Frames will include your files at this time.


The project is included into your current project.
Frames in the included project appear with pale icons
(e.g., ![]() ,
,
![]() )
to show they cannot be edited.
)
to show they cannot be edited.
Included Projects and Duplicate Class Names
If an included project defines a class that is already defined in the including project (i.e., has the same name), then one of the duplicate class definitions is ignored. (Usually the included definition is used, but there is no hard rule about this.) A warning is given at load time (Duplicate class definition was ignored") and the project is loaded. All references to the class work from both projects, because the reference mechanism uses the class name.
This feature allows you to exchange the included project - for example, with a different version. Ignoring duplicate classes also allows for the situation where one project (A) is included in two separate projects (B and C), which in turn are included in a final larger project (D):

Activating an Included Project
In a project that has included projects, you can choose which project to activate. This restricts the frames you can view in the Protege-Frames window to the ones from the project you have chosen. Note that you are still working with your including project and you cannot make edits which would affect the included project.
Activating an included project hides all projects at the same or higher level as that project.
Activating the current (top-level) project shows all frames and forms in the entire project hierarchy.
To activate an included project:
Select Manage Included Projects from the Project menu. The current project, and its included projects, if any, will be shown in a project hierarchy.
Select the project that you want to activate.
Click the Activate Selected Project button at the top right of the Manage Included Projects dialog box.
Unless you are activating the top-level project, you will receive a warning:
 "Changing the active project..." warning dialog
Click Yes to continue. Your project view will change.

Removing an Included Project
Removing an included project removes that project and any included projects it may have.
Select Manage Included Projects from the Project menu. The current project, and its included projects, if any, will be shown in a project hierarchy.
Highlight the project you want to remove.
Click the Remove Project (
 ) button,
at the top right of the Manage Included Projects dialog box.
) button,
at the top right of the Manage Included Projects dialog box.
To remove additional projects, repeat steps 2-3.
Click OK. You will see a warning:
save/reload warning dialogClick OK to remove the project. You will see a number of warnings. Classes that were included from the project; any classes you created subordinate to those classes will still appear as subclasses of :UNDEFINED. For example:
Let's say you have a project A.
Then, you include project B in project A.
From project B, you get a class called X.
In project A, you make a bunch of subclasses of X.
Then, you remove project B from project A.
Protege keeps all the subclasses of X that were created in project A, but they are now subclasses of a class called :UNDEFINED, because when you removed included project B, you lost class X.
Merging an Included Project
Merging an included project takes all the frames of the included project and directly incorporates them into the current project. After this, you can edit these frames just like the other frames in your project.
After a merge, the dynamic link to the included project has been broken and any further changes to the project file for the included project will not appear in the current project. The included project no longer appears in the Manage Included Projects dialog box.
To merge an included project:
Select Project | Merge Included Projects.
In the Merge Included Projects dialog box, select the project you want to merge.
 Merge Included Projects dialog
Click OK.

Configuring a Project
You can change the project configuration using the project Configure dialog box. This dialog box allows you to customize your project window.
Note: You can set additional preferences by choosing File | Preferences. Preferences apply to all Protege projects, while Configuration applies to the current project.
Configuring the Project Tab Widgets
To configure which tabs are displayed:
Select Configure... from the Project menu. The Configure dialog box will open.
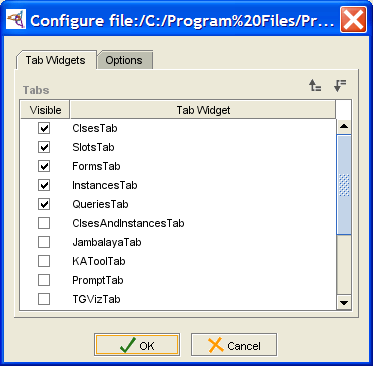 Configure dialog, Tab widgets tab
Make sure that Tab Widgets is selected. It will show the tabs that are available for your project. Marked tabs are visible; others are hidden.
By default, a project displays the following tabs: Clses, Slot, Forms, Instances, and Queries.
A number of other tabs are available, such as the KAToolTab (Knowledge Acquisition Tool) and the ClsesandInstancesTab.
You may see additional tabs for plug-ins you have installed.
If you have installed OWL capability, but are not using an OWL project, you will see a list of possible tabs that are not loaded.
To hide a tab, remove the mark from in front of it. For example, if you are giving your project to someone to let them enter instances, you might wish to hide the other tabs. You can also hide the current tab by selecting Window | Close Current View from the Protege project window.
If you wish to display a tab, add a mark in front of it. For example, you might want to display the Classes and Instances tab for a unified view of your classes and instances.
To change the order in which the tabs appear in the Protege project window, highlight the tab you want to move and use the up (
 )
and down (
)
and down ( ) icons
to move the tab up or down in the list.
A tab's position (left to right) in the Protege window
is correlated with its position (top to bottom) in the Configure dialog.
For example, to have the Classes and Instances tab appear
at the far left of the Protege window,
move it to the top of the list in the Configure dialog.
) icons
to move the tab up or down in the list.
A tab's position (left to right) in the Protege window
is correlated with its position (top to bottom) in the Configure dialog.
For example, to have the Classes and Instances tab appear
at the far left of the Protege window,
move it to the top of the list in the Configure dialog.
Click OK to close the dialog box and see your new configuration.

Configuring Project Options
To change project options:
Select Project | Configure...
Select the Options tab in the Configure dialog box.
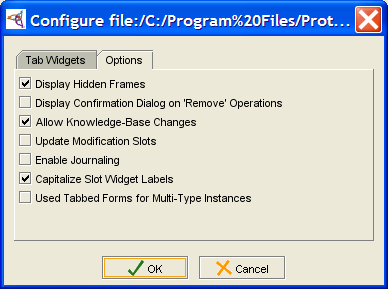 Configure dialog, Options tab
This tab provides the following options:
Display Hidden Frames: Allows you to toggle whether or not you can see any frames you have hidden. (You can hide a frame by selecting it, clicking the right mouse button, and choosing Hide from the menu.)
Display Confirmation Dialog on 'Remove' Operations: Allows you to add a warning when you perform a remove, such as removing a slot from a class. Recall that when you remove a slot, the slot remains in the project, but is simply removed from the current class. Regardless of the setting in this dialog box, you always receive a warning when you delete a frame from the project.
Allow Knowledge-Base Changes: Deselecting this item locks the knowledge base so that it cannot be changed by the viewer.
Update Modification Slots: Four system slots (attached to the :INSTANCE-ANNOTATION system class) keep track of the creator, modifier, and timestamps for any frame modification. The system will record this information automatically if you put these slots on the instance (attach them as template slots to the class) and check the box.
Enable Journaling: Allows you to keep a record of all the changes that you make to a project. Changes are stored in an ASCII (text) file, with one line for each change you make. The journaling file is created in the same directory as the project, with a .pjrn extension. It can be read using any text editor.
Capitalize Slot Widget Labels: This controls an aspect of the Forms interface. To distinguish slot names from class names, a recommended convention is to make internal slot names lowercase. If you use this convention and still want the names on your forms to be capitalized, select this option.
Use Tabbed Forms for Multi-Type Instances: Controls the display of the Instance Editor for multi-type instances.
If you wish to select an option, click to mark it.
If you wish to remove an option, click to remove the mark.
Click OK to close the dialog box and see your new configuration.

Project Metrics
Project metrics provide information about the number of frames in the current project. This information can be useful in analyzing performance issues.
Viewing Project Metrics
To view project metrics, select Project | Metrics:

Scalability and Tuning
Protege-Frames has successfully handled "simulated" knowledge bases (generated by a program) as large as 5M frames (classes & instances). Actual knowledge bases as large as 100K frames give acceptable UI performance if supported by the database backend.
For file-based projects, the primary impact of increasing the number of frames is that the project takes longer to load (load time is roughly proportional to the number of frames). For database projects, slow operations include expanding a class with a lot of direct subclasses and displaying the instances for a class with many instances.
Aside from limiting the size of the knowledge base, the most important thing to tune is the heap size. For more information, see Scalability and Tuning.
Using Undo
You can undo your actions using the Undo command on the Edit menu
or by clicking the Undo
(![]() ) button
at the top of the Protege-Frames window.
) button
at the top of the Protege-Frames window.
To redo a command, use Edit | Redo or click the Redo
(![]() ) button.
) button.
Protege-Frames allows multiple levels of undo and redo.
When you use Undo, your project will be restored to its previous state. In most cases, you will not see any difference. However, while Protege-Frames always creates a state that is logically identical to the initial state you were in, in some cases internal state will be represented in a slightly different way. For example, classes or instances might appear in a different order in the .pont or .pins files.
When you use certain advanced features, you may see a minor difference in the user interface. For example, if you are using the Graph Widget, some elements on the graph may appear in a slightly different location. The project has not been affected in any other way.
Project Types
This section of the User's Guide covers the concepts of understanding, creating, and using Protege-Frames project types.
Note: Before you create and use project types, you should be confident with the basic Protege-Frames interface. You should also be comfortable with Protege-Frames projects.
To return to the main table of contents, click the Protege-Frames User's Guide link (located at the top of the table of contents on the right-hand side of this page).
Understanding Project Types
Every Protege-Frames project stores two kinds of information:
Protege-specific information, stored in a .pprj (Protégé project) file
Information about the project ontology (classes, slots, etc.) and project instances, stored in one or more additional files.
No matter which format you choose, the information specific to the Protege-Frames interface is saved in a .pprj file. You can create, open, and save your projects directly via the .pprj file. You do not need to name or access any other files unless you wish to import a project.
Choosing the project type, or backend, determines how the project ontology and instances are stored. Protege-Frames supports three file formats:
Protege Files (the default) creates two text files in Protege-Frames format. See Protege Files.
Protege Database creates the project as a table in a JDBC database. To do this, you must have a database installed and configured on your system. See Protege Database Format.
Experimental XML saves the project in XML format. See Experimental XML Format.
Normally, for a Protege-Frames project, you would select Protege Files or Experimental XML. If you have installed support for additional backends, e.g., if you selected BASIC + OWL as your installation, you will see additional file formats.
If you decide you wish to change your project type, e.g., from Protege Files to Experimental XML, you can convert your project. This changes the format of the backend, while leaving the .pprj file unchanged. Protege still uses the .pprj file to access the project. You should not see a difference within Protege.
You can also export a project to CLIPS or HTML formats. In this case, the project itself stays the same, but a snapshot of the current version is created in the selected format.
Protege Files
You can save the ontology-related information for a Protege-Frames project in Protege Files format, a CLIPS-based text format that has been the default file format for Protege-Frames for many years.
In a Protege project, information specific to the Protege user interface is stored in a dedicated Protege project (.pprj) file. Internally, Protege-Frames maintains two files in addition to the .pprj file; these files contain further information about the ontology and instances of the project. When you open a .pprj file, Protege-Frames automatically loads these files. By default, the additional files are saved in the following format:
A text file with the extension pont (Protege ontology) contains the class and slot information.
A text file the extension pins (Protege instances) contains the instance information.
See Understanding Project Types for more information about project types.
Importing Protege Files
If you have an ontology that is stored in two text files, but do not have a .pprj file, you can import those files and create a new project file. To create a Protege-Frames project from text files:
Select New Project from the File menu. The Create New Project dialog box will open.
 Create New Project dialog, "Protege Files ..." selected
To import a project from text files, select Create from Existing Sources.
Create from Existing Sources checkbox (checked)Select Protege Files as the project type.
Click Next.
Locate the files you want to use as the ontology (.pont) and instances (.pins) files:
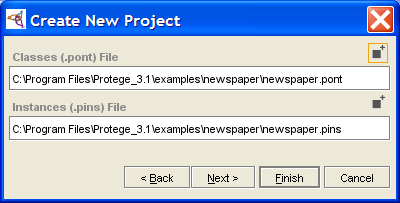 Create New Project dialog
If you are finished, click Finish.
If you wish to include any existing Protege-Frames projects in the project you are building, click Next. Then click the Add (
 ) button,
locate the project you want to include, and click OK.
You can include multiple projects by repeating this step.
Click Finish when you are done including.
) button,
locate the project you want to include, and click OK.
You can include multiple projects by repeating this step.
Click Finish when you are done including.


Protege-Frames will create a project file from your class and instance information. To save your project and give it a name, select Save from the Project menu.
Converting a Protege-Frames Project to Protege Files
Select File | Convert Project to Format...
Select Protege Files in the Select Format dialog box.
 Select Format dialog, "Protege Files ..." selected
Click OK.

Protege Database Format
You can save the ontology-related information for a Protege-Frames project as a single table in a JDBC database. Note that this is a "flat" table that does not use any special database constructs to represent the information. Information specific to the Protege-Frames user interface is stored in a separate Protege project (.pprj) file. See Understanding Project Types for more information about these files.
Requirements
Before you create a Protege Database project, you will need to do the following:
Make sure you have a database program installed on your system.
Make sure you have a JDBC driver that is compatible with your database and the version of the Java VM that you are using.
If you are using Microsoft Access, you don't need to acquire a JDBC driver; it's already bundled into the JDK. (not recommended option due to slow performance)
Otherwise, acquire a driver and rename it to "driver.jar" (or "driver1.jar" or "driver2.jar", if you have several). Add this driver to the Protege installation directory (not the plugins directory).
You can store multiple projects in the same database by giving their tables different names.
Note: When a project is saved in a JDBC database, backend changes to the database (for example, changes to slots, classes, and instances) are committed as soon as they are made. However, changes to the User Interface (stored in the .pprj file) are not committed until you save the project, for example by clicking Save.
Creating or Importing a Database Project
Select New Project from the File menu. The Create New Project dialog box will open.
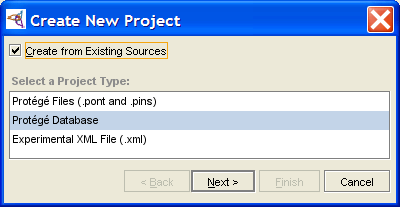 Create New Project dialog box, "Protege Database" selected
To import a project from existing files, select Create from Existing Sources. To create a new, empty Protege-Frames project, leave this blank (the default).
Create from Existing Sources checkbox (checked)Select Protege Database as the project type.
Click Next.
A Protege Database dialog box will be displayed.
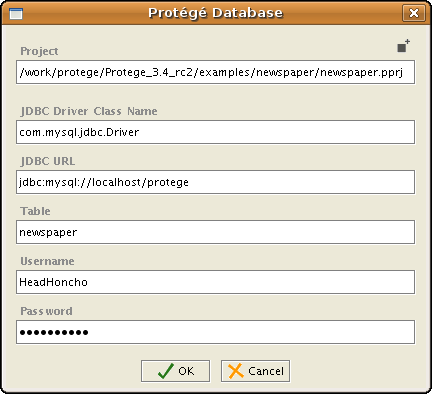 Protege Database dialog box
Enter the class name of your JDBC driver in the JDBC Driver line of the dialog box. The class name can be found in the documentation provided with your particular driver. (For Microsoft Access, use: sun.jdbc.odbc.JdbcOdbcDriver)
Enter the URL for your database in the JDBC URL line.
Note: For Microsoft Access, navigate to the "ODBC Data Source Administrator" dialog via the Control Panel and add a User DSN for your Access database. If you're unfamiliar with how to find this dialog or how to add a User DSN, please refer to Microsoft Windows Help. Your URL will look like: jdbc:odbc:<User DSN name>
Enter the name for the database table where you will be storing the information. If you are importing a file, enter the name of the table that contains the information you wish to import. This field is required.
If your database requires a username and/or password, enter these in the appropriate lines of the dialog box.
Click Finish.


To save your project and give it a name, select Save from the File menu. See Saving a Project for more information.
Converting a Protege-Frames Project to a Database
Select File | Convert Project to Format...
Select Protege Database in the Select Format dialog box.
Select Format dialog, "Protege Database" selectedIn the Protege Database dialog box, fill out the required information, as described above.
Experimental XML Format
Currently, the XML backend for Protege-Frames is still under development. The intent is to eventually make this the default backend for Protege-Frames, once it has become stable and supports the full feature set.
You can create a new XML project by selecting File | Create Project and then selecting Experimental XML File in the Create New Project dialog:

You can also convert an existing project to XML by selecting File | Convert Project and then selecting Experimental XML File in the Convert Project dialog box.
Note: The XML backend uses its own Schema and will not let you import an arbitrary XML file into Protege.
The first time you save an XML project, Protege creates the following files:
a .pprj file, which contains Protege-specific UI information
a .xml file, which contains XML-encoded ontology information for the knowledge base\
Protege-Frames uses a single XML Schema file that is optimized to work with the Protege model. All information in the knowledge base is treated as "instances". The format of these instances, described in the Schema file, is designed to be simple, readable, and easily processible by XSLT in straightforward ways. The Schema is available at:
http://protege.stanford.edu/xml/schema/protege.xsd
Feedback on the Schema is strongly solicited. The schema should not be considered fixed at this point and users should not rely on this backend functioning correctly or upon the schema remaining fixed from build to build. We do encourage you to try it out and report any problems that you see.
Note: This backend cannot be used to generate XML Schema files. For example, it does not turn classes in Protege-Frames into XML Schema complex types. An export mechanism that does this may eventually be developed separately.
Protege-OWL
Note: This User's Guide describes how to use the Protege-Frames interface. If you wish to use the OWL extension to Protege, see the CO-ODE website for documentation and examples.
In addition to the Protege-Frames editor, which these help topics document, Protege supplies a separate Protege-OWL editor, which enables users to build ontologies for the Semantic Web, in particular in the W3C's Web Ontology Language (OWL). See the Protege-OWL overview for a description of Protege-OWL and see the CO-ODE website for documentation, sample ontologies, and additional OWL plug-ins.
"An OWL ontology may include descriptions of classes, properties, and their instances. Given such an ontology, the OWL formal semantics specifies how to derive its logical consequences, i.e., facts not literally present in the ontology, but entailed by the semantics. These entailments may be based on a single document or multiple distributed documents that have been combined using defined OWL mechanisms." (see the OWL Web Ontology Language Guide)
Although Protege-OWL uses the Protege engine to display and manage projects, the logic and user interface of Protege-OWL and Protege-Frames are substantially different. You should determine which model suits your project and do all your project creation and editing in either Protege-OWL or Protege-Frames, rather than attempting to switch between modes. Although there is substantial overlap between the two models, both Protege-Frames and Protege-OWL have features which are not supported by the other.
Following are some of the differences between Protege-Frames and Protege-OWL.
Protege-Frames:
primarily object-oriented (frame-based) with classes and slots
builds classes and adds or creates attributes
supports frames-specific constructs, such as Abstract classes
Protege-OWL:
based on Description Logic
defines classes by their logical characteristics
supports advanced OWL features
To install Protege-OWL:
Download the Full version of Protege from the Protege website.
Once the installer has downloaded, double-click to start the installation.
During the installation wizard, select "Basic + OWL". This will install Protege, the OWL Plugin, and selected other plugins that are suited for OWL.
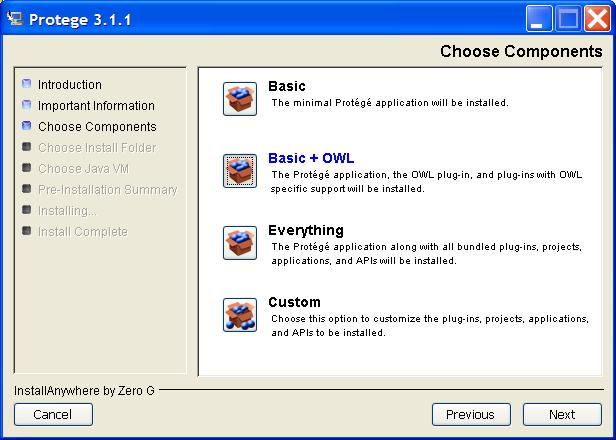 Choose Components dialog

If your installation has been successful, you should see the entries "OWL Files" and "OWL Database" in the listing of project formats at Protege's start-up screen.
If you do not see a Project Type called OWL Files when you attempt to create a new project, there may have been something wrong with the way Protege was installed.
Check that a folder named plugins/edu.stanford.smi.protegex.owl is present in your Protege installation directory. Make sure that this folder is not empty (you should see some .jar files and other things). If the folder and its contents are not present, they can be downloaded and unzipped into the plugins folder by hand.
If you cannot get OWL projects to load, try re-installing Protege. Make sure that you select Basic+OWL as your installation type.
Finally, refer to the OWL Plugin web pages to see if any changes have been made to the installation or running process.
RDF(S) Support in Protege
Protege allows you to create and edit Resource Description Framework (RDF) schema and instance data. (For more information about RDF, see http://www.w3.org/RDF.) Protege provides the following types of RDF (Schema) support:
Protege-OWL (recommended)
an RDF backend for Protege-Frames
additional RDF(S) plug-ins for Protege-Frames, including Sesame and Joseki support
Protege-OWL and RDF(S)
OWL is an extension of RDF, so any RDF project can also be regarded as an OWL project which simply does not use the advanced OWL features. Although the focus of the OWL Plugin is on OWL ontologies, it can also be used to edit RDF ontologies and RDF Schema files or databases. However, we don't recommend mixing pure RDF(S) elements with OWL elements in OWL ontologies.
The following steps show how to:
import or create a file in RDF(S) format using Protege-OWL
add RDF(S) support to an existing OWL project
These steps address the file format only; for additional information, see the Protege-OWL resources page.
Please note the following limitations:
Although you may see the full OWL interface when editing an RDF(S) project, it is your responsibility to avoid using OWL-specific elements in your project.
Currently, when you go to import (open from an existing) RDF(S) file, there is no separate RDF format option. You need to select OWL Files (.owl or .rdf) and later select RDF Schema or Pure RDF Schema without OWL.
When you save your RDF(S) project, the interface currently does not save separate RDFS and RDF files; instead, it combines everything in a single file that is given a .owl extension. This may be fixed in future versions.
Note that the use of RDF in Protege-OWL is not necessarily compatible with the RDF Backend for Protege-Frames, which was initially developed prior to the existence of OWL. Overall, the RDF support in Protege-OWL provides cleaner semantics and a richer set of modeling elements.
Importing or Creating an RDF(S) Project with Protege-OWL
Create a new project, either by selecting Create New Project from the start-up dialog or File | Create New in the Protege window.
Select OWL Files (.owl or .rdf) as the Project Type.
 Create New Project dialog, "OWL Files ..." selected
If you are importing an existing file, make sure to check Create from Existing Sources, located at the top of the dialog box. If you are creating a new RDF file, leave it unchecked (default).
Create from Existing Sources checkbox (checked)Click Next.
Specify any common ontologies to use and click Next.
Specify your default RDF namespace and click Next.
You can now choose your language profile. For an RDF project, select RDF Schema or Pure RDF Schema without OWL.
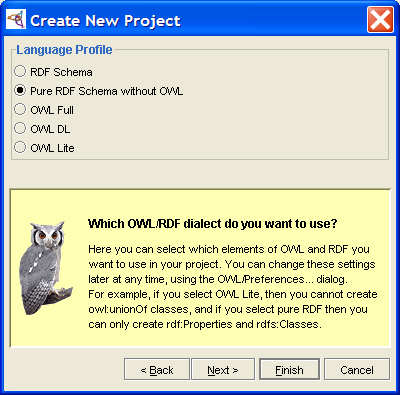 Create New Project dialog, "Pure RDF ..." selected


Activating RDF(S) Support in an OWL Project
To activate RDF(S) support in an existing Protege-OWL project:
Select the OWL | Preferences menu option.
In the OWL Preferences dialog, activate an RDF profile by changing the Language Profile to RDF Schema or Pure RDF Schema without OWL.
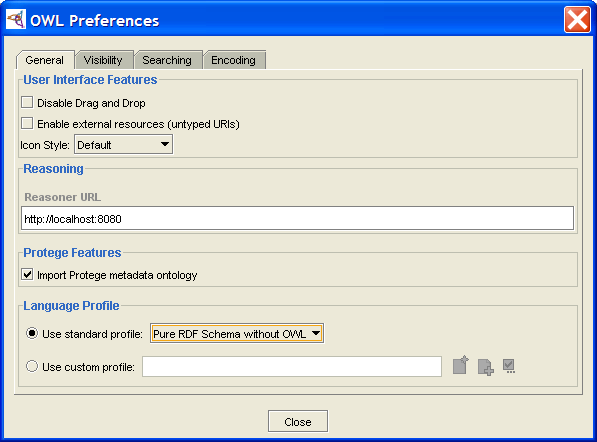 OWL Preferences dialog, General tab, "Pure RDF ..." selected
Click Close.
The Protege-OWL window will display buttons to create pure RDFS classes and RDF properties. In particular:

If you chose RDF Schema, there will be an additional button on the Properties tab, which can be used to create RDF properties:
 Property tab with extra buttons
You can also decide whether new classes shall be RDFS classes or OWL classes using "Create class using metaclass", or you can make rdfs:Class the default metaclass (both with a right-click on the classes tree in the OWLClasses tab).
If you chose Pure RDF Schema without OWL, the buttons on the Properties tab will be restricted to RDF properties:
 Property tab


RDF Backend for Protege-Frames
You can use Protege-Frames to design RDF schema and create the corresponding instance data. You can also view and edit your existing RDF files in Protege-Frames. The RDF backend for Protege-Frames was developed prior to the development of the Protege OWL interface and is not necessarily compatible with Protege-OWL. With the advent of Protege-OWL, it is no longer under active development, but some support is still available.
Note: This backend is actually an RDFS/RDF backend which saves a schema file (RDFS) and an instance file (RDF).
This interface has a number of limitations:
The backend uses the standard Protege-Frames GUI, which is not RDF(S) -specific. It is not clear how you can enter RDF specific elements. You see exactly the same GUI as for "normal" Protege-Frames.
Only the RDF Schema namespace (http://www.w3.org/TR/1999/PR-rdf-schema-19990303) is supported when saving (on import, the new namespace is also recognized).
Namespace abbreviations cannot be edited (they are automatically generated).
rdfs:seeAlso, rdfs:isDefinedBy, rdfs:label, container, and reified statements are not supported.
Multiple types for a single resource were not supported, prior to the 3.3 release.
You cannot make changes to the standard meta classes. (i.e., rdf:Resource, rdf:Property, rdfs:Class, etc.)
XML Schema data types are not recognized as rdfs:Literal (but it is unclear that they should be).
Additional RDF Plug-ins
The Protege community has written additional RDF plug-ins to support other RDF frameworks:
Protege RDF(s)-DB Backend Plugin: Store/retrieve RDFS ontologies in the Sesame RDF framework.
Protege2Joseki: Import/export Protege ontologies from/to Joseki RDF Server.
Using the Protege-Frames RDF Backend
Although it is recommended to use Protege-OWL for RDF(S) projects, Protege-Frames also has an RDF backend you can use for Protege-Frames projects. The backend does not work with Protege-OWL.
Creating an RDF(S) Project with the Protege-Frames Backend
Create a new project, either by selecting Create New Project from the start-up dialog or File | Create New in the Protege window.
Select Resource Description Framework (RDF) as the Project Type.
If you are importing an existing file, make sure to check Create from Existing Sources, located at the top of the dialog box. If you are creating a new RDF file, leave it unchecked (default).
Create from Existing Sources checkbox (checked)To select or change the name or location of the .pprj file, enter the information you want in the Project line of the dialog box. Be sure to give the file a .pprj extension. If you do not specify a location for the project, by default, the project is saved in the directory where Protege is installed.
Protege-Frames will create two files: one for the schema (classes and slots) and the other for the instances. By default, these use the name of the existing .pprj file. If you wish to change the name of the schema file, type the new name in the Classes file name line of the dialog box. Make sure to give the file an .rdfs extension.
If you wish to change the name of the instances file, type the new name in the Instances file name line of the dialog box. Make sure to give the file an .rdf extension.
Click OK.
Note: You should create new RDF classes as subclasses of rdfs:Resource.
Converting a Protege-Frames Project to RDF Format
Note: Subclasses of :THING from a non-RDF project will become subclasses of rdfs:Resource when you save as RDF.
After you have chosen your format, choose the name and location for the project, as follows:
Select Convert to Format... from the File menu.
Select Resource Description Framework (RDF) in the Select Format dialog box.
When you have selected Resource Description Framework (RDF), the RDF dialog box will be displayed.
To select or change the name or location of the .pprj file, enter the information you want in the Project line of the dialog box. Be sure to give the file a .pprj extension. To browse for a new location, click the Add (
) button.
If you do not specify a location for the project, by default,
the project is saved in the directory where Protege is installed.
Protege-Frames will create two files: one for the schema (classes and slots) and the other for the instances. By default, these use the name of the existing .pprj file. If you wish to change the name of the schema file, type the new name in the Classes file name line of the dialog box. Make sure to give the file an .rdfs extension.
If you wish to change the name of the instances file, type the new name in the Instances file name line of the dialog box. Make sure to give the file an .rdf extension.
Click OK.
Exporting a Project to CLIPS
The current version of Protege-Frames uses CLIPS (C Language Integrated Production System) as its internal file format. However, in order to support advanced Protege features, the CLIPS generated by Protege-Frames may not conform to the CLIPS standard.
You can export a conformant CLIPS view of your Protege project. This will not affect the format of your project; it simply produces a CLIPS file that reflects the project's current state. Note, however, that because of the limitations of CLIPS with respect to Protege, you may lose information during exporting. This means, for example, that if you re-import an exported file, it may not fully recapture the original project.
To export your project to CLIPS text files:
Select Export to Format from the File menu and select CLIPS from the submenu. The Clips Files to Export dialog box will be displayed.
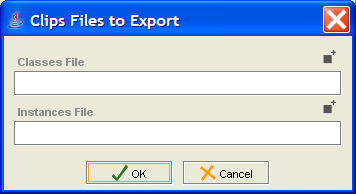 Clips Files to Export dialog box
Enter the names for your classes and instances files. If you want to save the file(s) in a different location from the default, type the new location in the Output Directory line or click the Add (
) button
to navigate to the desired location.
Click OK. The CLIPS files will be created in the selected location.

Exporting a Project to HTML
You can generate an HTML view of a project. This allows you to view all or part of the class hierarchy and, optionally, all the instances. The output consists of an index page, which gives the class hierarchy for the project, including links to individual pages for each the class. Class pages include slot descriptions and optional instances. If instances are selected, they have individual pages and appear in the index hierarchy and under each class.
You can generate HTML pages for the entire project, or restrict the output to a subset of the project.
Generating HTML Output
To generate HTML for a project:
Select File | Export to Format and select HTML from the submenu. The Export HTML Configuration Options dialog box will be displayed.
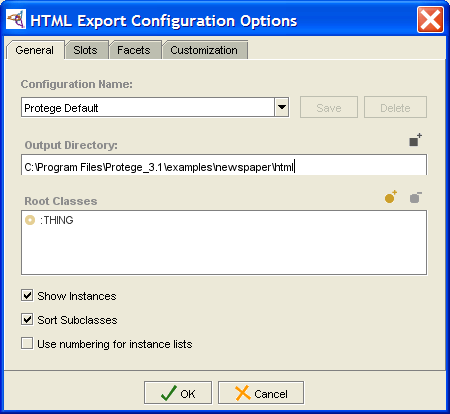 Export HTML Configuration Options dialog box, General tab
Change your settings, if desired. The effect of the different settings is described below. (We recommend changing the output directory; otherwise, the files will be saved directly in the Protege application directory.)
Click OK.

Output Format
Using the default options produces the following HTML output:
an index page, showing the class hierarchy; the example shown is for a subset of the newspaper project, with Layout_info selected as the root class
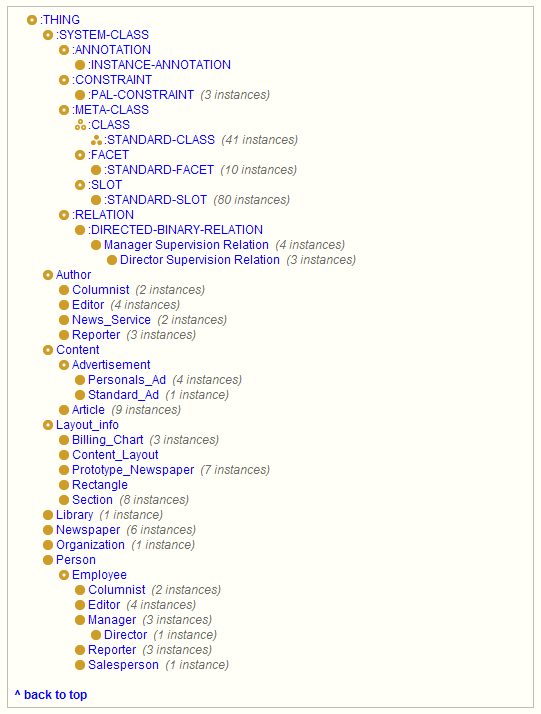 index page, "Layout_info" selected
a page for each class, showing its superclasses, subclasses, slots, and instances; the selection of classes is customizable
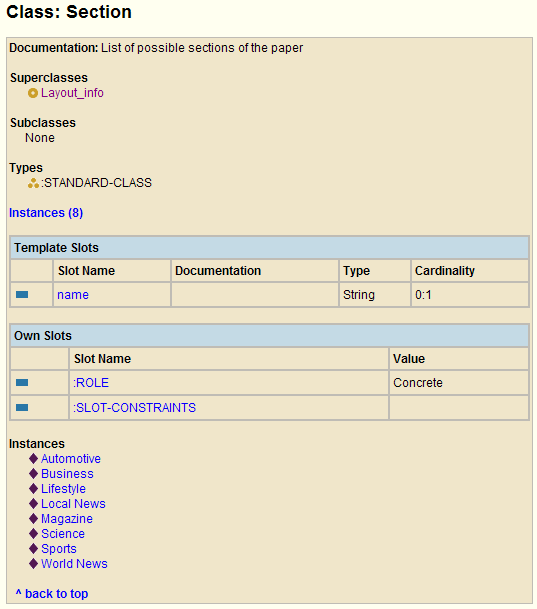 page for "Section" Class
a page for each slot, showing its facets and their values; the list of slots is customizable
a page for each instance of the chosen classes; you can choose to omit instances from the HTML web


Output Options
The effect of the different settings is described below.
General Tab
Configuration Name: Allows you to name and save the current settings in the dialog box. A saved setting is added to the menu; you can reload it by selecting it from the menu. To save your settings, enter a name and then click Save. This will save the current state of the HTML Export Configuration Options dialog box. Note that if you do not click Save, your settings will not be changed. Also, if you make additional changes without clicking Save, they will not be saved.
Output Directory: (recommended) Allows you to choose a directory where the HTML files will be saved. By default, they are saved directly in the Protege application directory. You can type a pathname directly in the entry bar or use the button to navigate to the desired directory.
Root Classes: Restricts the HTML output to the chosen classes and all their subordinate classes. By default, the root class is :THING, which will generate output for all classes in the hierarchy, including hidden system classes. To restrict your view to a smaller section of the project, first delete the :THING class using the Delete Class button, then add one or more classes by clicking the Add Class button and selecting the classes you want in the dialog box. Any class you choose will be included in the tree, along with all of its subclasses.
Show Instances: Select this option to generate a page for each instance subordinate to your chosen root classes. If you do not wish to include instance pages in your output, deselect this option.
Sort Subclasses: Users can reorder classes manually in the Protege class tree and Protege will remember the order. To ensure that the project to be exported in alphabetical order, you'll need to use this option.
Use numbering for instance lists: Numbers the instance lists shown for each class.
Slots Tab
This tab allows you to select which slots are displayed. A selected slot is shown at each class where it occurs and a page is generated for that slot.

Facets Tab
This tab allows you to select which slot facets are displayed. A selected facet, and its value, is shown for each slot where it appears.

Customization Tab
This tab allows you to customize the header, footer, and stylesheet of the output. Note that the default style sheet displays the icons for you.

Window Management
This section of the User's Guide covers the concepts of managing Protege-Frames windows.
Note: Before you create and use project types, you should be confident with the basic Protege-Frames interface. You should also be comfortable with Protege-Frames projects and project types.
To return to the main table of contents, click the Protege-Frames User's Guide link (located at the top of the table of contents on the right-hand side of this page).
Cascading All Editor Windows
Protege allows you to have multiple free-standing Editor windows open at a time. Each Editor displays the information for a class, instance, or slot. In addition, you may choose to detach one or more of the Protege tabs. As you continue to work with a project, you may find that these windows get hidden, or that the screen gets cluttered.
To cascade all open Editor windows, select
Windows | ![]() Cascade Windows.
All open Editor windows will be brought to the front and cascaded.
Cascade Windows.
All open Editor windows will be brought to the front and cascaded.
Closing All Windows
To close all open Editor windows, select the Window | Close All Windows menu item. All open Editor windows will be closed. The main Protege window will remain open. If you have detached a tab, it will be re-attached to the main window.
Detaching the Current View
You can detach one or more of the Protege-Frames tabs (Classes, Slots, etc.) and display them in free-standing windows. This allows you to view multiple tabs at the same time. For example, you could detach the Classes tab and display it in a separate window.
Detaching
To detach a tab:
Click on the tab that you want to detach, making sure that it is the current view displayed in the Protege-Frames window.
Select Window | Detach Current View. The tab you have selected will be detached.
Re-attaching
To restore a detached view and reincorporate it as a tab:
Click on the standard Close button at the top right. Instead of closing the tab completely, this will close the detached window and redisplay the information as a tab.
To completely remove a tab from view, close the view using Window | Close Current View.
Closing the Current Tab
You can choose not to display a Protege-Frames tab by closing it. For example, if you do not wish to edit Forms, you might choose to close the Forms tab. You might also close a tab for a plugin you are not planning to use in this project. A closed tab will no longer display in your project, but will display in other Protege-Frames projects.
Closing
To close a tab:
Click on the tab that you want to close, making sure that it is the current view displayed in the Protege-Frames window.
Select Window | Close Current View. The selected tab will no longer display.
You can also close a tab using the Configure dialog box.
Restoring a Closed Tab
To restore a closed tab, you can use the Configure dialog box:
Select Project | Configure....
Make sure Tab Widgets is selected.
To display a hidden tab, make sure the box is checked.
Click OK.
Working With a Small Window
Protege-Frames displays a lot of information in many of its windows. In some cases, if your window is sized to fit on a smaller screen, not all of the information will appear. In this case, you might have trouble finding some of the following:
the Superclasses pane at the Classes tab
the Classes pane at the Slots tab
the Query Library pane and the Search Results pane at the Queries tab
To view or enlarge these areas, try any of the following:
Enlarge the Protege window by dragging it. A hidden section will usually appear if the window becomes large enough.
Drag the slider bar to the position where the hidden section should be. For example, to view the Search Results pane, place the cursor over the slider bar at the right of the window, and drag the bar to the left. To view the Superclasses pane, Query Library pane, or Classes pane, place the cursor over the slider bar at the bottom left of the window and drag the bar up.
If your window is very small, you can toggle between two panes by clicking on the arrows on the slider bar. For example, to toggle between the Query Editor and the Query Library pane, click the up arrow on the slider bar to display only the Query Library pane; click the down arrow to display only the Query Editor.
You can also customize the distance between any of the panes, using the slider bars in the same way.
Synchronizing Class Trees
Often, when you switch between tabs in Protege-Frames, you wish to see the same class highlighted at either tab - or synchronized. You can synchronize between the Classes, Forms, and Instances tabs in two ways:
auto-synchronize (default)
synchronize manually
Automatically Synchronizing Class Trees
To turn the automatic synchronizing option on or off:
Select Window | Automatically Synchronize Class Trees.
When synchronizing is enabled (the default), this option shows a check mark.
Synchronizing Manually
If the Automatically Synchronize Class Trees setting is turned off, you can still synchronize a Classes, Forms, or Instances tab with the last one of these tabs you visited. To do this:
Select Window | Synchronize Class Trees.
Working With Notes
Protege-Frames allows you add a note to the Editor for any frame; that is, a class, instance, or slot. These notes, which are not part of the ontology structure, float over the Editor for that frame.
The buttons for working with a note are located at the top right of the Editor. This picture shows them in the Class Editor:
These buttons allow you to add, delete, display, or hide a note.
Adding a Note
To add a note to a frame:
Click the Create Note (
 ,
,
 ,
,
 ) icon
at the top right of the Editor
(e.g., Class Editor,
Instance Editor, etc.)
A yellow note will be created.
) icon
at the top right of the Editor
(e.g., Class Editor,
Instance Editor, etc.)
A yellow note will be created.
 Sticky note (empty)
Click in the note and type the desired text.
 Sticky note (filled)


As always, you can resize or reposition the note by dragging. However, you cannot move it out of the Editor window.
Deleting a Note
To remove a note:
Click the Delete Note (
 ,
,
 ,
,
 ) button
at the top right of the Editor.
) button
at the top right of the Editor.
If there is only one note, you will be prompted to confirm the deletion. Click OK.
If there is more than one note, a list of notes will be displayed. Select the note you wish to delete and click OK.
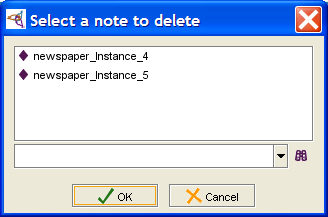 Select a note... dialog

Hiding Existing Notes
You can hide all existing notes for the current tab. When you do this:
Only the notes for the current tab (Classes, Slots, or Instances) are hidden.
New notes that you create after hiding will display. To hide additional notes, first display all notes and then hide them again.
To hide all existing notes for the current tab:
Click the Hide Notes (
 ,
,
 ,
,
 ) button
at the top right of the Editor.
The button will change to show that notes have been hidden.
) button
at the top right of the Editor.
The button will change to show that notes have been hidden.
Displaying Hidden Notes
When notes have been hidden, the Hide Notes button changes to show it has been selected:
To display all notes for the current tab:
Click the Hide Notes icon.
Classes
This section of the User's Guide covers the concepts of understanding, creating, and using Protege-Frames classes.
Note: Before you create and use classes, you should be confident with the basic Protege-Frames interface. You should also be comfortable with Protege-Frames projects, project types, and windows.
To return to the main table of contents, click the Protege-Frames User's Guide link (located at the top of the table of contents on the right-hand side of this page).
The Classes Tab
The Classes tab provides a single window in which you may view, create, and edit classes, which model concepts in your domain - usually objects, such as article or author.
The tab consists of two panes:
The Class Browser at the left shows the classes in your project and allows you to make edits that modify the class hierarchy. For example, you might create, delete, or move a class or work with superclasses and metaclasses.
When a single class is selected, the Class Editor on the right shows the properties of the selected class and allows you to edit class-specific attributes, such as class sticky notes, class name, role, any constraints, and template slots. The Class Editor can also be displayed as a separate window by clicking the View Class (
 ) icon
in the Class Browser.
) icon
in the Class Browser.
Click on an area in the picture to view more information:
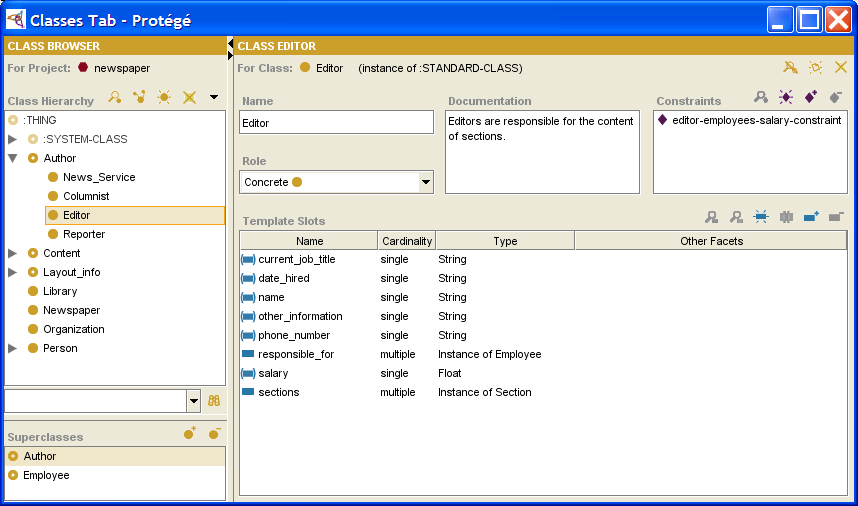
For information about the Classes user interface and about accomplishing specific tasks, see the Classes Table of Contents.
The Class Browser
The Class Browser, at the left of the Classes tab, displays the classes in the knowledge base as a tree. The Class Browser includes the following:
The Class buttons allow you to create (
 ),
view/edit
(),
view references to
(
),
view/edit
(),
view references to
( ),
and delete
(
),
and delete
( ) classes
in your knowledge base.
) classes
in your knowledge base.
The Relations menu (
 )
allows you to view relations between classes:
you can display the entire hierarchy (default)
or restrict the display only to those classes that are related to a selected class.
)
allows you to view relations between classes:
you can display the entire hierarchy (default)
or restrict the display only to those classes that are related to a selected class.
The Class Hierarchy window displays your class hierarchy. Icons give additional information about your classes. In this window, you can:
rearrange the class hierarchy using "drag-and-drop"; see Moving a Class for more information.
select a class to see its information displayed in the Class Editor to the right.
right-click a class to use the cascading Class menu, which allows you to create, delete, and hide classes, as well as work with metaclasses.
The Class lookup bar allows you to find a class in the Class Relationship window by typing all or part of the class name and clicking the Search for Class (
 ) button.
The Superclasses pane allows you to add and remove superclasses for a class, as well as jump to a different superclass in the hierarchy view.
Click on a region or name in the illustration to jump to a description:

The Class Buttons
The class buttons
(![]() ,
,
![]() ,
,
![]() ,
,
![]() ),
located at the top right
of the Class Browser,
allow you to view and edit,
view references to, create, or delete a class.
),
located at the top right
of the Class Browser,
allow you to view and edit,
view references to, create, or delete a class.
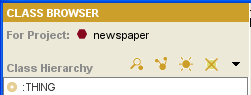
The buttons have the following actions:
The View Class button (
)
opens the Class Editor
for the highlighted class.
This allows you to view
or edit the class.
The View References to Class button (
)
opens the References window,
which shows all the frames that reference the highlighted class.
See Viewing References.
The Create Class button (
)
creates a new class
as a subclass of the highlighted class.
The Delete Class button (
)
deletes
the highlighted class and all of its subclasses.
If the Create Class or Delete Class button is grayed out, this indicates that the current class cannot be edited or deleted. A non-editable class always has a pale class icon to its left. A class cannot be edited if it is a system class or if it is included from another project.
Additional Buttons
The buttons above have the same operation wherever they appear. Additional buttons in the Protege-Frames interface allow you to add and remove the classes specified in a slot, field, or other relationship.
The Add Class button (
 )
displays a dialog box that allows you
to select one or more existing classes.
)
displays a dialog box that allows you
to select one or more existing classes.
The Remove Class button (
 )
removes the class from the current relationship
without deleting it from the knowledge base.
)
removes the class from the current relationship
without deleting it from the knowledge base.
The Class Hierarchy Window
The Class Hierarchy window in the Class Browser displays the classes for the project and allows you to rearrange your hierarchy using "drag-and-drop". By default, the Class window displays the class structure of your knowledge base, with all classes shown as descending, directly or indirectly, from the system class :THING.

Description
This window shows the following:
Subclasses appear below their superclasses and are indented to the right.
Hierarchy icons indicate how much or how little of the hierarchy is displayed:
An "expanded" icon (
 )
means that all direct subclasses of the class are displayed.
)
means that all direct subclasses of the class are displayed.
A "collapsed" icon (
 )
means that the class has direct subclasses which are not currently displayed.
You can click on this icon to toggle it.
)
means that the class has direct subclasses which are not currently displayed.
You can click on this icon to toggle it.
If no icon is displayed, the class has no direct subclasses.
Tip: You can also display all classes below a class by right-clicking the class and selecting Expand from the cascading Class Menu.
The currently selected class is shown with a highlight.
Classes with more than one superclass appear more than once in the tree.
Class icons show information about your class (e.g., the class role).
Note: You can also change the view from the default to view the class relations for a selected class. Most of the time, however, you will work with the default hierarchy view.
Tasks
The Class Hierarchy window allows you to perform the following tasks:
You can select a class by clicking on it.
You can edit the attributes of a class in the Class Editor. When a class is selected, the Class Editor appears to the right. You can also open the Class Editor for one or more selected classes by clicking the View Class (
) button.
You can create a new class by clicking the Create Class (
) button
and creating and editing its attributes
in the Class Editor.
You can delete a class by clicking the Delete Class (
) button.
You can search for a class by typing all or part of the class name in the Class lookup bar and then clicking the Find Class (
) button.
You can work with metaclasses and hidden classes, using the right mouse button. See the Class menu for more information.
You can also rearrange the superclass/subclass relationships:
You can move a class to another superclass by selecting the class, dragging it directly over the new superclass, and then dropping it.
You can add an additional superclass to a class by selecting the class, dragging it over the additional superclass, and holding down the Ctrl (Cmd) key while you drop it.
For additional superclass tasks that you can perform, see the Superclasses pane.
The Class Icons
The icons in the Class window provide information about the structure of your knowledge base and the nature of your classes.
Class Icons
Classes are indicated by round golden icons. Additional properties of the icons give information about the type of class:
A solid icon indicates a concrete class; that is, a class that may have direct instances:
|
|
A concrete class |
|
|
A concrete metaclass |
A hollow icon (with a hole) indicates an abstract class; that is, a class that cannot have direct instances. Abstract classes can have subclasses:
|
|
An abstract class |
|
|
An abstract metaclass |
A pale icon indicates a system class or a class that has been included from another project. These classes cannot be edited. See Including a Project for more information:
|
|
A system concrete class or an included concrete class |
|
|
A system abstract class or an included abstract class |
|
|
A system abstract metaclass or an included abstract metaclass |
A gray icon indicates a hidden class. You can use hidden classes to restrict a user's view of your knowledge base while retaining the structure of the larger project. You choose whether or not to display the hidden classes in a project using the Configure dialog box.
|
|
A hidden concrete class |
|
|
A hidden abstract class |
|
|
A hidden metaclass |
Hierarchy Icons
The following icons give information about the display of the class hierarchy:
|
|
All direct subclasses of the class are displayed. You can click on this icon to hide the subclasses. |
|
|
The class has direct subclasses which are not currently displayed. You can click on this icon to display the subclasses. |
| No icon |
The absence
of a |
Note: To display all subclasses below a class, right-click the class and select Expand from the cascading Class menu.
The Class Menu
Whenever you have a class selected, you can access the cascading class menu by clicking the right mouse button. This menu allows you to perform a number of class-related tasks.
To access the class menu:
Select a class in the Class Browser.
Click the right mouse button. The cascading class menu is displayed.
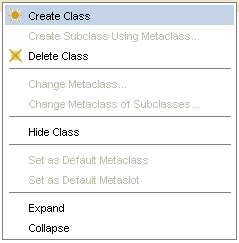 cascading class menu, "Create Class" selected
Make your selection and click the left mouse button.

The class menu allows you to perform the following tasks. Not all tasks are available at all times; tasks that cannot be performed are grayed out.
Create Class: Creates a class that is subordinate to the highlighted class. This operation is identical to clicking the Create Class (
) button.
 Create Subclass using Metaclass...:
If you have added metaclasses to your project,
this allows you to create a new class,
subordinate to the highlighted class,
using a metaclass as a template.
See Creating a Class Using a Metaclass
for more information.
Create Subclass using Metaclass...:
If you have added metaclasses to your project,
this allows you to create a new class,
subordinate to the highlighted class,
using a metaclass as a template.
See Creating a Class Using a Metaclass
for more information.
Delete Class: Deletes the highlighted class and all of its subclasses, removing it from the current project. This operation is identical to the Delete Class (
) button.
-
Change metaclass:
Changes the metaclass of the highlighted class.
See Changing the Metaclass of a Class
for more information.
-
Change metaclass of subclasses:
Changes the metaclass of all subordinate classes
to the metaclass of the highlighted class.
Hide class: Makes the highlighted class hidden. If the class is already hidden, the selection is Make class visible.
-
Set as Default Metaclass:
Makes the selected metaclass the default;
that is, new classes will automatically be created using this as a template.
-
Set as Default Slot Metaclass:
Makes the selected metaclass the default slot metaclass;
that is, new slots will be created using this as a template.
Expand: Shows all classes that are subordinate to the highlighted class. This is a multi-level display operation that is more extensive than clicking the
icon,
which only shows the next level of direct subclasses.
Collapse: Hides all classes that are subordinate to the highlighted class.
![]() Metaclasses are an advanced feature;
you should have a good understanding of Protege-Frames before you use metaclasses.
Metaclasses are an advanced feature;
you should have a good understanding of Protege-Frames before you use metaclasses.
The Class Search Bar
The Class Search Bar in the Class Browser allows you to type the name of a class
and locate it in the Class window by clicking the Search for Class
(![]() ) button.
) button.
The Superclasses Pane
The Superclasses pane, at the bottom of the Class Browser, displays all superclasses of the currently selected class.

Note: If you cannot see the Superclasses pane, your window may be too small. You can see the pane by enlarging your window or by dragging the slider bar at the bottom of the Class Browser. See Working With a Small Window for more information.
Viewing the List of Superclasses
To see a list of all superclasses of a given class, highlight any occurrence of the class in the Class Browser. The Superclasses pane automatically displays a list of all of the superclasses of the selected class.
Adding a Superclass
To add a superclass to the selected class,
click the Add Superclass
(![]() ) button,
highlight the class you want as an additional superclass in the Select Class window,
then click OK.
See Adding a Superclass
for more information.
) button,
highlight the class you want as an additional superclass in the Select Class window,
then click OK.
See Adding a Superclass
for more information.
Removing a Superclass
To remove a superclass from the list of superclasses for the selected class,
highlight the superclass you want to remove and click the Remove Superclass
(![]() ) button.
The superclass/subclass relationship is broken,
but the superclass is not deleted from the knowledge base.
See Removing a Superclass
for more information.
) button.
The superclass/subclass relationship is broken,
but the superclass is not deleted from the knowledge base.
See Removing a Superclass
for more information.
Locating Another Superclass
To jump to a different superclass in the Class Browser, click on any superclass in the Superclasses pane. The highlight in the Class Browser automatically moves to the occurrence of the class which is directly under the chosen superclass. If the occurrence is not currently visible in the Class Browser, Protege-Frames automatically scrolls to the correct location and expands the hierarchy to make the class visible. See Jumping to Another Superclass for more information.
The Class Editor
The Class Editor can be used to define and edit the attributes of a class. Click on a link or an area of the picture to jump to a summary. See also Creating a Class, Displaying the Class Editor, Editing a Class, and Editing Template Slots.

Note Icons
The note icons
(![]() ,
,
![]() ,
,
![]() )
at the upper right of the Editor allow you to work with class sticky notes.
These notes, which are not part of your ontology,
can be used for todos or communication while you are developing your knowledge base.
They can be hidden using the Hide Class Notes
(
)
at the upper right of the Editor allow you to work with class sticky notes.
These notes, which are not part of your ontology,
can be used for todos or communication while you are developing your knowledge base.
They can be hidden using the Hide Class Notes
(![]() ) button.
For information on how to add notes to any frame (class, instance, or slot),
see Working with Notes.
) button.
For information on how to add notes to any frame (class, instance, or slot),
see Working with Notes.
Notes are not available when working with the Editor as a free-standing window.
The Class Name Field
The Name field allows you to name your class. When a class is created, it is given a default name, such as newspaper_Class_1. You can change the name of a new or existing class by highlighting the name and overwriting it. The following rules apply to class names:
The name must be a unique class name in the knowledge base.
Class names are case sensitive.
A recommended convention is to make the first character of each word in a class name uppercase and the rest lowercase, and to separate words with underscores.
The Class Role Menu
The Role menu allows you to choose the role of your class: concrete or abstract.
Concrete classes may have direct instances.
Abstract classes cannot have direct instances.
Protege-Frames sets the role to Concrete, by default. Protege-Frames does not impose any restrictions on the role of your classes. One common modeling convention is to make all leaf (bottom-level) classes concrete, and all interior (higher-level, non-leaf) classes abstract.
The Class Constraints Pane
Class constraints are defined programmatically. See Constraints for more information.
The Class Documentation Pane
The Class Documentation pane allows you to enter a text description of the class and other relevant information. These notes are part of your ontology. Filling in this field is optional, but is recommended to aid in the maintenance of the knowledge base.
The Template Slots Pane
The Template Slots pane displays the direct and inherited slots for the selected class. Slots, which represent properties of your class, are a crucial part of your knowledge base. In the example, Editor has several slots which appear in the Template Slots pane. For a full description, see the separate Template Slots pane topic.
Constraints
Protege-Frames builds relationships (e.g., between classes and instances, slots and slot facets). However, these relationships may be insufficient to capture all the constraints that hold among the frames of the knowledge base. Typically, Protege-Frames does not offer a way of relating the values of different slots attached to a given class, nor does it help in relating the slot values of different instances of a class.
For example, in the newspaper project, one might want to state that editors should have a higher salary than the employees for whom they are responsible (i.e., a constraint that involves the Editor and Employee classes and the salary and responsible_for slots).
The Protege Axiom Language (PAL) extends the Protege-Frames knowledge modeling environment with support for writing and storing logical constraints and queries about frames in a knowledge base. PAL is a plugin toolset that comprises engines for checking constraints and running queries on knowledge bases, as well as a set of useful user interface components. PAL's primary purpose is to support the definition of arbitrary logical constraints on the frames of a knowledge base.
Information about constraints can be found in the PAL section of the Plugins Library, including a quick reference guide and comprehensive documentation.
The Template Slots Pane
The Template Slots pane, at the bottom of the Class Editor, displays the direct and inherited slots for the selected class. Slots, which represent properties of your class, are a crucial part of your knowledge base. In the example, Article has a number of slots which appear in the Template Slots pane.

The Template Slot Buttons
The buttons at the upper right of the Template Slots pane allow you to edit, override, add, and remove slots. See the separate Template Slot buttons topic for more information.
You can also view, create, and delete slots directly from the Slots tab. See the Slot buttons for more information.
The Template Slot Menu
Right-clicking anywhere in the Template Slots pane brings up the Template Slot menu, which allows you to edit, override, add, and remove slots. These are the same actions provided by the Template Slot buttons.

The Slot Icons
The icons at the left of the column give information about the slot.
|
|
A blue icon means that the slot is direct; that is, it was created directly on the selected class. responsible_for is a direct slot. |
|
|
A bracketed icon means that the slot is inherited from one of the selected class's ancestors. Inherited slots can be edited, but not deleted; there are also some restrictions on the edits that are allowed. In the example above, containing_section is an inherited slot. |
|
|
A bracketed icon containing "0" means the slot has overrides; that is, the slot is inherited and it has been modified at the class. |
Slot Summary Columns
The columns in the Slot Templates pane summarize the slot properties; these can be viewed and edited in the Slot Editor or Slots tab.
|
Name |
Displays the name of the slot. Hovering over the name of an inherited slot will show the names of the class(es) that the slot is inherited from. |
|
Cardinality |
Indicates whether a slot value can consist of Multiple items or must be a Single item. |
|
Type |
Indicates the kind of values that the slot may hold. Available types are: Any, Boolean, Class, Float, Instance, Integer, String, and Symbol. For slots of type Class or Integer, also displays the allowed classes. See The Value Type menu for more information. |
|
Other Facets |
Displays any other facets defined in the Slot Editor or Slots tab, such as any required values, defaults, or minimum or maximum values. Also lists the allowed values for a slot of type Symbol. |
The Template Slot Buttons
The Template Slot buttons, located at the top right of the Template Slots pane, allow you to view/edit, override, create, remove overrides, add, or remove a slot for the current class. You can also access these commands by right-clicking on the slot and selecting an action from the Template Slot menu.
Note: You can also view and create slots directly from the Slots tab, as well as deleting a slot from the project. See the Slot buttons for more information.
The buttons have the following actions:
|
|
View Top-Level Slot: Opens the top-level Slot Editor for the highlighted slot. If you make any changes to the slot at the top level, they affect the slot everywhere it appears, including the Slots tab and all classes where the slot is attached. See Viewing a Slot. |
|
|
View Slot Overrides: Opens the class-level Slot Editor for the highlighted slot. Overrides to the slot at the class level have the following properties:
|
|
|
Create Slot: Creates a new slot for the current class. Note:
If the Create Slot
( |
|
|
Remove Slot Overrides: Removes any slot overrides. |
|
|
Add Slot: Adds a pre-existing slot to the current class. |
|
|
Remove Slot:
Removes
the highlighted slot from the current class.
The slot remains in the project and can be viewed
in the Slot Browser.
To delete
a slot completely from the project,
use the Delete Slot
( Note:
If the Remove Slot
( |
The References Window
In a complex project,
it is possible to have many different relationships
between classes, instances, and slots.
A reference for a frame is any other frame
that has a direct relationship to it.
The References window can be viewed by selecting an item
and clicking on the References
(![]() or
or ![]() ) button.
See
) button.
See
Viewing References for more information.

It is also possible to view those classes that are related through a particular slot, using the Relations Menu.
Examples
For example, references for a class include:
any superclasses of the class
any direct subclasses of the class
any instances of the class
any direct slots (inherited slots are not considered to be references)
any notes at the class
the metaclass of the class
For a slot, references include:
any superslots or subslots
:STANDARD-SLOT or other slot metaclass
any classes that have the slot attached as a direct slot
The References window allows you to view a list of all the references of a selected frame.
The View Buttons
|
|
View Reference: Opens the editor for the highlighted frame and allows you to view the frame's properties. Depending on the frame, this could be the Class Editor, the Slot Editor, or the Instance Editor. |
|
|
View References to Value: Shows the references for the highlighted frame. |
The Frame Column
This column shows the name of each frame that references the highlighted item.
The type of frame is indicated
by a class icon,
slot icon, or instance icon
(![]() ).
).
The Slot Column
This column specifies the slot that actually references the selected item. Note that Protege-Frames provides standard slots which indicate the relationship between the selected item and the referencing frame. For example:
| DIRECT-INSTANCES | The selected item is a direct instance of the frame. |
|
DIRECT-SUPERCLASSES |
The selected item is a direct superclass of the frame. |
|
DIRECT-SUBCLASSES |
The selected item is a direct subclass of the frame. |
|
SLOT-VALUE-TYPE |
The frame is a slot and the selected item appears as one of its values. If the selected item is an instance, it may be a value. If the selected item is a class, it may be an Allowed Superclass (for a slot of type Class) or an Allowed Class (for a slot of type Instance). |
The name of any other slot in the project may also appear in this column.
The Facet Column
This column gives information about the facet value for certain types of references and gives information about the slot relationships between classes. For example, an item may appear as a value for a slot which is called by that frame.
In the illustration above, the class Author appears as an Allowed Class for the slot author, as shown in the second row. In addition, the slot author appears as a slot for the class Article. Therefore, Article references Author. This reference appears in the fifth row in the example.
For an embedded reference of this type, the facet value column specifies whether the selected item appears as an Allowed Class or an Allowed Superclass.
Creating a New Class
To create a new class:
In the Class Browser, highlight the class that you want to be the superclass of the new class.
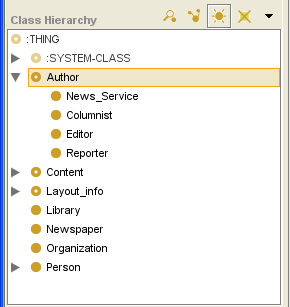 Class Browser, "Author" class highlighted
Click the Create Class (
) button
in the class buttons area
at the right of the Class Browser.
Alternatively, you can click the right mouse button
and select Create Class from the class menu.
Class menu, "Create Class" selectedThe new class will be added under the highlighted class. It will have a default name, such as newspaper_Class_1.
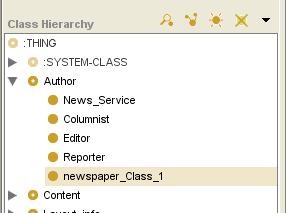 addition of newspaper_Class_1 class
Use the Class Editor to name the class, choose its role, create constraints, and create and edit slots. See Editing a Class for more information.


Creating Multiple Subclasses
Protege-Frames supplies a wizard that lets you quickly create multiple subclasses of a selected class.
At the Classes tab, select the class you want as a superclass for the classes you create.
Select Tools | Wizards, then select Create multiple subclasses from the submenu.
Set your options:
To have all classes you create begin the same way, enter an optional prefix.
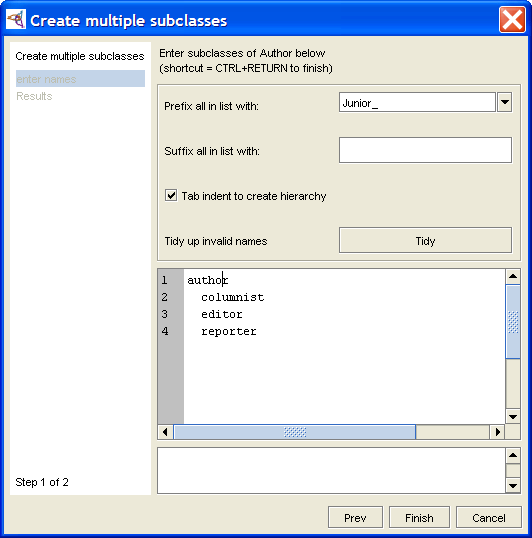 Create multiple subclasses dialog, entering a prefix
To have all classes you create end the same way, enter an optional suffix.
If you select Tab indent to create hierarchy, you can use tab indents, as described in Step 5.
Enter your class names:
Type the name of a class, then press Enter to begin entering a second class.
You can edit or delete the name of any class you have already entered by moving the cursor to that name. You can also cut and paste text within and between class names.
If you enter an invalid character (e.g., /) in a class name, the name will be highlighted in red. You can edit the class name from the keyboard, or you can click Tidy to have Protege automatically substitute an underscore (_) for each invalid character.
To create subclasses of a class, make sure that Tab indent to create hierarchy is selected. Then, use the tab key to create a hierarchy:
No tabs means the class will be a direct subclass of the selected superclass.
A single tab means the class will be a subclass of the nearest untabbed class above it in the list.
N tabs means the class will be a subclass of the nearest class with N-1 tabs above it in the list. For example, suppose you are creating subclasses of Superclass and you enter the following:
Subclass direct subclass of Superclass
Subclass_II direct subclass of Superclass
SubSubclass subclass of Subclass_II
SubSubSubclass subclass of SubSubclass
SubSubclass_III direct subclass of Superclass
Note: Extra Tab characters will be ignored. For example, if you insert a Tab before the first class name in the list, it will still be created as a direct subclass of the selected superclass.
Click Finish or type Ctrl-Enter (Cmd-Enter). The wizard will display a list of classes that have been added. This is informational only - you cannot cancel at this point.
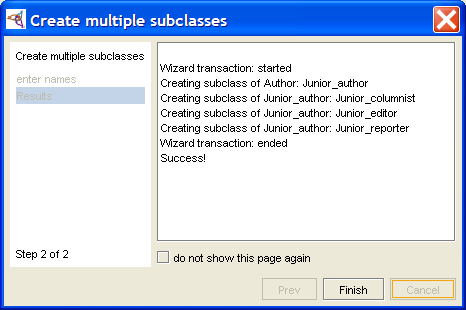 Create multiple subclasses dialog, result display
Click Finish to exit the wizard.
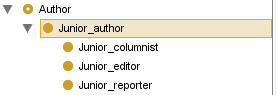 wizard exited; result appears


The new classes will inherit all the properties of their superclass. If you wish to make any additional edits to your classes (e.g., attach an additional slot or override an inherited slot), use the Class Editor.
Deleting a Class
Deleting a class deletes the class and all of its subclasses. Once a class has been deleted, it cannot be recovered. You may wish to archive your project before deleting.
Deleting a Single Class
To delete a class from the knowledge base:
Highlight the class you want to delete in the Class Browser.
Click the Delete Class (
)
button
or click the right mouse button and choose Delete selected class
from the Class menu.
You will be prompted for confirmation. Click OK. The selected class and any subclasses will be deleted.
Deleting Multiple Classes
To delete multiple classes:
Highlight one or more classes in the Class Browser. To highlight multiple classes, hold down the Ctrl (Cmd) key while clicking each class. To highlight a range of classes, click the first class, then hold down the Shift key and click the last class in the range.
Click the Delete Class (
)
button.
You cannot use the Class menu to delete multiple classes.
You will be prompted for confirmation. Click OK.
Undeletable Classes
The following types of classes cannot be deleted:
system classes
classes included from another project
Displaying the Class Editor
You can view or edit an existing class using the Class Editor.
Note: If the class is a system class or has been included from another project, it cannot be edited. Included classes are shown with a pale class icon to the left.
Whenever you enter changes into the Class Editor, they are immediately visible everywhere in the project. To write the changes to disk, select File | Save Project.
Using the Classes Tab
To view or edit a class from the Classes tab:
Select the class you want to edit in the Class Browser in the Classes tab.
Enter the updated information directly in the Class Editor to the right.
Displaying the Class Editor as a Free-standing Window
You can open the Class Editor to view
or edit a class anywhere the View Class
(![]() ) button appears,
including the following locations:
) button appears,
including the following locations:
the Classes tab
the Class Browser at the Instances tab
the Allowed Superclasses pane for a slot of type Class
the Class Entry field at the Queries tab
To view or edit a class using the Class Editor:
Select the class you want to edit.
Click the View Class (
) icon
at the upper right of the pane
to open the Class Editor
as a free-standing window.
To view or edit the information for several classes at once, open a separate Class Editor for each class. Opening a new Class Editor does not close the previous editor. This allows you to compare the attributes for two or more classes. Edits can be made directly in any open Class Editor.
Managing Multiple Editors
If you have multiple editor windows open, you can manage them as follows:
Cascade multiple windows by selecting Windows |
 Cascade Windows.
Close all open editor windows by selecting Windows |
 Close All Windows.
Editing a Class
Using the Class Editor, you can view or edit a class's constraints, documentation, name, notes, or template slot fields.
Any changes you enter into the Class Editor take effect immediately. To make the changes permanent, save the knowledge base by selecting Save from the Project menu. To revert to the last saved version, close Protege-Frames without saving changes. If you have made extensive changes to your knowledge base during the current session, you may wish to save or archive the project before editing classes.
Working with Class Notes
The note icons
(![]() ,
,
![]() ,
,
![]() )
at the upper right of the Editor allow you work with class sticky notes.
These notes, which are not part of your ontology,
can be used for todos or communication
while you are developing your knowledge base.
)
at the upper right of the Editor allow you work with class sticky notes.
These notes, which are not part of your ontology,
can be used for todos or communication
while you are developing your knowledge base.
To hide or show all class notes, click the Hide Class Notes (
) button.
To create a note for the current class, click the Create Class Note (
) button.
To delete a note from the current class, click the Delete Class Note (
) button
and then select the note from the list.
For more information, see Working with Notes.
Notes are not available when working with the Editor as a free-standing window.
Changing the Name of a Class
To change the name of a class, edit the name in the Name field. The following rules apply to class names:
The name must be a unique frame name in the knowledge base.
Class names are case sensitive.
Note: A recommended convention is to make the first character of each word in a class name uppercase and the rest lowercase, and to separate words by underscores.
Changing the Role of a Class
Select the new role from the Role menu. Concrete classes may have direct instances, but do not have to; abstract classes cannot have direct instances. Protege-Frames does not impose any restrictions on the role of your classes.
Changing Constraints
Class constraints are defined programmatically. See Constraints for more information.
Changing Class Documentation
To change the notes for a class, change the text directly in the Class Documentation pane.
Working with Template Slots
The Template Slot buttons at the Template Slots pane allow you to:
edit a slot at the top level using the View Top-level Slot (
 ) button.
override a slot at the class using the View Slot Overrides (
 ) button;
slots that have been overridden are displayed with an override
(
) button;
slots that have been overridden are displayed with an override
( ) icon.
create a new slot using the Create Slot (
 ) button.
remove slot overrides using the Remove Slot Overrides (
 ) button.
add an existing slot to the class, using the Add Slot (
 ) button.
remove a slot from the class using the Remove Slot (
 ) button;
the slot is removed from the class,
but still exists in the knowledge base.
) button;
the slot is removed from the class,
but still exists in the knowledge base.
For more information about working with slots, see the Slots Table of Contents.
Other Class Editing Operations
Viewing Multiple Classes
To view or edit the information for several classes at once,
select the classes one by one and click the View Class
(![]() )
button
to open the Class Editor
for every selected class.
Opening a new Class Editor does not close the previous editor.
This allows you to compare the attributes for two or more classes.
Edits can be made directly in any open Class Editor.
)
button
to open the Class Editor
for every selected class.
Opening a new Class Editor does not close the previous editor.
This allows you to compare the attributes for two or more classes.
Edits can be made directly in any open Class Editor.
Changing Superclasses
To change the superclasses of a class, see: Adding a Superclass, Replacing a Superclass, and Removing a Superclass.
Editing Template Slots
The Template Slots pane in the Class Editor allows you to add, clear, create, edit, override, and remove slots.
Editing a Top-level Slot
To edit a slot at the top level:
Highlight the slot name in the Template Slots pane.
Click the View Top-level Slot (
) button at the top right of the pane.
The Slot Editor will be displayed.
Use the Slot Editor to edit slot properties such as Name, Type, and Cardinality, and to add notes. See Viewing a Slot for more information on how to edit a slot.
Overriding a Slot at a Class
To override a slot at the class:
Highlight the slot name in the Template Slots pane.
Click the View Slot Overrides (
) button at the top right of the pane.
The Slot Editor
will be displayed.
Use the Slot Editor to edit slot properties such as Name, Type, and Cardinality, and to add notes. See Viewing a Slot and Overriding Slot Properties at a Class for more information.
Your class can have slots that were inherited
(![]() )
from a superclass.
If the slot is inherited,
there are limitations on the edits that can be performed.
Direct slots, which were created or added at the level of the slot,
have no editing restrictions.
)
from a superclass.
If the slot is inherited,
there are limitations on the edits that can be performed.
Direct slots, which were created or added at the level of the slot,
have no editing restrictions.
If you edit a slot at the class level,
the slot is displayed with an override
(![]() ) icon.
) icon.
Creating a New Slot
You can define a new slot for your class.
Make sure the correct class is highlighted in the Class Browser.
Click the Create Slot (
) button
at the top right of the pane.
The Slot Editor will be displayed.
Use the Slot Editor to edit slot properties such as Name, Type, and Cardinality, and to add notes. See Creating a Slot for more information on how to create a slot.
A direct slot is displayed
with a blue (![]() ) icon.
) icon.
Clearing Slot Overrides
If you have overridden a slot at the class, you can remove your overrides and use the top-level definition of the slot:
Highlight the slot name in the Template Slots pane.
Click the Remove Slot Overrides (
) button at the top right of the pane.
Any changes you made at the class level are removed
and the top-level definition of the slot is used.
See Removing Overrides From a Slot
for more information.
Adding an Existing Slot to a Class
Once slots have been created, you can add them to more than one class. For example, the Prototype_Newspaper class has a Weekday slot, which can be used to choose among the days of the week. If you were creating a new type of employee who wrote a weekly feature, you might want to reuse this slot.
To choose a pre-existing slot to add to your class:
Make sure the correct class is highlighted in the Class Browser.
Click the Add Slot (
) button
at the top right of the pane.
The Select Slots dialog box displays all the slots
that you can add to the class.
Highlight the slot that you wish to add to your class.
Click OK.
The new slot is added to the Template Slots pane.
It is a directly-attached slot and is displayed
with a blue (![]() ) icon.
You do not need to name the slot;
however, you may need to override its facets.
If you wish to override the facets on the slot,
you may click the View Top-level Slot
(
) icon.
You do not need to name the slot;
however, you may need to override its facets.
If you wish to override the facets on the slot,
you may click the View Top-level Slot
(![]() )
or View Slot Overrides
(
)
or View Slot Overrides
(![]() ) button
to display the Slot Editor.
See Viewing a Slot for more information.
) button
to display the Slot Editor.
See Viewing a Slot for more information.
Removing a Slot
You can remove any direct slot that appears in the Template Slots pane. To remove a slot:
Highlight the slot
Click the Remove Slot (
) button.
The slot will be removed from the class.
Note that the slot has not been deleted from the knowledge base. It will still appear in the Select Slots dialog box (see
Adding an Existing Slot to a Class, above)
and the Slots tab. See Deleting a Slot for more information.
Finding a Class
To find a class in the Class Browser:
Type all or part of the name of the class in the Class lookup bar. Matches will be found for classes whose names begin with the entered text. Matching is case-insensitive.
 Class lookup bar
Press Enter/Return or click the Search for Class (
) button.
If there is one match,
the class will be highlighted.
Otherwise, you will get a dialog box of all the matches,
and you will be able to select one.
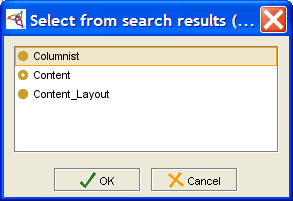 search results dialog box

If a matching class is not currently visible in the Class Browser, Protege-Frames automatically scrolls to the correct location and expands the hierarchy to make the class visible.
Note:
If you are unable to find the class you are looking for,
the class may be hidden.
To verify that hidden classes are displayed,
choose Project | Configure,
go to the Options tab,
and make sure the Display Hidden Classes option is checked.
Hidden classes are shown with a gray icon
(e.g., ![]() ).
).
Hiding a Class
You can hide a class, using the Class menu. Hidden classes are still part of your project, but are not visible. You can use this, for example, if you want to restrict the user's view to a part of your knowledge base, but want to retain the structure of the larger project. All subclasses of a hidden class are also hidden.
You can choose whether or not hidden classes are displayed in the Class Browser by choosing Project | Configure, going to the Options tab, and toggling the Display Hidden Classes option. See Configuring a Project for more information.
Hiding a Class
To hide a class:
Select the class in the Class Browser.
Click the right mouse button to display the Class menu.
Select Hide Class and click the left mouse button.
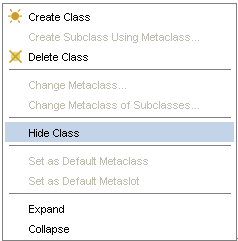 Class menu, "Hide Class" selected
If hidden classes are visible in your project, you will see a gray icon (e.g.,
 ),
indicating that the class is hidden.
If hidden classes are not visible in your project,
you will no longer see the class or any of its subclasses.
),
indicating that the class is hidden.
If hidden classes are not visible in your project,
you will no longer see the class or any of its subclasses.

Making a Hidden Class Visible
To make a hidden class visible:
If you cannot see your class because hidden classes are not currently displayed, make hidden classes visible. To do this, choose Project | Configure, select Options, and make sure that Display Hidden Classes is selected.
Select the class you wish to make visible.
Click the right mouse button to display the Class menu.
Select Make Hidden Class Visible and click the left mouse button.
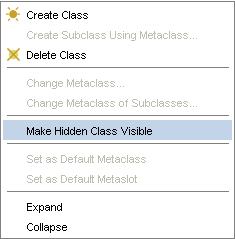 Class menu, "Make Hidden Class Visible" selected
Note: If your class has a superclass which is hidden, it will still not display.
The gray icon will be removed from your class.

Replacing a Superclass
You can move a class to a different superclass, using drag-and-drop in the Class Browser. This will remove the class from one superclass and make it a subclass of another superclass. Note that when you replace the superclass of a class, the class will often lose and gain inherited slots.
Moving a Class
To move a class:
Select the class you want to move. If the class has more than one superclass, select the view of the class that appears under the superclass you want to replace.
Hold down the mouse button and drag the class on top of the new superclass.
Release the mouse. The subclass will no longer be under the original superclass, but will now be located under the new superclass. Note that the slots of the moved class will automatically change to reflect the inheritance from its new superclass.
You can also add a superclass by holding down the Ctrl (Cmd) key while you drag.
Example
The following example shows how to make Columnist inherit from Employee, rather than the class Person.
Highlight Columnist in the Class Browser. Because Columnist has more than one superclass, you must make sure to select the copy of Columnist that is under Employee. (When a class has more than one superclass, you can use the Superclasses pane to select the copy that you want. See Jumping to a Different Superclass for more information.) Note that the Template Slots pane for Columnist includes slots it inherits from Employee.
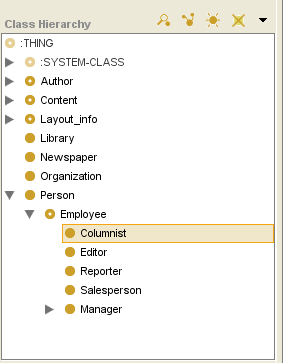 Class Browser, "Columnist" selected
Hold down the mouse button and drag Columnist on top of the new superclass Person.
Release the mouse button to drop the class. Person is outlined and the Class Browser redisplays to show the new hierarchy. The dragged class and all of its subclasses, if any, will be moved from the original superclass to the new superclass.
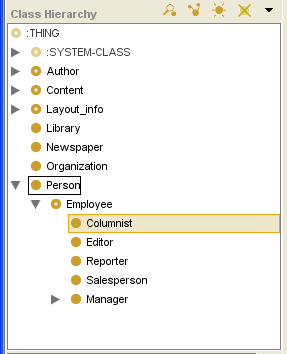 Class Browser, "Person" outlined, "Columnist" selected


If you highlight Columnist after it has been repositioned, you will see that some of the slots it had before are now missing. These were the slots it inherited from Employee.

Adding a Superclass
Classes in Protege can have more than one superclass. Classes inherit the properties of every one of their superclasses, so by adding a superclass to a class, you are adding all of its slots as well.
Note: If you cannot see the Superclasses pane, your window may be too small. You can see the pane by enlarging your window or by dragging the slider bar at the bottom of the Class Browser. See Working With a Small Window for more information.
Adding a Superclass in the Superclasses Pane
To add a superclass using the Superclasses pane:
Select the subclass in the Class Browser.
Click the Add Superclass (
) button
in the Superclasses pane
(located at the bottom left of the Classes tab,
below the Class Browser).
A Select Classes window will appear.
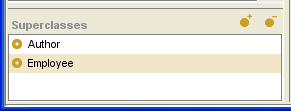 Superclasses pane, "Employee" selected
Choose the additional superclass(es) you want from the Select Classes window. To highlight multiple classes, hold down the Ctrl (Cmd) key while clicking each class. To highlight a range of classes, click the first class, then hold down the Shift key and click the last class in the range.
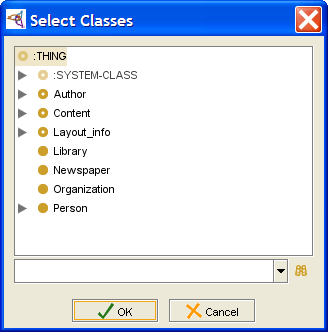 Select Classes window, ":THING" selected


Note: If nothing happens when the class is dropped over a new superclass, the target class is not allowed to be a superclass of the dragged class. For example, descendants of the dragged class are excluded.
Adding a Superclass Using Drag-and-Drop
To add a superclass, using drag-and-drop in the Class Browser:
Select the subclass in the Class Browser.
Hold down the mouse button and drag the subclass over the additional superclass.
Hold down the Ctrl (Cmd) key and release the mouse button to drop the subclass. The system will add the new superclass to the subclass.
Note: If you do not hold down the Ctrl (Cmd) key when releasing the mouse, the operation is interpreted as Moving a Class.
Multiple Superclasses and Inheritance
Adding a superclass results in more than one superclass for a class, which then inherits the slots and facets of all of its superclasses. For example, the Columnist class in the Newspaper example has two occurrences in the Class Browser: one with the superclass Author, and one with the superclass Person; it inherits slots from both superclasses.
Jumping to a Superclass
If a class has more than one superclass, you can use the Superclasses pane to jump from one superclass to another in the Class Browser.
Note: If you cannot see the Superclasses pane, your window may be too small. You can see the pane by enlarging your window or by dragging the slider bar at the bottom of the Class Browser. See Working With a Small Window for more information.
To jump to another superclass:
Highlight any occurrence of the class in the Class Browser. The superclasses of the class are displayed in the Superclasses pane, located at the lower left of the Classes tab, below the Class Browser.
Click on any superclass in the Superclasses pane. The highlight in the Class Browser automatically moves to the occurrence of the class which is directly under the chosen superclass. If the copy is not currently visible in the Class Browser, Protege-Frames automatically scrolls to the correct location and expands the hierarchy to make the class visible.
In the illustration below, if you clicked on Employee in the Superclasses pane, the highlight in the Class Browser would jump to the copy of Columnist under Employee. If the Employee hierarchy was not currently expanded, it would expand to display the Columnist class.
Removing a Superclass
If a class has more than one superclass, you can remove one or more of its superclasses. You must leave at least one superclass. The subclass still appears in the knowledge base as a subclass of its other superclass(es).
Note:
If the class has only one superclass,
the Remove Superclass
(![]() ) button is disabled.
) button is disabled.
Removing a Superclass
To remove a superclass from a class:
Highlight the class that you want to work with in the Class Browser. The superclasses of the selected class will be shown in the Superclasses pane immediately below the Class Browser.
Highlight the superclass you want to remove in the Superclasses pane.
Click the Remove Superclass (
) button
at the top right
of the Superclasses pane.
The superclass will remain in the knowledge base,
but the superclass/subclass link will be broken.
Example
For example, to remove Employee as a superclass of Columnist in the newspaper project:
Highlight Columnist in the Class Browser.
Class Browser, "Columnist" highlightedHighlight Employee in the Superclasses pane.
Superclasses pane, "Employee" highlightedClick the Remove Superclass (
) button
at the top right
of the Superclasses pane.
Columnist remains a subclass of Author.
To delete a class from the knowledge base,
highlight the class and click the Delete Class
(![]() )
class button.
See Deleting a Class.
)
class button.
See Deleting a Class.
Viewing Class Relations
If Class_A has a direct slot of type Class or an Instance that includes Class_B in the allowed class(es) of the slot, we say that Class_B is related to Class_A. The Relations menu, available by clicking on the arrow to the right of the class buttons, allows you to choose which relation between classes to show in the Class Browser. This help topic describes the choices on the Relations menu.
Example
For example, the responsible_for slot at the Editor class is a class of type Instance that has Employee as an allowed class; this means that Employee is related to Editor.

The picture below shows the Class Relationship menu for the class Editor in the Newspaper example. Editor has two Instance slots, responsible_for and sections.

Note: If the highlighted class does not have any related classes, the menu only displays Show Class Hierarchy and Show all Relations.
Selecting Show Relations responsible_for changes the Class Hierarchy window to display only the classes that are related to Editor through the responsible_for slot.

The Relations Menu
Show Class Hierarchy
The default Show Class Hierarchy displays the subclass-superclass hierarchy of your knowledge base. All the classes in the knowledge base appear in the displayed tree. (Some classes may be hidden. You can choose whether or not hidden classes are displayed in the Class Browser by choosing Configure from the Project menu, going to the Display tab, and toggling the Display Hidden Classes option.)
Show All Relations
Show All Relations displays a hierarchy of classes that are related to the selected class via its slots, as follows:
The root is the class (Class_A) that was highlighted when Show All Relations was selected.
The next level (direct children) consists of any classes (Class_B1, Class_B2, etc.) that are related to Class_A through one or more of its slots.
The next level consists of any classes (Class_C1, Class_C2, etc.) that are related to one of the classes on the previous level (Class_B1, Class_B2, etc.), through one of the slots of Class_A. Note the following:
A class Class_C1 is shown as a child of the class it is related to.
If a class is related to more than one class on the previous level, it is shown everywhere it occurs (multiple superclasses).
Only classes related through the slots of Class_A are shown; if Class_X is related to Class_B through a slot that is not attached to Class_A, it will not appear.
Subsequent levels continue the tree of classes that are related to the higher classes via the slots of Class_A.
It is possible (and sometimes useful) to have a recursive relation: Class_A appears somewhere subordinate to Class_A on the tree. This can happen, for example, if Class_B is related to Class_A, which in turn is related to Class_B through a different slot. In this case, all the levels are shown from Class_A to Class_A and the second instance is labeled (recursive).
Show Relation slot
Selecting a slot from the menu will show the hierarchy of classes, starting at the selected class, that are related to each other only through the slot selected on the menu. The slot-specific view can be read as "parent-relation-child", where "relation" is the slot selected on the Relations menu. For example, in the responsible_for view, Editor - is responsible for - Employee.
This view is not necessarily a subset of the Show All Relations view. If Show All Relations has recursion, the view restricted to a single slot can be quite different and possibly more extensive. Consider the following situation:
Class_A and Class_B both have slot_a and slot_b.
Class_B is related to Class_A through slot_a.
Class_A is related to Class_B through slot_b.
There are a number of additional classes that are related to Class_B through slot_a.
In this case:
Show All Relations will display Class_A and Class_B in a two-level recursion; the class relations from slot_a at Class_B are not shown.
Show Relation slot_a will show the classes that are related to Class_B through slot_a and any children of those classes.
It is also possible to view a list of all the frames
that reference a highlighted class,
using the References Class
(![]() ) button.
See Viewing References for more information.
) button.
See Viewing References for more information.
The Classes & Instances Tab
The Classes & Instances tab is an optional tab that combines the functionality of the Classes tab and the Instances tab in a single window. In this window, you may view, create, and edit classes and instances.
To display the Classes & Instances tab, use the Configure Project dialog box.

The Classes & Instances tab includes the following components:
A Class Browser at the left shows and allows you to work with the class hierarchy (e.g., creating and deleting classes).
An Instance Browser allows you to create and delete instances.
An Editor window on the right displays the information for the current selection. When a single class is selected, the Editor window contains the Class Editor for the selected class. When a single instance is selected, the Form pane contains the Instance Editor for the selected instance.
For information about the Classes tab user interface and accomplishing class-related tasks, see the Classes Table of Contents. For information about the Instances tab user interface and accomplishing instances-related tasks, see the Instances Table of Contents.
Viewing References
In a complex project, it is possible to have many different relationships between classes, instances, and slots. The References window allows you to view a list of all the frames that reference a value.
Note: For classes, it is also possible to view those classes that are related through one or more slots. See Viewing Class Relations for more information.
Viewing the References Window
To open the References window:
Highlight the item for which you wish to see a list of references. Make sure to go to the correct location:
For a class:
Go to the Classes tab.
Highlight the item in the Class Browser.
Click the View References to Class (
) button.
For an instance:
Go to the Instances tab.
Highlight the class where the instance appears in the Class Browser.
Highlight the instance in the Instance Browser
Click the View References to Instance (
 ) button.
Viewing the Editor for a Reference
To open the Editor for any of the frames shown in the References window:
Click on the frame to highlight it.
Click the View Reference (
 ) button.
Viewing References to a Value
To view the references for any of the frames shown in the References window:
Click on the frame to highlight it.
Click the View References to Value (
 ) button.
For example, clicking on Content in the above window
and then clicking View References to Value
(![]() )
would show the references for Content.
This allows you to view references to a slot.
)
would show the references for Content.
This allows you to view references to a slot.
Slots
This section of the User's Guide covers the concepts of understanding, creating, and using Protege-Frames slots.
Note: Before you create and use slots, you should be confident with the basic Protege-Frames interface. You should also be comfortable with Protege-Frames projects, project types, windows, and classes.
To return to the main table of contents, click the Protege-Frames User's Guide link (located at the top of the table of contents on the right-hand side of this page).
The Slots Tab
The Slots tab provides a single window in which you may view, create, and edit slots. Slots usually represent properties of classes or relationships between classes. For example, the name slot represents the property of having a name. Once you have created a slot, you can attach it to a class. When name is attached to the Person class, it represents the name of the person.
Although slots are usually thought of in terms of classes, they can be defined and manipulated independently, and can exist without any relationship to classes.
The tab consists of two panes:
The Slot Browser, on the left, shows all the slots in the project. It allows you to edit existing slots, create new slots, and delete slots, as well as work with superslots.
When a single slot is selected, the Slot Editor for the selected slot is shown at the right. The Slot Editor allows you to name the slot, choose its cardinality and value type, define constraints, defaults, and maximum and minimum values, as well as provide a brief description. The Slot Editor can be displayed as a separate window by clicking the View Slot (
) button
in the Slots pane.
The Slot Editor
can also be accessed
from the Templates Slots pane
in the Classes tab.
Click on an area in the picture to jump to it:
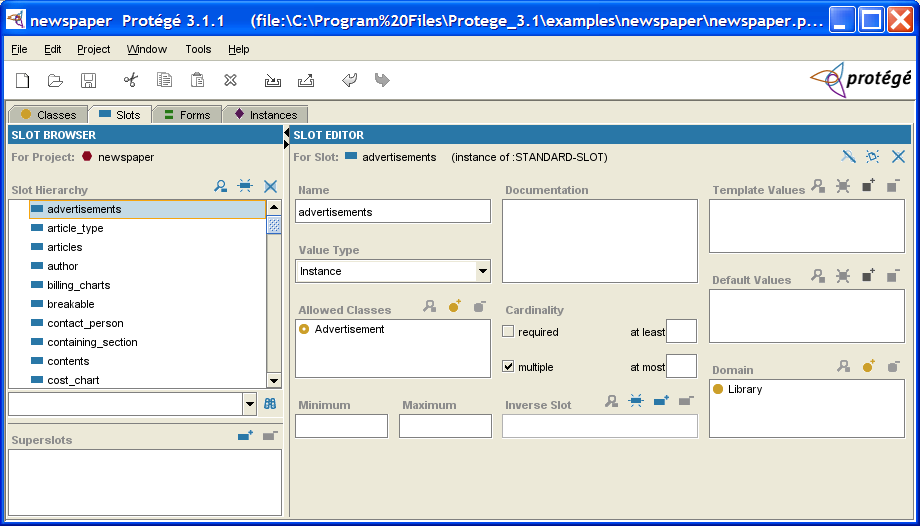
For information about the Slots tab user interface and about accomplishing specific tasks, see the Slots Table of Contents.
The Slot Browser
The Slot Browser, on the left of the Slots tab, displays the all the slots in your project. The Slot Browser includes the following:
Slot buttons allow you to create (
),
view/edit
(),
and delete
( ) classes
in your knowledge base.
) classes
in your knowledge base.
The Slot Hierarchy window: displays your slot hierarchy. Icons give additional information about your slots. In this window you can:
rearrange the slot hierarchy, using "drag-and-drop".
select a slot and see its information displayed in the Slot Editor to the right.
right-click a slot to use the Slot menu, which allows you to create and delete slots as well as work with slot metaclasses.
Slot search bar: allows you to find a slot in the Slot Hierarchy window by typing all or part of the slot name and clicking the Search for Slot (
) button.
Superslots pane: allows you to add and remove superslots for a slot as well as jump to a different superslot in the hierarchy view.
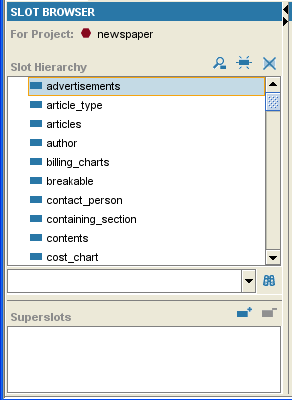
For information about the Slots tab user interface and about accomplishing specific tasks, see the Slots Table of Contents.
The Slot Buttons
The slot buttons, located at the top right of the Slot Browser in the Slots tab, allow you to view/edit, create, or delete a slot. You can also perform these commands by right-clicking on a slot and selecting a command from the Slot menu.
The buttons have the following actions:
|
|
View Slot: Opens the Slot Editor for the highlighted slot. You can also view a slot by double-clicking it in the Slot Browser. If you make any changes to the slot from the Slots tab, they affect the slot everywhere it appears, including the Slots tab and all classes where the slot is attached. See Viewing a Slot. |
|
|
Create Slot: Creates a new slot. |
|
|
Delete Slot: Deletes the highlighted slot from the project. See Deleting a Slot. |
You can also view, create, and edit slots from the Template Slots pane. See the Template Slot buttons for more information.
The Slot Menu
Whenever you have a slot selected in the Slot Editor, you can access the cascading slot menu by clicking the right mouse button. This menu allows you to perform a number of slot-related tasks.
To access the slot menu:
Select a slot in the Slot Editor.
Click the right mouse button. The cascading slot menu will be displayed.
 cascading slot menu
Make your selection and click the left mouse button.

The slot menu allows you to perform the following tasks. Not all tasks are available at all times; tasks that cannot be performed are grayed out. Note that metaclasses and metaslots are advanced features; you should have a good understanding of Protege-Frames before you use metaclasses:
-
Create slot:
Creates a new slot.
This operation is identical to clicking the Create Slot
()
button.
Create Subslot: Creates a subslot subordinate to the highlighted slot.
Create subslot using slot metaclass...: (advanced) If you have added slot metaclasses to your project, allows you to create a new subslot, using a slot metaclass as a template.
-
Delete Slot:
Deletes
the highlighted slot and all of its subslots,
removing it from the current project.
This operation is identical to the Delete Slot
()
button.
Change slot metaclass: (advanced) Changes the slot metaclass of the highlighted slot. See Changing the Slot Metaclass of a Slot for more information.
Change slot metaclass of subslots: (advanced) Changes the slot metaclass of all subordinate slots to the slot metaclass of the highlighted slot.
Expand: Shows all slots subordinate to the highlighted slot. This is a multi-level display operation that is more extensive than clicking the "collapsed" (
) icon,
which only shows the next level of direct subslots.
Collapse: Hides all slots subordinate to the highlighted slot. This is a multi-level display operation that is more extensive than clicking the "expanded" (
) icon
to the left of the slot.
The Slot Editor
The Slot Editor can be used to define and edit the attributes, or facets, of a slot. The Slot Editor for the selected slot is displayed at the right of the Slots tab. The Slot Editor can also be displayed as a free-standing window, as follows:
When you highlight a slot in the Slots tab and then click the View Slot (
)
button.
When you create a new slot for a highlighted class by clicking the Create Slot (
) button
in the Template Slots pane
of the Classes tab.
When you highlight a slot in the Template Slots pane and then click the View Top-level Slot (
)
or the View Slot Overrides
()
button.
In the example below, the slot urgent for the class Article was double-clicked in the Template Slots pane. The Slot Editor displays a Boolean Type, with Single Cardinality, and a text documentation pane of the urgent slot.

A slot can be attached to more than one class. Each slot has a top-level (system) description; the system description can be specialized, or overridden, for a specific class. The scope of your edits depends on how you access the Slot Editor:
Editing a Top-Level Slot: When you access the Slot Editor via the Slots tab or via the View Top-level Slot (
) button
in the Template Slots pane
of the Classes tab,
you can view and edit the top-level description;
these modifications affect the slot for any class where it occurs.
Overriding Slot Properties at a Class: When you access the Slot Editor via the View Slot Overrides (
) button
in the Template Slots pane
of the Classes tab,
you can view and edit the slot properties for the currently highlighted class.
Class-level modifications, called overrides,
only affect the slot at the current class and its subclasses.
The Slot Editor displays the following information for a slot:
Note icons, which allow you to add notes.
Name of the slot.
Value Type of the slot.
Cardinality of the slot.
(optional) Minimum and Maximum values for the slot (slots of type Integer or Float only).
(optional) Any Documentation that has been entered for the slot.
(optional) An Inverse Slot for the slot (slots of type Class or Instance).
(optional) Any Template Values that have been defined for the slot.
(optional) Any Defaults that have been defined for the slot.
Domain of the slot.
For certain value types, an additional pane appears below the Value Type pane:
For type Class, the Allowed Superclasses pane appears.
For type Instance, the Allowed Classes pane appears.
For type Symbol, the Allowed Symbols pane appears.
Note Icons
The note icons
(![]() ,
,
![]() ,
,
![]() ),
at the upper right of the Editor,
allow you to add and remove yellow sticky notes to your slot.
These notes, which are not part of your ontology,
are displayed when the slot is selected
at the Slots tab.
For information on how to add notes to any frame
(class, instance, or slot),
see Working with Notes.
),
at the upper right of the Editor,
allow you to add and remove yellow sticky notes to your slot.
These notes, which are not part of your ontology,
are displayed when the slot is selected
at the Slots tab.
For information on how to add notes to any frame
(class, instance, or slot),
see Working with Notes.
Slot Name
You can edit the slot name directly in the Name field. Slot names are case-sensitive. A recommended convention is to make slot names lowercase, separating adjacent words with an underscore (_).
Value Type Menu
The Value Type menu allows you to select the slot value type, which determines the kind of values that the slot may hold. When you are creating instances for a slot, the slot type also determines how the slot is displayed in the Instance Editor. See the Standard Widgets for more information about instances and type.

The following table summarizes the value types. For a full description, click on the type name:
| Type | Description | Examples |
|---|---|---|
|
any of the types below (logical Union) |
||
|
a logical, Boolean value; i.e., a value that is either true or false |
true, false | |
| the slot takes one or more classes as values | Editor | |
| a floating-point number (number with a decimal point) | 1.0, 3.4e10, -0.3e-3 | |
| the slot takes one or more instances as values | Head Honcho | |
| an integer (a whole number) | 1, 2, -4, 0 | |
| String of alphanumeric (ASCII) characters, possibly including spaces | "Mars Mission" | |
| the slot takes values from a list of strings you define | {red, blue, green} |
When a value type of Class, Instance, or Symbol is selected, an additional pane appears below the Value Type menu. This pane allows you to select or create the values for the slot.

Cardinality
The Cardinality field allows you to specify the number of values allowed or required for the slot. This supplies the following options:

The default configuration allows the slot to have at most one value; that is, it can have one value or no value. You can change the default by entering a positive whole number in the at least and/or at most options, or by selecting the multiple option:
required/at least: Sets the minimum number of values for the slot. To use, enter a positive whole number in the at least entry bar:
If you enter a value for at least, required is automatically selected.
Setting at least equal to one (1) means a value is required for the slot.
Setting at least greater than one automatically selects multiple as well.
Setting at least equal to 1 and at most equal to 1 specifies that the slot must have exactly one value.
at most: Sets the maximum number of values for the slot. To use, enter a positive whole number in the at most entry bar:
Setting at most equal to one (1) means that the slot can have at most one value; this is called a single slot.
Setting at most greater than one automatically selects multiple. The slot can contain multiple values, but there is a limit to the number of values.
multiple: Allows the slot to have more than one value; multiple values are stored and displayed as a list:
As above, to set a minimum number of values, set the at least value.
As above, to set a maximum number of values, set the at most value.
The lack of an at most value indicates that there is no limit to the number of items the slot may contain.
Duplicate values are allowed, although their use is uncommon
Minimum (optional)
This field is applicable only to slots of type Integer or Float.
Minimum allows you to specify a minimum value for your slot. When present, the Minimum value is displayed in the Other Facets column of the Template Slots pane.
When an instance is created for a class with this slot, the value of the slot must be greater than or equal to the minimum. For example, a minimum of zero means instances cannot have negative values.
Together, Minimum and Maximum can be used to define an allowable range.
Maximum (optional)
This field is applicable only to slots of type Integer or Float.
Maximum allows you to specify a maximum value for your slot. When present, the Maximum value is displayed in the Other Facets column of the Template Slots pane.
When an instance is created for a class with this slot, the value of the slot must be less than or equal to the maximum. Together, Minimum and Maximum can be used to define an allowable range.
Documentation (optional)
The Documentation field allows you to enter a text description of the slot. Filling in this field is optional, but is recommended to make maintaining the knowledge base easier. This documentation is part of your knowledge base.
Inverse Slot (optional)
Only available for slots of type Class or Instance.
Allows you to create a reciprocal relationship between two slots. If this relationship is set up correctly, assigning a value (i.e., a specific class or instance) to the slot for one instance automatically assigns the instance as a value to the appropriate inverse slot. For example, the "direct superclass/direct subclass" relationship is actually an inverse slot relationship. See Understanding Inverse Slots and Creating an Inverse Slot Relationship for more information.
If a slot has an inverse slot, the name of the inverse slot is shown after the slot name at the Slots tab.
Template Values (optional)
Allows you to specify the value(s) for a slot at the class level:
The template value is a required, uneditable value that is filled in for all classes and instances that use or inherit the slot.
The template value can not be changed or overridden at the instance level.
The number of Template Values should not exceed the at most value for the Cardinality of the slot.
For a value that can be overridden, use Defaults instead.
When present, any Template Values are displayed in the Other Facets column of the Template Slots pane in the Classes tab.
Defaults (optional)
Allows you to specify default value(s) for a slot:
When an instance is created for a class that has this slot, the default is automatically entered as the value of the slot.
The default value can be changed or overwritten.
The number of defaults should not exceed the at most value for the Cardinality of the slot.
When present, any Defaults are displayed in the Other Facets column of the Template Slots pane in the Classes tab.
Domain
The set of classes where the slot is attached is called the domain of the slot. For example, the slot urgent is attached to a single class, Content, while the slot name is attached to a number of classes:


See Adding a Slot to a Class for more information about editing the domain of a slot.
Viewing Several Slots
To view the information for several slots at once,
select the slots at the Slots tab
and click the View
(![]() )
slot button
to open the Slot Editor for each slot.
To highlight multiple slots, hold down the Ctrl (Cmd) key while clicking each slot.
To highlight a range of slots, click the first slot,
then hold down the Shift key and click the last slot in the range.
)
slot button
to open the Slot Editor for each slot.
To highlight multiple slots, hold down the Ctrl (Cmd) key while clicking each slot.
To highlight a range of slots, click the first slot,
then hold down the Shift key and click the last slot in the range.
You can also view multiple slots using the View Top-level Slot
(![]() )
or View Slot Overrides
(
)
or View Slot Overrides
(![]() )
template slots buttons
in the Template Slots pane.
)
template slots buttons
in the Template Slots pane.
Opening a new Slot Editor does not close the previous Editor. This allows you to compare the attributes for two or more slots. Edits can be made directly in any open Editor.
If you have multiple forms open, you can manage them as follows:
Cascade multiple forms by clicking the Cascade (
 )
button below the main menu bar,
or by selecting Cascade Windows from the Windows menu.
)
button below the main menu bar,
or by selecting Cascade Windows from the Windows menu.
Close all open forms by clicking the CloseAllWindows (
)
button below the main menu bar,
or by selecting Close All Windows from the Windows menu.
The Value Type Menu
The Value Type menu in the Slot Editor allows you to select the slot value type, which determines the kind of values that the slot may hold. When a value type of Class, Instance, or Symbol is selected, an additional pane appears below the Value Type menu.
When you are creating instances for a slot, the slot type also determines how the slot is displayed in the Instance Editor. See the Standard Widgets for more information about instances and type.
The following value types are available:
Any: the slot can take any of the values on the menu.
Boolean: a logical, Boolean value; i.e., a value that is either true or false
Class: the slot takes one or more classes as values
Float: the slot has a floating-point number as a value
Instance: the slot takes one or more instances as values
Integer: the slot takes an integer as a value
String: the slot takes ASCII text strings as values
Symbol: the slot takes values from a list of strings you define
The Any Value Type
A value type of Any means the slot can take any one of the other values: Boolean, Class, Float, Instance, Integer, String, or Symbol. Any allows you to create a generic slot for a high-level class and then determine the actual value type at a lower level.
If a class inherits a slot of type Any, then the slot may be modified by restricting it to one of the other types. This is the only case where the actual value type of an inherited slot can be changed.
For example, suppose you are modeling a taxonomy for all the vertebrates in an ecosystem, with specific species as the instances. You could create the slot Diet at the Vertebrate class level. Then:
for the subclass Carnivore, you could restrict the Diet slot to type Instance, so that you could select specific species already in your taxonomy as the diet
for the subclass Herbivore, you could restrict the Diet slot to type Symbol and list possible food plants by name
A class that has a slot of type Any cannot have instances.
The Boolean Value Type
A Boolean slot holds a logical Boolean value; that is, a value that is either true or false. To set the value type of a slot to Boolean:
Create the slot, or view the Slot Editor for an existing slot.
Select Boolean from the Value Type menu.
The Name of the slot will be used as a label for the checkbox; make sure this is what you want.
When an instance is created for a class with a Boolean slot, the instance entry field corresponding to the slot is a Boolean field and is displayed as a checkbox:
|
|
not Urgent |
|
|
Urgent |
For example, the Personals_Ad class contains the Boolean slot Urgent; the Silly instance of Personals_Ad is not Urgent, while the M137 instance is.
The Class Value Type
A slot of type Class has classes as values. Specifically, when Class is selected as the value type, you specify one or more allowed superclasses. An instance of this class then has a class entry field that takes one of these classes or any of their subclasses as the value(s) of the slot.
Setting the Value Type to Class
To set the value type of a slot to Class:
Create the slot, or view the Slot Editor for an existing slot.
Select Class from the Value Type menu. The Allowed Superclasses pane will be displayed.
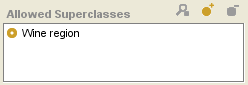 Allowed Superclasses pane
To add one or more allowed superclasses, click the Add Class (
) button.
Select the classes you want as allowed superclasses in the Select Classes dialog box. To select multiple classes, use the Ctrl (Cmd) key; to select a range, use the Shift key. When an instance is created, the only values that can appear in the entry field corresponding to this slot will be the listed classes and their subclasses.
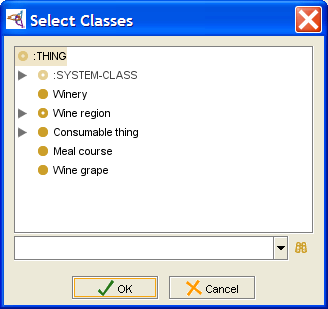 Select Classes dialog
Click OK.


Removing an Allowed Superclass
To remove a class from the list of allowed superclasses for a slot of type Class:
Select the classes to remove in the Allowed Superclasses pane. To highlight multiple classes, use the Ctrl (Cmd) key. To highlight a range of classes, use the Shift key.
Click the Remove Class (
) button
at the top of the Allowed Superclasses pane.
Example
For example, the Wines project is a knowledge base which includes, among other information:
the class Winery, which has wineries as instances
the class Wine region, which has a subclass hierarchy of regions. For example, Wine region has the subclass French region, which in turn has subclasses such as Bordeaux region and Loire region.
The slot location, which is of type Class, with Wine Region as the Allowed Superclasses. location is attached to the Winery class.

When a user creates an instance for Winery, the entry field corresponding to the location slot is a Class Entry field. A user can choose the region from the list of classes subordinate to and including Wine region.


The Float Value Type
A slot of type Float has numbers as values; these numbers may include a decimal point. Values of type Float are stored on your system as floating-point values, and are only as accurate as the representation used by your system.
Setting the Value Type to Float
To set the value type of a slot to Float:
Create the slot, or view the Slot Editor for an existing slot.
Select Float from the Value Type menu.
Fill in the other facets of the slot as desired.
Minimum and Maximum Values
For slots of type Float, you can enter a Minimum and/or Maximum value. See The Slot Editor for more information:
Minimum allows you to specify a minimum value for your slot. When an instance is created for a class with this slot, the value of the slot must be greater than or equal to the minimum. For example, a minimum of zero means instances cannot have negative values.
Maximum allows you to specify a maximum value for your slot. When an instance is created for a class with this slot, the value of the slot must be less than or equal to the maximum.
Together, Minimum and Maximum can be used to define an allowable range.
When present, the Minimum and/or Maximum values are displayed in the last column of the Template Slots pane.
Entering Floating-Point Numbers for an Instance
When entering a Float value for an instance, you can use decimal point or exponential representation. You can enter positive and negative values. For example:
| Representation | Description |
|---|---|
| 1234.56 | Standard decimal notation. |
| 1.23456E3 or 1.2345e3 |
Exponential notation; the example is shorthand for 1.23456 · 103. Represents 1234.56 (For convenience in typing, you can enter a lower case e, instead of an uppercase E.) |
| -1234.56 | Negative number. |
| 1.23456E-3 or 1.2345e-3 |
Exponential notation with a negative exponent, shorthand for 1.23456 · 10-3. Represents 0.00123456. |
The Instance Value Type
A slot of type Instance has instances as values. More specifically, when Instance is selected as the value type, you specify one or more allowed classes. An instance of the class with this slot then takes instances of the allowed classes or of their subclasses as the value(s) of the slot.
Setting the Value Type to Instance
To set the value type of a slot to Instance:
Create the slot, or view the Slot Editor for an existing slot.
Select Instance from the Value Type menu. The Allowed Classes pane will be displayed.
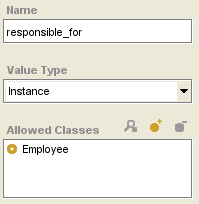 Slot Editor, "Instance" selected
To add one or more allowed classes, click the Add Class (
) button.
Select the classes you want as allowed classes in the Select Classes dialog box. To select multiple classes, use the Ctrl (Cmd) key; to select a range, use the Shift key.
Select Classes dialogClick OK.
Removing an Allowed Class
To remove a class from the list of allowed classes for a slot of type Integer:
Select the classes to remove. To highlight multiple classes, use the Ctrl (Cmd) key. To highlight a range of classes, use the Shift key.
Click the Remove Class (
) button
at the top of the Allowed Classes pane.
Example
In the Newspaper example, the slot responsible_for in the class Editor takes instances of the class Employee as values.

The instance Chief_Honcho is responsible for two instances which are descended from Employee: Sports Nut and Ms Gardiner.

The Integer Value Type
An Integer slot holds an integer number value. (Recall that integer numbers are whole numbers that are positive, negative, or zero; they cannot include a decimal point. Values of type Integer are stored programmatically on your system as integer values.)
To set the value type of a slot to Integer:
Create the slot, or view the Slot Editor for an existing slot.
Select Integer from the Value Type menu.
Fill in the other facets of the slot as desired.
For slots of type Integer, you can enter a Minimum and/or Maximum value.
Minimum allows you to specify a minimum value for your slot. When an instance is created for a class with this slot, the value of the slot must be greater than or equal to the minimum. For example, a minimum of zero means instances cannot have negative values.
Maximum allows you to specify a maximum value for your slot. When an instance is created for a class with this slot, the value of the slot must be less than or equal to the maximum.
Together, Minimum and Maximum can be used to define an allowable range.
When present, the Minimum and/or Maximum values are displayed in the last column of the Template Slots pane.
The String Value Type
A slot of type String has text strings as values. You can enter ASCII characters for an instance, including upper and lowercase letters, numbers, and the basic symbols on the keyboard, such as !, _, and %. String values can also include spaces.
To set the value type of a slot to String:
Create the slot, or view the Slot Editor for an existing slot.
Select String from the Value Type menu.
Fill in the other fields as desired.
The Symbol Value Type
A slot of type Symbol allows you to create a predefined list of strings; an instance of a class chooses from among these strings. When Symbol is selected as the value type, the Allowed Values pane is displayed. An instance then takes string(s) from among the allowed values as the value(s) of the slot.
To set the value type of a slot to Symbol:
Create the slot, or view the Slot Editor for an existing slot.
Select Symbol from the Value Type menu. The Allowed Values pane will be displayed.
Create the values you want as the list of available values for a slot. To create a value:
Click the Create Value (
) button
at the top of the Allowed Values pane.
Type the string you want in the Create Symbol window. You can enter ASCII characters, including upper and lowercase letters, numbers, and other common characters, such as !, _, and %.
Click OK.
When you have created all the values you want for this symbol, fill in the other fields as desired.
To edit a pre-existing value:
Click the View Value (
) button
at the top of the Allowed Values pane.
Edit the string in the Edit Symbol window.
Click OK.
To remove a value from the list of values:
Select the values to remove. To highlight multiple values, hold down the Ctrl (Cmd) key while clicking each value. To highlight a range of values, click the first value, then hold down the Shift key and click the last value in the range.
Click the Remove Value (
 ) button
at the top of the Allowed Values pane.
) button
at the top of the Allowed Values pane.
Example
For example, the weekday slot at the class Prototype_Newspaper allows you to choose from among the seven days of the week: Sunday, Monday, Tuesday, Wednesday, Thursday, Friday, and Saturday.

An instance has a pop-up menu that allows a user to choose one of the symbol values for the slot:

Creating a New Slot
A new slot is created with a generic name, such as newspaper_Slot_1. There are three ways to create a slot:
By clicking the Create Slot (
)
Slot button in the Slot pane
of the Slots tab.
This creates a slot, but does not assign it to any class.
The slot can later be attached
to one or more classes.
By right-clicking in the Slot Browser in the Slots tab and selecting Create slot from the Slot menu. This is identical to the previous operation.
Slot menu, "Create Slot" selectedBy selecting a class in the Classes tab and then clicking the Create Slot (
) button
in the Template Slots pane.
This creates a slot
and attaches it to the selected class.
You can use the Slot Editor to edit the properties of the slot.
Viewing a Slot
You can view and edit a slot at two levels:
View/edit the top-level properties of a slot. This changes the fundamental definition of the slot all across the project, including the Slots tab and all classes that reference the slot.
View/override the slot at a class. This creates "overrides" that appear at the class and any subclasses. The slot remains unchanged at the Slots tab, any superclasses, and any unrelated classes. A slot with overrides is shown with an override (
 ) icon
in the Template Slots pane.
) icon
in the Template Slots pane.
In either case, you can edit the properties of the slot directly in the Slot Editor. See Editing Slot Properties for more information. Any changes you enter into the Slot Editor take effect immediately. To make the changes permanent, save the project by selecting Save from the Project menu.
Editing a Top-Level Slot
Editing at the top-level changes the definition of the slot. The changes appear everywhere the slot occurs, including the Slots tab and all the classes that reference the slot.
You can edit the top-level properties of a slot in two locations:
directly from the Slots tab
by using the View Top-level Slot (
) button
in the Template Slots pane.
From the Slots Tab
To edit the properties of a slot from the Slots tab:
Select the slot you wish to edit in the Slot pane of the Slots tab.
Click the View Slot (
)
button
or press Enter/Return.
This will open the Slot Editor
for the selected slot.
From the Template Slots Pane
To edit the top-level properties of a slot from the Template Slots pane in the Classes tab:
Select a class in the Class Browser in the Classes tab.
Select the slot you wish to edit in the Template Slots pane.
Open the Slot Editor in one of the following ways:
Click the View Top-level Slot (
)
Template Slot button
at the upper right of the template
Template Slots pane
or Double-click the slot and select View top-level slot in the Select Slot View dialog box, then click OK.
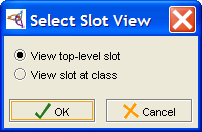 Select Slot View dialog

You can also override the slot properties at a class and all of its subclasses without changing the top-level slot. See Overriding Slot Properties at a Class for more information.
Overriding Slot Properties at a Class
You can override slot properties by editing the slot at the class level.
This allows you to be more restrictive about the slot facets relative to that class.
A slot with overrides is shown with an override
(![]() ) icon
in the Template Slots pane.
) icon
in the Template Slots pane.
You can also edit the properties of a slot directly, instead of just overriding them at a class. See Editing a Top-level Slot for more information.
Overriding a Slot
To edit the slot properties for a specific class:
Select a class in the Classes tab of the Class Browser.
Select the slot you wish to edit in the Template Slots pane.
Open the Slot Editor in one of the following ways:
Click the View Slot Overrides (
)
Slot button
at the upper right
of the Template Slots pane.
Double-click the slot and select View slot at class in the Select Slot View dialog box, then click OK.
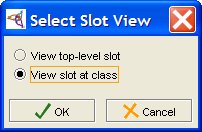 Select Slot View dialog
Change the desired properties in the Slot Editor. See Editing Slot Properties for more information.

After you have edited a slot at the class level,
the slot will be displayed with an override
(![]() ) icon.
) icon.
Scope
Overrides appear:
at the selected class
at all of its subclasses
Overrides do not appear:
at the Slots tab
at any superclasses
at any unrelated classes
Examples
The slot employee_list is a slot of type Instance that takes the value Employee at the top level. By default, whenever you attach this slot to a class, it will range over the instances of Employee. Suppose, however, that for this class, you want to restrict the possible employees to salespeople. By overriding the slot, you can restrict the value range to the Salesperson subclass of Employee for the current class and its subclasses, without affecting the slot value range for any other class.
Suppose you had a class of articles which appeared only on work days, not Saturday or Sunday. You could override the slot weekday at that class to remove Saturday and Sunday from the Symbol list for that class only, restricting the possibilities to working days. Once again, the top-level slot and its range at other classes will remain unchanged.
Restrictions
When you override a slot at a class, you can edit slot facets in the same way as you can at the top level. The override will not remove any existing restrictions, however, and may in fact tighten one or more of them:
The Name of an inherited slot cannot be changed.
For Cardinality, the slot may be changed from Multiple to Single, but not vice versa. The at least value may be increased; the at most value may be decreased.
For certain value types, some restrictions apply:
For a slot of type Any, the slot may be restricted to one of the other types (Boolean, Class, Float, Instance, Integer, String, or Symbol). You cannot change the type of slots other than type Any.
For a slot of type Class, the allowed superclasses can only be changed to subclasses of the allowed superclasses in the superclass.
For a slot of type Instance, the allowed classes can only be changed to subclasses of the allowed classes in the superclass.
A Minimum value (on types Integer or Float) may be created or increased.
A Maximum value (on types Integer or Float) may be created or decreased.
Default values cannot be removed.
Note: Currently, when you override a slot, Protege-Frames does not enforce the restrictive property. That is, you could theoretically expand or change the facets of a slot, rather than restricting them. However, it is not recommended that you do this, both because it is not good practice and because Protege-Frames may enforce restriction in the future.
Editing Slot Properties
You can edit the properties of a newly created or existing slot using the Slot Editor.
Slot Name
To change the name of a slot, edit the text in the Name field. Slot names are case sensitive. To distinguish slot names from class names, a recommended convention is to make slot names lowercase.
Value Type
To change the value type of the slot, select a different type from the Value Type menu. The available types are summarized in the following table:
| Type | Description | Examples |
|---|---|---|
| Any | Any of the types below (logical Union) | |
| Boolean | Logical Value | True, False |
| Class | Class in the knowledge base | Organization |
| Float | Number with a decimal point | 1.0, 3.4e10, -0.3e-3 |
| Instance | Instance of a class in the knowledge base | instance_00010 |
| Integer | Whole number | 1, 2, -4 |
| String | List of alphanumeric characters, possibly including spaces | "John Doe" |
| Symbol | Enumerated list of values, which may not include spaces | red, blue, and green |
Note: If you are editing the slot from a specific class, and the slot is inherited, the following restrictions apply:
For an inherited slot of type Any, you can select any one of the other types.
For an inherited slot of a value type other than Any, you cannot change the type of the slot. However, for slots of type Class, Instance, or Symbol, you can change the choices in the associated Allowed menu.
When a value type of Class, Instance, or Symbol is selected, an additional pane appears below the Value Type menu, as follows:
| Value Type | Associated Pane |
|---|---|
|
The Allowed Superclasses pane. See Setting the Value Type to Class in the Value Type Class for information on how to add and remove allowed superclasses. | |
Setting the Value Type for information on how to add and remove allowed classes. | |
|
The Allowed Values pane. See The Symbol Value Type for information on how to add and remove allowed values. |
Cardinality
To change whether or not a slot can be composed of more than one item, select a different option for the Cardinality.
The default configuration allows the slot to have at most one value; that is, it can have one value or no value. You can change the default by entering a positive whole number in the at least and/or at most options, or by selecting the multiple option with no at most value.
To require a minimum number of values for the slot, enter a positive whole number in the at least entry bar. Setting at least equal to one requires a value for the slot. Setting at least equal to 1 and at most equal to 1 means that the slot must have exactly one value. If you enter a value for at least, required is automatically selected. If you set at least greater than one, multiple is automatically selected.
To allow the slot to have multiple values, select multiple.
To allow the slot to have multiple values, but to limit the number of values allowed, enter the maximum number of values in the at most entry var. If you set at most greater than one, multiple is automatically selected.
Note: If you are editing the slot for a specific class, and the slot is inherited, you cannot change the cardinality from single to multiple. The at least field must be greater than or equal to any inherited at least. The at most field must be less than or equal to any inherited at most.
Minimum (optional)
For a slot of type Integer or Float, you can change the minimum value by typing the new value in the Minimum field. If you are editing the slot for a specific class, and the slot is inherited, the new minimum value must be greater than or equal to the inherited minimum.
Maximum (optional)
For a slot of type Integer or Float, you can change the maximum value by typing the new value in the Maximum field. If you are editing the slot for a specific class, and the slot is inherited, the new maximum value must be less than or equal to the inherited maximum.
Defaults (optional)
Allows you to specify the default value(s) for a slot. When an instance is created for a class that has a slot with a defined default, the default value is automatically entered as the value of the slot. The default value can then be changed or overwritten.
For a slot with Single cardinality, Defaults must be a single value or no value; for a slot with Multiple cardinality, Defaults can be more than one item.
When present, any Defaults are displayed in the second-to-last column of the Template Slots pane in the Classes tab.
Documentation (optional)
You can change the text description of the slot directly in the documentation field.
Removing a Slot from a Class
You can remove a slot from a class without deleting it from the knowledge base. You can remove the association between a slot and a class in one of two ways:
removing the slot from the template slots of the class
removing the class from the domain of the slot
You can only remove a direct slot from a class; you may not remove an inherited slot. Removing a slot cannot be undone; you may wish to save or archive the project before removing slots.
Removing a Slot at a Class
To remove a slot from the list of template slots for a class:
Display the Class Editor for the class which has the slot you want to remove. The slots for the class will be displayed in the Template Slots pane.
Highlight the slot(s) you wish to remove in the Template Slots pane. To highlight multiple slots, hold down the Ctrl (Cmd) key while clicking each slot. To highlight a range of slots, click the first slot, then hold down the Shift key and click the last slot in the range.
Click the Remove Slot (
)
Template Slot button.
Any slots you removed no longer appear among the slots for the class.
They are also removed from any subclasses of the class.
Removing a Class from the Domain of a Slot
To remove a class from the classes listed in the domain of a slot:
Display the Slot Editor for the desired slot. The Domain is located at the bottom right of the Slot Editor.
Select the class(es) you wish to remove from your slot. To remove more than one class, hold down Ctrl (Cmd) while clicking, or use the Shift key to select a range of classes.
Click the Remove Class (
) button
at the top right of the Domain facet.
You can also delete a slot from the entire knowledge base, using the Slots tab. See Deleting a Slot for more information.
Deleting a Slot from the Project
You can delete a slot so that it is no longer part of the knowledge base. Deleting a slot cannot be undone. You may wish to save or archive your project before deleting slots.
Deleting a Single Slot
To delete a single slot:
In the Slots tab, highlight the slot which you want to remove.
Click the Delete Slot (
)
button
or click the right mouse button and select Delete selected slots
from the Slot menu.
 Slot menu, "Delete Slot" selected
The slot will no longer appear in the list of slots. It will also be removed from any classes where it appears.

Deleting Multiple Slots
To delete several slots at once:
In the Slots tab, highlight the slots you wish to remove. To highlight multiple slots, hold down the Ctrl (Cmd) key while clicking each slot. To highlight a range of slots, click the first slot, then hold down the Shift key and click the last slot in the range.
Click the Delete Slot (
)
button.
The slots will no longer appear in the list of slots
and will be deleted from any classes where they appear.
You can also remove a slot from a class where it appears without deleting it from the project. See Removing a Slot for more information.
Adding a Slot to a Class
You can attach a slot to one or more classes. For example, the Prototype_Newspaper class has a Weekday slot, which can be used to choose among the days of the week. If you were creating a new type of employee who wrote a weekly feature, you might want to reuse this slot. You can create an association between a slot and a class in one of two ways: attaching the slot to a class or adding a class to the domain of the slot.
Attaching a Slot to a Class
To attach a slot to a class:
Display the Class Editor for the desired class.
Click the Add Slot (
) button
at the top right
of the Template Slots pane.
The Select Slots form will display all of the slots you can add to the class.
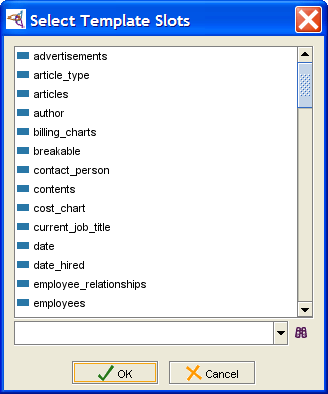 Select Template Slots dialog
Select the slot(s) you wish to add to your class. To add more than one slot, hold down Ctrl (Cmd) while clicking, or use the Shift key to select a range of slots.
Click OK. The selected slot(s) are added to the Template Slots pane as directly attached slot(s), displayed with a blue rectangle (
 ) icon.

If you wish to edit
or override a slot after adding it,
double-click it or click the View Top-Level Slot
(![]() )
or the View Slot at Class
(
)
or the View Slot at Class
(![]() ) button
to display the Slot Editor.
See Viewing a Slot
and Editing Slot Properties
for more information.
) button
to display the Slot Editor.
See Viewing a Slot
and Editing Slot Properties
for more information.
Adding a Class to the Domain of a Slot
The domain of a slot (i.e., the list of the classes to which the slot is attached) is shown in the Domain facet of the Slot Editor. You can associate a slot to a class by adding the class to the domain of the slot:
Display the Slot Editor for the desired slot. The Domain is located at the bottom right of the Slot Editor.
Click the Add Class (
) button
at the top right of the Domain facet.
Select the class(es) you wish to add to your slot. To add more than one class, hold down Ctrl (Cmd) while clicking, or use the Shift key to select a range of classes.
Select Classes dialogClick OK. The selected class(es) are added to the Domain for the slot. If you view the Class Editor for the class(es), you will see the slot in the Template Slots pane.
Removing Overrides From a Slot
You can remove any class-level
overrides from a slot,
using the Remove Slot Overrides
(![]() )
Template Slot button
in the Template Slots pane.
)
Template Slot button
in the Template Slots pane.
To remove the slot overrides at a class:
Select the class where you want to remove the overrides in the Class Browser.
Select the slot whose overrides you wish to remove in the Template Slots pane. Overrides are indicated by the override (
) icon.
Click the Remove Slot Overrides (
)
button
at the upper right
of the Template Slots pane.
The overrides will be cleared from the slot at this class and all of its subclasses.
The slot will now match the top-level definition.
Any overrides created at an unrelated class will still exist.
Understanding Inverse Slots
This topic gives an overview of how to analyze a project and design inverse slots in Protege-Frames. An inverse slot relationship is a reciprocal relationship between two slots. Whenever one slot is filled in at one instance, its inverse slot is automatically filled in at another instance, according to the relationship you specified.
This topic describes the most common relationship - an inverse slot relationship between two instances, including the following steps: identifying an inverse relationship, analyzing the Protege-Frames components of the relationship, implementing the relationship in Protege-Frames.
You create inverse slots using the Inverse Slot widget in the Slot Editor. For more information on how to use the user interface, see Creating an Inverse Slot Relationship. Note that if you create an inverse slot relationship after one or more instances have been created, existing instances will not display the inverse slot information.
Example
For example, suppose you want to keep track at the section level of which editor(s) edit which section(s). There is already a slot named sections at the class Editor; it takes instances in the class Section as values:
You could create an inverse slot named editor at the class Section which takes instances in the class Editor as values:
Now, when you edit the instance Mr. Science to assign the value Science to the slot sections, the inverse relationship is tracked by Protege-Frames. At the instance Science, Mr. Science automatically appears as a value for the slot editor.
Identifying the Relationship
First, you must determine if an inverse slot will appropriately represent the structure of your knowledge base. An inverse slot represents a reciprocal relationship that always occurs. For example, if Mr. Science edits the Science section, the Science section is edited by Mr. Science. Protege-Frames supports several different types of inverse relationships:
The relationship must be reciprocal.
The relationship can be a one-to-one correspondence, or one or both of the slots can have multiple values. For example, Chief Honcho edits a number of sections.
The relationship can be between instances in different classes or instances in the same class. For example, likes and is_liked_by would be a relationship where the slot and its inverse slot are both attached to Person.
A slot can be its own inverse. shares_ an_ office_ with would be a candidate for an inverse relationship where the inverse slot was identical with the original slot. This is a stronger tie than simply having instances in the same class.
Analyzing the Relationship for Protege-Frames
Once you have identified the relationship in your ontology, you need to analyze it in terms of your Protege-Frames project. For an inverse slot relationship between Instance slots, determine the following:
What Protege-Frames class(es) do you want for the first set of instances? We will call this first list of classes Class_List_A.
Make sure to choose a class or classes that are appropriate for the project.
It is most important to choose a class list that is not too small; that is, you need to select a list of classes such that every possible instance is in one of those classes.
At the same time, for simplicity, you want the class list to be focused on the instances and not be too broad.
This list may consist of a single class. For example, in the newspaper project, one of the reporters, Larry Tennis-Nut, is an eager beaver and sometimes edits the Sports section. It would make sense to expand the list of classes to Editor and Reporter. However, no salesmen or columnists are allowed to edit a section. Therefore, while it would be possible to simply use the class Employee, it is cleaner not to.
If the second set of instances is different from the first, perform the same analysis for the second set of instances. Call this second list of classes Class_List_B.
As before. this list may be a single class.
This list may be identical to Class_List_A.
Steps Required for Implementing the Relationship
In this example, we will restrict ourselves to instances in the class Section.
The following steps are necessary to create an inverse slot relationship in a Protege-Frames project:
Create a slot of type Instance whose allowed classes are Class_List_A. We'll call this the original_slot.
Create another slot of type Instance whose allowed classes are Class_List_B. We'll call this the inverse_slot. If the information is important in your ontology, it is likely that one or both of these slots already exist in the project.
Attach your Protege-Frames slots to the appropriate classes.
First, add original_slot to every class in Class_List_B. Recall that the target values of original_slot are in Class_List_A. Assigning the slot to Class_List_B is what creates the cross-connection between the classes.
Similarly, assign inverse_slot to every class in Class_List_A.
Create the inverse relationship between inverse_slot and original_slot. (You can actually do this as soon as both slots are created.)
If you already have a slot original_slot of type Instance in your project and it already has the desired allowed classes and domain, you can create a new slot specifically as the inverse of original_slot. In this case, the inverse_slot has the following properties; you can edit them after creation if necessary:
inverse_slot is automatically attached to all classes in the list of allowed classes for original_slot.
its allowed classes automatically includes the list of all the classes where original_slot is attached.
For information on how to use the Protege-Frames interface to make an inverse slot, see Creating an Inverse Slot Relationship.
Creating an Inverse Slot Relationship
The Inverse Slots widget on the Slot Editor allows you to create an inverse relationship between two slots of type Class or Instance.
You can create an inverse slot relationship in one of two ways: linking two existing slots and creating a new slot as the inverse of an existing slot
You can also modify inverse slot relationships, removing the inverse slot link between two slots or replacing an inverse slot with another slot.
For an inverse relationship to work correctly, your two slots and the classes where they appear must be designed appropriately. For slots of type Instance, the following situation provides optimal results:
All classes where the first slot is attached (i.e., the domain of the slot) appear in the Allowed Classes pane for the second slot.
All classes where the second slot is attached appear in the Allowed Classes pane for the first slot.
However, depending on the structure of your knowledge base, this may not be appropriate or feasible. Other situations are also valid. For example, suppose slots A and B are inverse slots. If one of the allowed classes for slot A does not have B as one of its attached slots, all that happens is that inverse slot value does not get created for those instances. The inverse relationship will still work normally for those allowed classes that do have slot B attached.
A slot can have at most one inverse slot. For more information on designing an inverse slot relationship, see Understanding Inverse Slots.
Note that if you create an inverse slot relationship after instances have been created, existing instances will not display the inverse slot information.
Linking Two Existing Slots
To create an inverse slot relationship between two existing slots, the slots you choose must be of value type Class or Instance. To create the relationship:
Open the Slot Editor for one of the two slots; it does not matter which one you choose. You can open the Slot Editor from the Classes tab or the Slots tab.
Click the Add Slot (
) button
at the right of the Inverse Slot field.
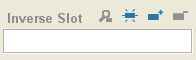 Inverse Slot field
Note: If the button is grayed out, you cannot create an inverse slot for the selected slot. Make sure that the slot is of type Class or Instance.
Select the slot you want to use from the Select Slot dialog box. Only slots of type Class or Instance will appear.
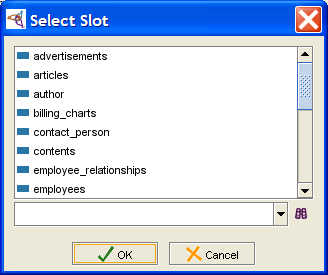 Select Slot dialog
Click OK. The two slots will now be inverses of each other.


You can view the Slot Editor of the second slot
by double-clicking on its name in the Inverse Slot field
or by using the View Slot
(![]() ) button.
You will see that it automatically has the first slot as its inverse slot.
You may also wish to check that the Allowed Classes of each slot
contains all the possible classes where the other slot will appear.
) button.
You will see that it automatically has the first slot as its inverse slot.
You may also wish to check that the Allowed Classes of each slot
contains all the possible classes where the other slot will appear.
Creating a New Inverse Slot
To create a new slot and make it the inverse of a slot:
Open the Slot Editor for the slot you want to create an inverse for. You can do this from either the Class tab or the Slots tab:
On the Slots tab, select the slot from the list of slots in the Slot Browser pane.
On the Classes tab, double-click the slot in the list of Template Slots (or select the slot in the list of Template Slots and click the "View Top-Level Slot" button).
Click the Create Slot (
) button
at the right of the Inverse Slot Editor.
Inverse Slot barNote: If the button is grayed out, you cannot create an inverse slot for the selected slot. Make sure it is of type Class or Instance.
A new class of type Instance is created. The Slot Editor for the new slot opens automatically.
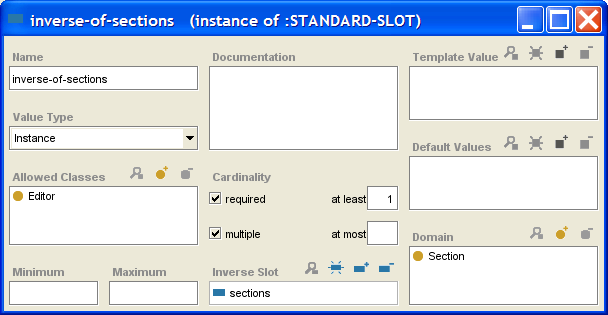 inverse-of-sections dialog
Name the slot.
The classes where your original slot appears will be automatically entered in the Allowed Classes field. Modify this list if necessary.
The classes in the Allowed Classes field of the original slot will be added to the Domain field. Modify this list if necessary. Remember that attaching a slot to a class also attaches it to all subclasses of the class.
Make any other changes you wish to the slot definition.

Removing an Inverse Slot Relationship
Removing the inverse slot relationship removes the link between the two classes. Note that, if you remove an inverse slot relationship after instances have been created, existing values that were created by the inverse slot relationship are not removed. Removing an inverse slot only affects the values of new instances. To remove the inverse slot relationship between two slots:
Highlight the Inverse Slot field in the Slot Editor for either one of the two slots.
Click the Remove (
) button
at the right of the Inverse Slot field.
The slot relationship will be removed.
Replacing an Inverse Slot
Replacing the inverse slot relationship at a slot removes the link to the original inverse slot and makes a link with a different, existing, slot. Note that, if you replace an inverse slot relationship after instances have been created, existing values that reflect the original (replaced) inverse slot relationship are retained. Replacing an inverse slot only affects the values of new instance. To replace an inverse relationship:
Select the slot you want to have a different inverse.
Click the Add Slot (
) button
at the right of the Inverse Slot field.
Select the slot you want from the Select Slot dialog box.
Click OK. The new slot becomes the inverse slot of the current slot. The original inverse slot is now unlinked from the slot where you made the change and no longer has an inverse slot.
Working with Subslots
Normally, whenever you create a new slot, it is a top-level slot. However, you can also create a subslot of an existing slot.
Understanding Subslots
Subslots have the following characteristics:
When you first create a subslot, the subslot inherits the properties of the superslot. Only the name is different.
You can only modify a subslot to make it more restrictive than its superslot. You cannot make it less restrictive.
When you attach a superslot to a class, all of its subslots are attached.
Subslots allow you to do the following:
You can create two (or more) slots which share information, but where one slot (the subslot) is more restrictive.
You can attach multiple related properties, using a single slot. To do this, create a single superslot and then create subslots that define characteristics of the superslot. By attaching the superslot to a class, you automatically attach all of its subslots.
Creating a Subslot
To create a subslot of a slot:
In the Slot tab, select the slot that you want as the superslot of your subslot.
Click the right mouse button.
Select Create Subslot from the Slot menu.
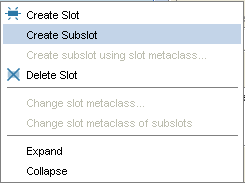 Slot menu, "Create Subslot" selected
The new slot is created as a subslot of the selected slot. Except for the name, when created, it has the same properties as its parent slot.
You can use the Slot Editor to edit the properties of the new slot.

Restrictions on Edits
When you create a subslot, there are restrictions on the possible edits:
For Cardinality, the slot may be changed from Multiple to Single, but not vice versa. The at least value may be increased; the at most value may be decreased.
For certain value types, some restrictions apply:
For a slot of type Any, the slot may be restricted to one of the other types (Boolean, Class, Float, Instance, Integer, String, or Symbol). You cannot change the type of slots other than type Any.
For a slot of type Class or Instance, you cannot change the allowed classes.
A Minimum value (for types Integer or Float) may be created or increased.
A Maximum value (for types Integer or Float) may be created or decreased.
Default values cannot be removed.
These restrictions are similar to the restrictions on slot overrides, except that you can change the name of a subslot, and you cannot make any changes to the allowed classes of a subslot.
Finding a Slot
To find a slot by name in the Slot Browser:
Type all or part of the name of the slot in the Slot lookup bar at the bottom of the Slot Browser.
 Slot lookup bar
Press Enter/Return or click the Search for Slot (
 ) button.
If there is one match, the slot will be highlighted.
Otherwise, you will get a dialog box of all the matches,
and you will be able to select one.
) button.
If there is one match, the slot will be highlighted.
Otherwise, you will get a dialog box of all the matches,
and you will be able to select one.
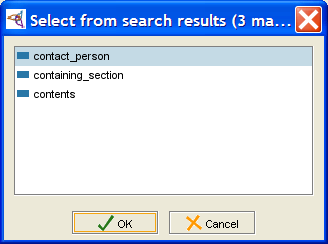 Select from search results dialog

The Slot Hierarchy Window
The Slot Hierarchy window in the Slot Browser displays the slots for the project and allows you to rearrange your hierarchy using "drag-and-drop". By default, the Slot window displays the slot structure of your knowledge base, with all slots shown as descending, directly or indirectly, from the system slot :THING.

Description
This window shows the following:
Subslots appear below their superslots and indented to the right.
Hierarchy icons indicate how much or how little of the hierarchy is displayed. An "expanded" (
) icon
means all direct subslots of the slot are displayed.
A "collapsed"
() icon
means the slot has direct subslots which are not currently displayed.
Clicking on either icon toggles it to the other.
If no icon is displayed, the slot has no direct subslots.
Tip: You can also display all slots below a slot by right-clicking the slot and selecting Expand from the cascading Slot menu.
The currently selected slot is shown with a highlight.
Slots with more than one superslot appear more than once in the tree.
Slot icons show information about your slot.
If a slot has an inverse slot, the name of the inverse slot is shown after the slot name:
 slot entry with inverse slot
Tasks
The Slot Hierarchy window allows you to perform the following tasks:
You can select a slot by clicking on it.
You can edit the attributes of a slot in the Slot Editor. When a slot is selected, the Slot Editor appears to the right. You can also open the Slot Editor for one or more selected slots by clicking the View Slot (
) button.
You can create a new slot by clicking the Create Slot (
) button,
then creating and editing its attributes
in the Slot Editor.
You can delete a slot by clicking the Delete Slot (
) button.
You can search for a slot by typing all or part of the slot name in the Slot lookup bar, then clicking the Search for Slot (
) button.
You can work with slot metaclasses, using the right mouse button. See the Slot menu for more information.
You can also rearrange the superslot/subslot relationships:
You can move a slot to another superslot by selecting the slot, dragging it directly over the new superslot, and then dropping it.
You can add an additional superslot to a slot by selecting the slot, dragging it over the additional superslot, and holding down the Ctrl (Cmd) key while you drop it.
For additional superslot tasks you can perform, see the Superslots pane.
The Slot Icons
The icons in the Slot Browser and the Template Slots pane give information about the slots. There are two types of icons: slot icons and hierarchy icons.
Slot Icons
These icons give information about a slot. When a class inherits a class from a superclass, icons in the Template Slots pane give information related to the inheritance and overrides; these icons are not shown anywhere else.
|
|
A blue rectangle indicates a slot. In the Template Slots pane, this icon means that the slot is direct; that is, it was attached directly to the selected class. responsible_for is a direct slot. |
|
|
(Template Slots pane only) A bracketed icon means that the slot is inherited from one of the selected class's ancestors. Inherited slots can be edited, but not deleted; there are also some restrictions on the edits that are allowed. |
|
|
(Template Slots pane only) A bracketed icon with an O inside it means the slot has overrides; that is, the slot is inherited and it has been modified at the class. |
|
|
A pale icon indicates a system slot or a slot that has been included from another project. These slots cannot be edited. |
Hierarchy Icons
(Slot Browser only) If you have created any subslots, the following icons in the Slot Browser give information about the display of the slot hierarchy:
|
|
All direct subslots of the slot are displayed. You can click on this icon to hide the subslots. |
|
|
The slot has direct subslots which are not currently displayed. You can click on this icon to display the subslots. |
| No icon |
The absence
of an "expanded" ( |
The Superslots Pane
The Superslots pane, at the bottom of the Slot Browser, displays all the superslots of the slot that is currently selected. This pane provides the interface for adding, locating, removing, or viewing superslots.

Note: If you cannot see the Superslots pane, your window may be too small. You can see the pane by enlarging your window or by dragging the slider bar at the bottom of the Slot Browser. See Working With a Small Window for more information.
Viewing the List of Superslots
To see a list of all superslots of a given slot, highlight any occurrence of the slot in the Slot Browser. The Superslots pane automatically displays a list of all of the superslots of the selected slot.
Adding a Superslot
To add a superslot to the selected slot,
click the Add Superslot
(![]() ) button,
highlight the slot you want as an additional superslot in the Select Slot window,
and then click OK.
) button,
highlight the slot you want as an additional superslot in the Select Slot window,
and then click OK.
Removing a Superslot
To remove a superslot from the list of superslots for the selected slot,
highlight the superslot you want to remove,
and click the Remove Superslot
(![]() ) button.
The superslot/subslot relationship is broken,
but the superslot is not deleted from the knowledge base.
) button.
The superslot/subslot relationship is broken,
but the superslot is not deleted from the knowledge base.
Locating Another Superslot
To jump to a different superslot in the Slot Browser, click on any superslot in the Superslots pane. The highlight in the Slot Browser automatically moves to the occurrence of the slot which is directly under the chosen superslot. If the occurrence is not currently visible in the Slot Browser, Protege-Frames automatically scrolls to the correct location and expands the hierarchy to make the slot visible.
Forms
This section of the User's Guide covers the concepts of understanding, creating, and using Protege-Frames forms.
Note: Before you create and use classes, you should be confident with the basic Protege-Frames interface. You should also be comfortable with Protege-Frames projects, project types, windows, classes, and slots.
To return to the main table of contents, click the Protege-Frames User's Guide link (located at the top of the table of contents on the right-hand side of this page).
Understanding Forms
Once you have built the classes and slots of your ontology, you will want to begin to create instances. This is done by filling out forms. The Forms tab allows you to customize the user interface that will be used for entering instances. In Protege-Frames, the expectation is that ontology creation and instance entry could be done by different groups of people:
The Classes and Slots tabs are used by domain experts and knowledge engineers to create ontologies - that is, to design a set of classes that describe the domain. For example, a team of medical specialists could design an ontology dealing with blood diseases.
The Instances tab is used to acquire instances. It is typically used by people who are neither domain experts nor knowledge engineers. For example, nurses at a hospital could use the ontology above to enter instances to describe each patient.
The Forms tab generates the basic user interface for instance entry:
A class has template slots, each of which has a value type.
The form for a class is composed of widgets, each one of which corresponds to a template slot. The appearance of the widget is based on the slot value type.
When a user enters an instance, each widget becomes an entry field in the Instance Editor.
Every class, concrete or abstract, has an associated form. For a concrete class, a user defines an instance of the class by filling out the class's form. For an abstract class, the form is used to define layout information which can then be inherited by other classes.
Using the Forms tab, you can customize the appearance of forms. Protege-Frames generates a default form for every class you create, based on the slots that are attached to the class and their slot value types. On the default form, there is a widget for every slot that is attached to the class.
The default form is intended as an initial, useful set of forms; however, these default interfaces are not always user-friendly. For example, if a class has a slot such as name or title, you might want the form to display this field first. The default form probably will not do this for you.
Different slot value types use different widgets: for example, a string slot uses a text entry bar widget, while a Boolean slot uses a checkbox. You can customize the form by moving and resizing widgets and deleting widgets; for some slot value types, you can also select another widget that is different from the default. For example, you can set up a widget which displays Symbol values as icons and allows the user to select those.
The Forms tab also allows you to create several user interfaces for the same ontology - forms for knowledge acquisition can be customized for different groups of users.
The Forms Tab
The Forms tab provides a single window in which you may view and edit prototype forms. The forms you design and create at the Forms tab can be viewed in their final format at the Instances tab. End users will use the finished forms to enter instances into the knowledge base.
The Forms tab consists of two panes:
The Form Browser pane, at the left, shows the hierarchy of all the classes and allows you to clear all customizations from your form. You can also create a form with one of the following preset layouts: the default, a form that has been created for a superclass, or a form for another class.
The Form Editor pane, at the right, shows the layout of the form associated with the selected class. Each slot in the class is associated with a user-interface widget on the form. If you have not modified the form, Protege-Frames uses a default layout based on the slot type and cardinality.

As mentioned above, the forms you design will appear at the Instances tab. Click to see this example as it appears at the Instances tab.
The Form Browser
The Form Browser, at the left of the Forms tab, displays all the classes in your project. To ensure that the selected class is the same one that was selected at the Classes tab or the Instances tab, you can synchronize class trees.
The Form Browser has three components:
The Forms window displays the hierarchy of the classes in your project. Icons give more information about the form associated with the class. You cannot change the hierarchy in this window. To edit the hierarchy, use the Classes tab.
The Form buttons, at the top right of the pane, allow you to clear all customizations from your form as well as to create a form with a preset layout.
The Forms lookup bar, at the bottom of the pane, allows you to locate a form in the Forms window by typing all or part of the name and clicking the binoculars.

The Forms Window
This displays all the forms in the project, ordered by the names of their associated classes. When a single form is selected in this window, its associated form is displayed in the Form Editor to the right. If you have not created or modified the form, Protege-Frames uses a default layout, based on the slot type and cardinality.
The following icons, shown at the left of each form name, provide information about the form associated with the class:
|
|
The form uses the default layout that is automatically created by Protege-Frames. |
|
|
The form has been customized.
You can customize a form by altering its widgets, for example:
moving or resizing a widget, changing a widget's label,
or selecting which buttons appear for the widget.
See Modifying a Widget's Appearance
for more information.
You can clear all customizations for the selected form by clicking the Remove Customizations
( |
Hierarchy Icons
The following icons, shown at the beginning of each line, provide information about the display of the class hierarchy:
|
|
All direct subclasses of the class are displayed. You can click on this icon to hide the subclasses. |
|
|
The class has direct subclasses which are not currently displayed. You can click on this icon to display the subclasses. |
| No icon |
The absence of a
|
The Form Buttons
The Form buttons, at the top right of the Form Browser, allow you to change the layout of the selected form.
|
|
View Form Customizations: Opens the Form Configuration dialog box for the selected form. |
|
|
Remove Form Customizations: Clears all customizations for the selected form. This will return the form to the default layout, which has the following characteristics:
|
|
|
Relayout Form with Current Widgets: Creates a default layout using the current widgets. This means:
|
|
|
Layout Form Like: Displays a dialog box of all forms and allows you to choose one as a basis for your layout, as follows:
|
You can also customize a form in a number of ways, by customizing global properties as well as changing individual widgets on the form. See the Forms Table of Contents for more information.
The Form Editor
The Form Editor shows the layout of the form associated to the selected class and allows you to edit the form's layout.
Components
The Form Editor has the following components:
The Display Slot menu, which allows you to choose the display slot for the form.
The Widget Type menu, which allows you to choose a widget type for the currently selected widget, if any.
A number of user-interface widgets. The currently selected widget, if any, is outlined in blue. Widgets are translated to entry fields in the Instances tab, and control how users will enter information as instances. Each slot in the class is associated with a user-interface widget on the form.
In addition, double-clicking on the Form Editor brings up a dialog box, as follows:
Double-clicking on any widget brings up the Widget Configuration dialog for that widget, which allows you to view widget information and edit the widget's configuration, depending on the widget type.
Double-clicking on the background of the Form Editor brings up the Form Configuration dialog, which allows you to view the widget type for each widget, redisplay hidden widgets, and select which widget, if any, takes up most of the horizontal and/or vertical space as the form expands.

Default Layout
If you have not created or modified the form, Protege-Frames uses a default layout, as follows:
Widgets appear in an order that is based on their size and type.
Each widget has a standard type, based on the slot's value type and cardinality.
Each widget has a standard size, based on the widget type.
The layout that you create in the Form Editor appears in the Instance Editor. Users fill in the form, entering instances into the knowledge base. You can use the Form Editor to design an interface which allows easy entry of the disparate types of information represented by the different types of slots.
Editing Tools
There are a number of basic editing tools provided on the Form Editor. Some of the actions you can perform with widgets are:
Moving widgets to a different location and/or resizing them.
Hiding or redisplaying a widget.
Selecting a different type of widget from the Select Widget Type menu.
For widgets with buttons, choosing which buttons are displayed.
Note: It is also possible to create customized widgets, using the programmer's interface.
Global Edits
You can also make changes to the global properties of the form, including:
Selecting a display slot, which is used to identify the different instances when they are displayed in a list.
Selecting a single widget that will expand to take up most of the form, rather than having all widgets resize proportionally.
The Display Slot Menu
The Display Slot menu allows you to choose the display slot, used to identify the different instances when they are displayed in the Instance Browser or on a list.
The display slot can also be set at the Instances tab. See Setting the Display Slot for more information.


If you do not select a slot to use as a display slot, Protege-Frames uses a default key, <instance name>, such as newspaper_0017. It is usually helpful to set a display slot.
If you set a display slot for a class, the slot is inherited by any subclasses.
The Selected Widget Type Menu
The Selected Widget Type menu allows you to choose the widget type, that is, the way the information for that slot is formatted for the currently selected widget. The choices for widget type depend on the value type of the slot. Each value type has a default widget for the slot, as well as a preset list of possible widget types, based on the slot's value type.
Clicking on the menu displays a list of possible options for the currently selected widget. Making a new selection will change the appearance of the widget on the form.

For example, for a String field of Single Cardinality, you can select a number of widgets, including a TextAreaWidget, TextAreaWidget, a UniqueStringWidget, or a YellowStickyWidget.
|
 |
| Various String Widgets |
If you select <none> from the Widget Type menu, the widget is removed from the Form Editor and is not displayed in the Instance Editor for that class. To redisplay a widget that has been removed, open the Form Configuration dialog (by double-clicking on the background of the Form Editor) and choose a different display type for the widget.
The Widget Configuration Dialog
The Widget Configuration dialog box allows you to customize the label, buttons, and other properties of a selected widget. This dialog has a number of tabs, depending on the widget type.
Note: To select a different widget type, use the Form Configuration dialog or the Selected Widget Type menu.
The General Tab
The General tab displays the names of the class and slot with which the widget is associated. For simple widgets, the General tab is the only tab that is available.
You can customize the following at the General tab:
Edit the Label that is used for the widget on the form.
Create a Tool Tip that displays when the user hovers the cursor over the widget label.
The example below shows the General tab for the Name widget in the Editor form.

The Buttons Tab
The Buttons tab is available for widgets with buttons, such as Class and Instance widgets, as well as all widgets with multiple Cardinality. For example, the dialog box for a standard InstanceListWidget also has a Buttons tab. This tab allows you to choose which buttons to display on the form.

Additional Tabs
The InstanceRowWidget, InstanceTableWidget, and ContainsWidget show additional widget-specific tabs. See the topics for these widgets for more information.
The Form Configuration Dialog Box
The Form Configuration dialog box allows you to:
View the list of available widgets for the currently selected form.
Change the widget type for any widget, including redisplaying currently hidden widgets.
Select a single widget that takes up extra horizontal and/or vertical space as the form expands.
The Widgets Tab
The Widgets tab displays all of the widget information for the form. For example, the Widgets tab in the Form Configuration dialog box for Editor lists all the slots for Editor with the currently selected widget type.

If a widget has been hidden by choosing <none> from the Widget Type menu, you can redisplay the widget by selecting a different widget type (under the Widgets tab in the Form Configuration dialog box).
The Layout Tab
The Layout tab displays the current layout information. You can use the Layout tab to choose a widget that will expand when the form expands as the Protege-Frames window is resized. This can be useful, for example, when you have a complex table widget that you wish to have take up most of the form. You can choose a widget that expands vertically and a widget that expands horizontally. If you wish, these can be the same widget.
Selecting <<none>> from the menu means that the widgets do not expand even if the form does. Selecting <<all>> from the menu means that each widget is resized an equal amount. The default is to have all widgets expand horizontally and none expand vertically.

Default Widget Types
The Form Editor displays a widget for each slot in the class. In the Instance Editor, these widgets are displayed as fields where users can enter the information for that slot. The possible display and options for the widget depend on the type of information that is included in the slot. For more information on the different types of slots and fields, see the Instances Table of Contents.
When Protege-Frames generates a default layout, it creates a default widget for each slot. These widgets are described below. Protege-Frames provides widgets for both Single and Multiple cardinality. For simplicity, only the Single cardinality is shown. For a description of the Multiple cardinality widget, see the topic for the corresponding field.
Note: These topics describe the default widgets only. You can select different formats for the widgets using the Widget Type menu.
| Value Type | Field Type | Default Widget |
|---|---|---|
|
CheckBoxWidget: a checkbox widget that is true when selected or false when blank
| ||
|
ClsFieldWidget: a display widget and buttons that allow the user to specify a class as the field value
| ||
|
FloatFieldWidget: an entry widget that verifies that the entered value is a valid decimal number
| ||
|
InstanceFieldWidget: a display widget and buttons that allow the user to specify an instance as the field value
| ||
|
IntegerFieldWidget: an entry widget that verifies that the entered value is a valid whole number
| ||
|
TextFieldWidget: an entry widget that verifies that the entered value is a valid string
| ||
|
ComboBoxWidget: a drop-down list that displays the Symbol's preset list of values
|
In addition to these widgets, Protege-Frames also provides a graph widget, which allows you to display relational information in the form of a diagram or graph.
Additional String Widgets
There are a number of additional widget types available for String widgets.
Single Cardinality String Widgets
The following widgets are available for a String field of Single cardinality. These widgets can be chosen by selecting a String widget at the Forms tab and then selecting the desired widget from the Widget Type menu:
YellowStickyWidget
Displays the string entry field as a yellow sticky note.

TextAreaWidget
Displays the entry field as a text area - useful for extensive strings.

UniqueStringWidget
Identical in appearance to the default TextStringWidget, but verifies that the entered string is a unique value, i.e., it is not the same value at any other instance.
URLWidget
Allows the user to enter and display a URL.
Entering a URL and pressing Enter/Return
or clicking Home (![]() )
loads the URL into the field.
Clicking View in Browser
(
)
loads the URL into the field.
Clicking View in Browser
(![]() )
opens the URL in the default browser.
)
opens the URL in the default browser.
ImageWidget
Allows the user to enter the path to an image. Pressing Enter/Return loads the image.

Multiple Cardinality String Widgets
The following widget is available for a String field of Multiple cardinality.
ResourceListWidget
Allows the user to enter a list of URLs; checks to see that the syntax of the entered string is a valid URL, but does not verify that the URL is available. See Using a ResourceListWidget for more information.

InstanceRowWidget and InstanceTableWidget
InstanceRowWidget is an optional widget for slots of type Instance with single cardinality (at most equal to 1). It shows all slot values for the instance. (The default widget, InstanceFieldWidget, only shows the name of the instance that is selected as the value of the slot.)

InstanceTableWidget is very similar to InstanceRowWidget, except that it is available for Instance slots with multiple cardinality (at most not specified or greater than 1). So, it can display multiple rows of information.

For information on how to customize the display of this widget, see Customizing an InstanceRow- or InstanceTableWidget.
ContainsWidget
ContainsWidget is an optional widget for slots of type Instance. The default widget, InstanceFieldWidget or InstanceListWidget, lists Instance(s) that are selected as the value of the slot. ContainsWidget actually contains a version of the form for each instance that is a value of the slot.
ContainsWidget is useful primarily for Class or Instance slots where the Class Editor for the Allowed Classes is fairly simple, and where the cardinality is single or small. For a widget that provides a summary of selected fields, see InstanceRowWidget or InstanceTableWidget.

For information on how to customize the display of a ContainsWidget, see Customizing a ContainsWidget.
DirectInstancesWidget
DirectInstancesWidget is an optional widget for slots of type Instance. Similar in appearance and operation to the default InstanceFieldWidget or InstanceListWidget, this widget only permits direct instances of the Allowed Classes as slot values.

Changing Global Characteristics
You can change global properties of a form, including the display slot and the layout.
Setting the Display Slot
The display slot identifies the different instances when they are displayed in a list. For example, the form for Prototype_Newspaper has the display slot set to weekday. This means that, in the Instance Browser, the different instances are listed by the value in the weekday field.
If you do not select a slot to use as a display slot, Protege-Frames uses a default key, <instance name>, such as newspaper_0017. It is usually helpful to set a display slot.
To set a display slot for a class:
In the Form Browser, at the left of the Forms tab, select the name of the class whose form you wish to edit.
Click the Display Slot menu. A list of slots will be displayed.
Select the slot you wish to use as a display slot.
You can also set multiple display slots and/or set the display slot at the Instances tab. See Setting the Display Slot for more information.
Selecting a Widget that Expands with the Form
You can choose a widget that will expand as the form expands whenever the Protege-Frames window is resized. This can be useful, for example, when you have a complex table widget that you wish to have take up most of the form. To do this:
Double-click anywhere on the background of the form, that is, on an area that does not contain a widget. The Form Configuration dialog box will be displayed.
Click on the Layout tab.
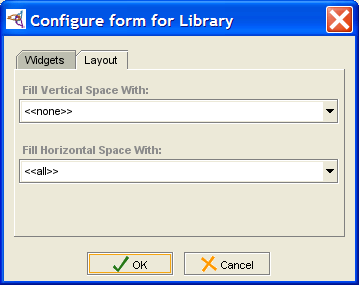 Form Configuration dialog, Layout tab
To select a widget that will take up most of the vertical room when the form expands, select the widget name from the Fill Vertical Space With: menu. Selecting <<all>> means each widget will expand equally.
To select a widget that will take up most of the horizontal room when the form expands, select the widget name from the Fill Horizontal Space With: menu. You can select the same widget or a different one. Selecting <<all>> means each widget will expand equally.
To reset the form so that no widget expands more than the others, make sure that <<all>> is selected in both menus.
Note: For additional tasks that change a form's appearance, such as resizing, moving, changing, or hiding a widget, see the Forms Table of Contents.
Moving or Resizing a Widget
Moving a Widget to a New Location
To move a widget on the form:
Click on the widget to select it. A blue boundary will appear around the border of the widget.
Click in the interior of the widget and hold down the mouse button.
Drag the widget to the desired location.
Resizing a Widget
You can easily make a widget smaller or larger by resizing it. To do this:
Click on the widget to select it. A border will appear around the selected widget.
Click and drag anywhere on the border to resize the widget. Many widgets can only be resized horizontally (narrower or wider). You can resize Multiple Cardinality widgets both horizontally and vertically.
Note: You can select a single widget that will take up most of the form when the Instance Editor is resized on the screen by end users. See Changing a Form's Layout for more information.
Note: To hide a widget so that it won't be displayed on the form, use the Widget Type menu. See Selecting a Widget Display for more information.
Changing Widget Configuration Properties
The Widget Configuration dialog box allows you to customize the label, buttons, and other properties of a selected widget. This dialog has a number of tabs, depending on the widget type. For some widgets, you can customize additional properties. See the specific topic for the widget for more information.
Changing General Properties
You can change the following properties at the General tab of the Configuration dialog box:
the widget label: Each widget has a label - a string of text displayed in the left-hand corner of the widget. The default layout uses a version of the slot name for the widget label, where underscores are replaced by blanks and the first letters of the resulting words are capitalized. When end users actually enter instances, they use the label to determine the type of information they should enter.
the widget tool tip: This is displayed as a pop-up when the user holds the cursor over the widget label.
To change the General properties of a widget:
Double-click directly on the widget. The Widget Configuration dialog box will be displayed. (Note: If the Form Configuration dialog box is displayed, you have accidentally double-clicked somewhere on the background of the form. Close the dialog box and double-click on the widget.)
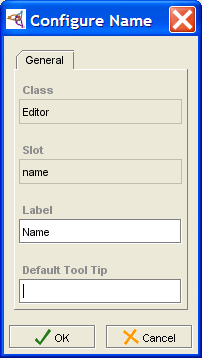 Widget Configuration dialog
Enter the label you want in the Label field of the Widget Configuration dialog box. You can use a multi-word phrase.
To create a tool tip, type the text you want in the Default Tool Tip field.
To implement your changes, click OK.
Choosing a Widget's Buttons
Some widgets (e.g., Class and Instance widgets, Multiple Cardinality widgets) have buttons displayed on their upper right corners. You can turn the display of these buttons on and off individually. To choose which buttons are displayed for a widget:
Double-click directly on the widget. The Widget Configuration dialog box will be displayed. (Note: If the Form Configuration dialog box is displayed, you have accidentally double-clicked somewhere on the background of the form. Close the dialog box and double-click on the widget.)
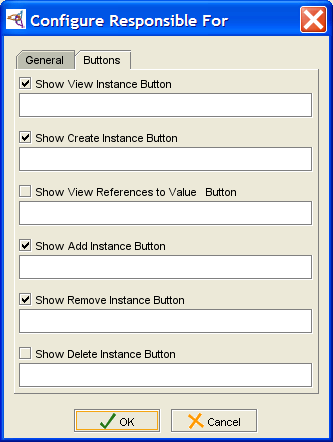 Widget Configuration dialog, Buttons tab
If the widget has buttons, there will be a Buttons tab in the Widget Configuration dialog box. Click this tab.
Select the buttons you want to display by making sure there is a check in the appropriate boxes.
Click OK.
Selecting a Widget Display
Some slot types have multiple widget configurations that can be selected from the Widget Type menu. For example, a String slot can have a number of different widgets, such as a TextFieldWidget, TextAreaWidget, a UniqueStringWidget, or a YellowStickyWidget. By experimenting with these widgets, you can learn how to use them to get the desired display.
|
|
| Various String Widgets |
You can also remove a widget from the form by hiding it completely.
Using the Selected Widget Type Menu
To select a different display for your widget from one of the available configurations:
In the Form Browser at the left of the Forms tab, select the name of the class whose form you wish to edit.
Click the widget you wish to edit in the Form Editor. The widget will be outlined.
Click the Selected Widget Type menu. A list of possible widget types will be displayed.
Select the type of widget that you wish to use.
If you do not select a widget type, Protege-Frames uses a default type, based on the value type of the slot.
Using the Configure Form Dialog Box
You can also select different widgets, using the Configure Form dialog box.
To change the widget type for the slot:
Double-click on an empty part of the form to display the Form Configuration dialog box.
Click on the widget name in the widget column. A menu will show the list of standard widget types for the slot.
Note: If the menu does not display, click on the down arrow at the right.
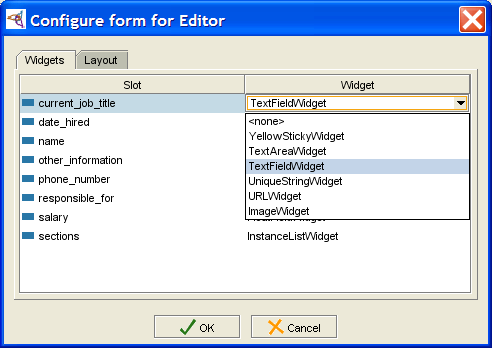 Configure Form dialog, with menu
Select the widget you want.
Click OK.

Hiding a Widget
In addition to selecting a different widget type, you can hide a widget completely, or redisplay a hidden widget.
Using the Selected Widget Type Menu
The Selected Widget Type menu, at the top right of the Form Editor, allows you to hide a widget:
Select the widget you wish to hide by clicking it once. The widget will be outlined.
Select <none> from the Selected Widget Type menu. The selected widget will be removed from the form.
Using the Configure Form Dialog Box
Double-click on an empty part of the form to display the Form Configuration dialog box.
Click on the widget name in the widget column. A menu will show the list of standard widget types for the slot.
Note: If the menu does not display, click on the down arrow at the right.
Configure Form dialog, widget menuSelect <none>.
Click OK.
Redisplaying a Hidden Widget
To redisplay a widget which is no longer visible on the form:
Double-click on an empty part of the form to display the Form Configuration dialog box.
Select the widget you want to redisplay by clicking on its name at the Widget tab.
Click on the text <none> under the Widget column.
Select a different display type for the widget.
Click OK.
Customizing an InstanceRowWidget or InstanceTableWidget
InstanceRowWidget (Single Cardinality) and InstanceTableWidget (Multiple Cardinality) show all the slot values for any instance that is a value of the slot.
You can perform the standard customizations:
Change the widget type of an Instance field to an InstanceRowWidget or InstanceTableWidget using the Widget Type menu.
Resize or move the widget using click and drag.
Change General properties and/or select Action Buttons, using the Configure Widget dialog box; see Changing Widget Configuration Properties for more information.
The Configure Widget dialog box for an InstanceRowWidget or InstanceTableWidget has the following additional customizations: Defining Columns, New Instances, In-place editing characteristics, Warnings and Suggestions.
Defining Columns
You can choose which slots to show in the widget and/or change the order in which they appear using the Define columns of instance table tab. Although the current implementation does not allow you to change the order directly by dragging, you can reorder the slots by first removing them from the widget, and then adding them back in the order in which you wish them to appear.
To add or remove slots, change their order, or change the name under which they are displayed:
Double-click on the widget to open the Configure Widget dialog box.
Click the Define columns of instance table tab.
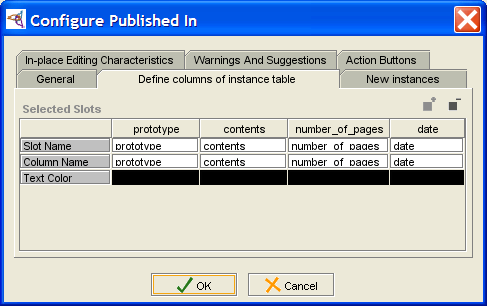 Configure Widget dialog, Define columns of instance table tab
To make any modifications, you must click in the Column Name of the slot you wish to modify. (The top row, Slot Name, is a property of the slot and cannot be modified.)
To remove a column, click in its Column Name and click the Remove the currently selected column (
) button.
To rename a column, edit the text in Column Name.
To add a column, click the Add one or more slots to the list of columns (
) button.
The column will be added after all the existing columns.
To reorder columns, remove all the columns except the one you want to appear first, then add the other columns. For instance, to make date appear first in the example, you would delete the prototype, contents, and number_of_pages columns, then add any columns you wanted back in.

New Instances
If you are allowing end-users to create new instances from this field,
you can control various aspects of new instance creation.
If you do not want users to be able to create instances,
disable the Create Instance
(![]() ) button
using the Buttons tab.
) button
using the Buttons tab.
Double-click on the widget to open the Configure Widget dialog box.
Click the New instances tab.
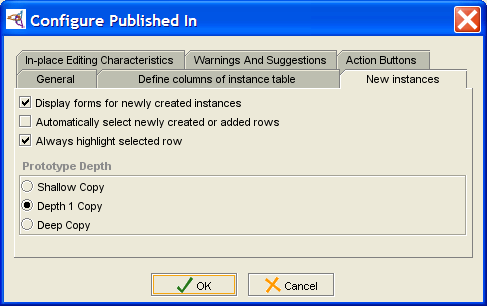 Configure Widget dialog, New instances tab
Select the basic options you want:
Display forms for newly-created instances: When enabled, the Instance Editor is automatically displayed whenever the end-user creates a new instance. This allows the user to define the properties of the instance immediately. If this option is disabled, you may want to enable Use in place editing at the In-place Editing Characteristics tab.
Note: Users can still edit the instance by clicking the View Instance (
 ) button.
Automatically select newly created or added rows: When this option is enabled, the row corresponding to the new instance is automatically selected; again, this is useful if you allow in-place editing.
Always highlight selected row: This option is self-explanatory.
Select the Prototype Depth to control how the values in this field are copied if the instance that contains this field is copied:
Shallow Copy: If the containing instance is copied, the copy has the same instance(s) as values for this field that the original does.
Depth 1 Copy: If the containing instance is copied, the value(s) of this field will be shallow copies of the original instances in this field. For example, if this field contains three instances and the containing instance is copied, the new instance will have three new instances at this field; they will be identical to the previous instances except for the name.
Deep Copy: New instances are created for each instance in the field and for any additional referenced instances. See What is a Deep Copy? for more information.

In-Place Editing Characteristics
Double-click on the widget to open the Configure Widget dialog box.
Click the In-place Editing Characteristics tab.
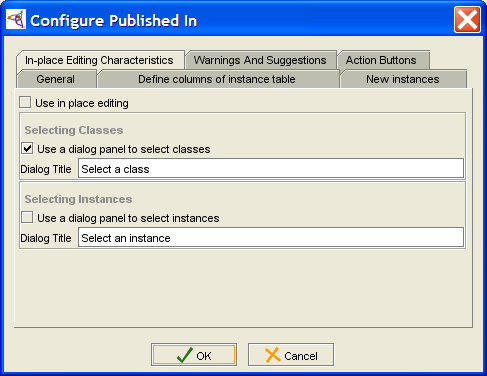 Configure Widget dialog, In-place Editing Characteristics tab
Select the options you want:
Use in place editing: This allows the user to edit a value directly in the instance table.
Use a dialog panel to select classes: If the instance values of the field have fields of type Class, enabling this means that double-clicking in the field displays a menu which allows the user to select a class.
Use a dialog panel to select instances: If the instance values of the field have fields of type Instance, enabling this means that double-clicking in the field displays a menu which allows the user to select a class. You may want to enable this if Display forms for newly-created instances is disabled at the New Instances tab.

Example: using the dialog panel to select instances
If Use a dialog panel to select instances is enabled, then the user can select an instance as follows:
Double-click in the instance field. A menu is displayed:
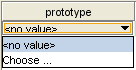 instance selection menu
Select Choose... to open the Select Instance dialog box.
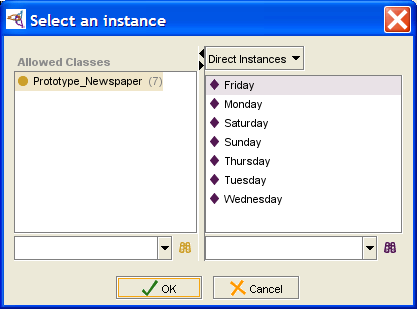 Select Instance dialog
Select the class and instance you want and click OK.


If the field already contains a value, the user can change it in the same manner:
Double-click in the instance field. A menu is displayed:
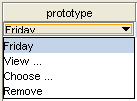 field selection menu
Select Choose... to open the Select Instance dialog box. You can also choose View... to display the Instance Editor for this instance, or Remove to clear the field.
Select the class and instance you want and click OK.

Warnings and Suggestions
You can check the configuration of the widget at the Warnings and Suggestions tab.

Customizing a ContainsWidget
ContainsWidget is an optional widget for slots of type Instance. It contains a version of the Instance Editor for each value of the slot. ContainsWidget is useful primarily for Instance slots where the Editor for the Allowed Classes is fairly simple, and where the cardinality is single or small.
For a widget that provides a summary of selected fields, see InstanceRowWidget or InstanceTableWidget.
You can perform the standard customizations:
Change the widget type of an Instance field to ContainsWidget, using the Widget Type menu.
Resize or move the widget, using click and drag.
Change General properties and/or select Action Buttons, using the corresponding tab in the Configure Widget dialog box; see Changing Widget Configuration Properties for more information.
The Configure Widget dialog box for a ContainsWidget has the following additional customizations: Appearance, Instance Creation, and Summary Panel.
Appearance
The Appearance tab allows you to control how the "subwidgets", or Instance Editors, are displayed:
Double-click on the widget to open the Configure Widget dialog box.
Click the Appearance tab.
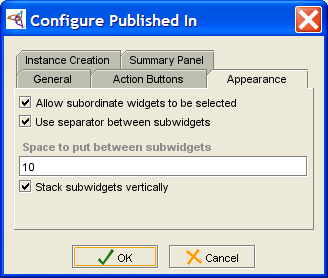 Configure Widget dialog, Appearance tab
Select the options you want:
Allow subordinate widgets to be selected: allows the user to select and edit the Instance Editor(s) directly inside the widget.
Use separator between subwidgets: places a horizontal line between subwidgets.
Space to put between subwidgets: specifies the spacing, in points.
Stack subwidgets vertically: chooses between a vertical or horizontal display for the subwidgets.

Instance Creation
If you are allowing end-users to create new instances from this field,
you can control various aspects.
If you do not want users to create instances, disable the Create Instance
(![]() ) button,
using the Action Buttons tab.
) button,
using the Action Buttons tab.
Double-click on the widget to open the Configure Widget dialog box.
Click the Instance Creation tab.
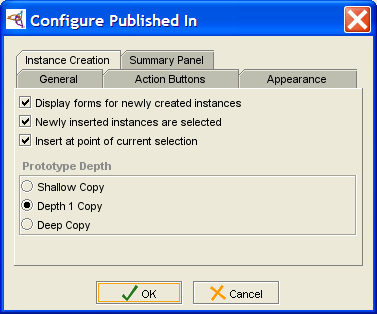 Configure Widget dialog, Instance Creation tab
Select the basic options you want:
Display forms for newly-created instances: When enabled, the Instance Editor is automatically displayed whenever the end-user creates a new instance. This allows the user to define the properties of the instance.
Newly inserted instances are selected: When this option is enabled, the form corresponding to the new instance is automatically selected.
Insert at point of current selection: This option is self-explanatory.
Select the Prototype Depth to control how the values in this field are copied if the instance that contains this field is copied:
Shallow Copy: if the containing instance is copied, the copy has the same instance(s) as values for this field that the original does.
Depth 1 Copy: If the containing instance is copied, the value(s) of this field will be shallow copies of the original instances in this field. For example, if this field contains three instances and the containing instance is copied, the new instance will have three new instances at this field; they will be identical to the previous instances, except for the name.
Deep Copy: New instances are created for each instance in the field and for any additional referenced instances. See What is a Deep Copy? for more information.

Summary Panel
The Summary Panel is shown at the top of the widget.
Double-click on the widget to open the Configure Widget dialog box.
Click the Summary Panel tab.
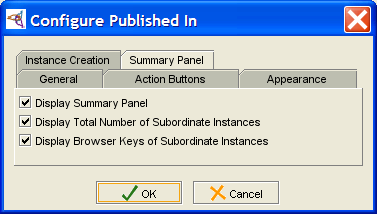 Configure Widget dialog, Summary Panel tab
Select the options you want:
Display Summary Panel: displays or hides the summary panel
Display Total Number of Subordinate Instances: gives the number of instances in the field.
Display Browser Keys of Subordinate Instances: in the current version, this has no effect.

Using a ResourceListWidget
ResourceListWidget is an optional widget for slots of type String with multiple Cardinality. It is similar in appearance and operation to the default StringListWidget, but allows the end-user to enter a list of URIs. Basic syntax checking is performed on each entered URI, but does not verify that the URI can be accessed.
To enter a value in a ResourceList field at the Instances tab:
Click the Add Value (
) button.
A dialog box will appear, prompting you to enter a URI as a value.
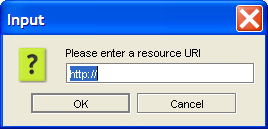 Resource List dialog
If the string is not a URI, an error message will be displayed:
 Invalid URI dialog
If the string appears to be a URI, the string will be added to the resource list.


You can also view/edit a resource
by highlighting it and selecting the View Value
(![]() ) button,
or delete a resource by highlighting it and clicking the Delete Value
(
) button,
or delete a resource by highlighting it and clicking the Delete Value
(![]() ) button.
) button.
Additional Widget Types
When Protege-Frames generates a default layout, it creates a default widget for each slot. However, the Widget Type menu allows you to to change the widget type for the currently selected widget. The choices for type of widget depend on the value type of the slot. Some value types have only one possible widget.
The following additional widget types are available:
InstanceRowWidget or InstanceTableWidget, which allow you to see a summary of all the slots of an Instance value
ContainsWidget, which displays the Instance or Class Editor for single or multiple Instance or Class values
DirectInstancesWidget, which restricts the values of an Instances field to direct instances of the Allowed Classes.
You can also change a Boolean field from a CheckBoxWidget to a ComboBoxWidget.
In addition, the graph widget is available for some fields.
Note: You may see additional widgets on the Selected Widget Type menu. Not all of these widgets are currently working correctly; we do not recommend the use of widgets other than the ones listed here unless they are part of a plug-in.
To change a widget, first select the widget you want to change, then select the new widget type from the Widget Type menu.
Instances
This section of the User's Guide covers the concepts of understanding, creating, and using Protege-Frames instances.
Note: Before you create and use classes, you should be confident with the basic Protege-Frames interface. You should also be comfortable with Protege-Frames projects, project types, windows, classes, slots, and forms.
To return to the main table of contents, click the Protege-Frames User's Guide link (located at the top of the table of contents on the right-hand side of this page).
The Instances Tab
The Instances tab provides a window in which you may view, create, and edit instances. (Classes model concepts in your domain, slots model properties of classes and any relationships between them, and instances model the actual data.)
An example of the Instances tab is shown below. The window consists of three panes:
The Class Browser, at the left, shows the classes in a superclass/subclass relationship. The Instances tab lets you view classes, but you cannot edit or rearrange them. See the Classes tab for information about working with classes.
The Instance Browser, in the center, shows all of the direct instances, if any, for the selected class. It allows you to view, edit, create, and delete direct instances.
When a single instance is selected, the Instance Editor for the selected instance is displayed to the right. The Instance Editor displays all the slots which apply to the instance, and allows you to edit them. The Instance Editor can also be displayed as a separate window by clicking the View Instance (
) button
in the Instance Browser
or anywhere else it appears.
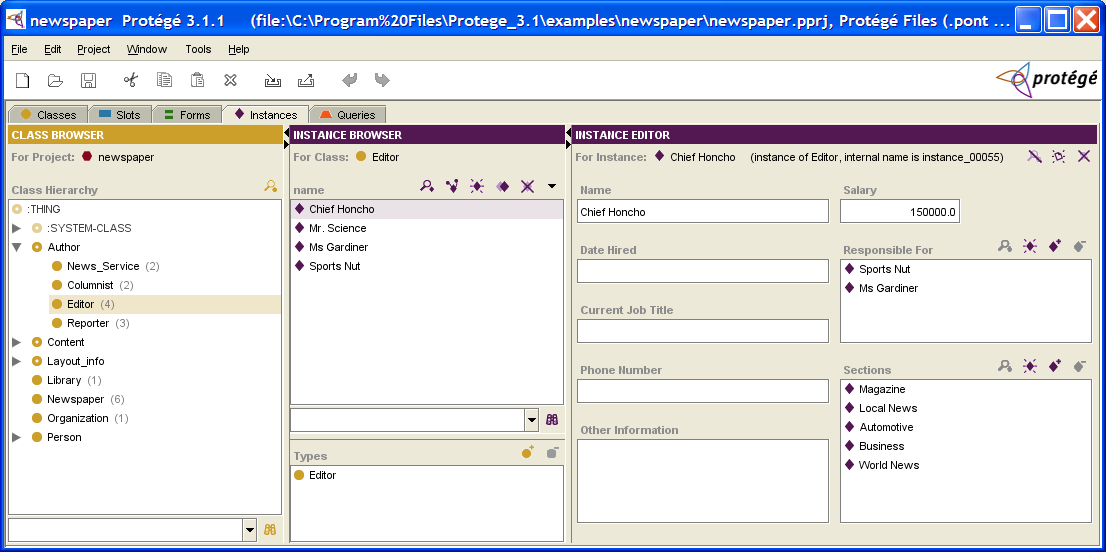
The Class Browser at the Instances Tab
The Class Browser at the Instances tab shows the classes in your knowledge base in a superclass/subclass relationship. When a class with instances is selected, its instances are shown in the Instance Browser to the right. By navigating through the classes, you can select the class whose instances you wish to see.

Parenthesized numbers to the right of a class give information about the number of direct instances that class has. For example, Editor has four instances. If no number is displayed, the class does not have any instances.
This window is similar to the standard Class Browser, but you cannot change the hierarchy or add or delete classes. Therefore, there are a number of options that are not available at the Instances tab.
Note: You can choose to have Protege-Frames always highlight the class that is currently selected in the Classes tab. To do this, select Windows | Automatically Synchronize Class Trees. See Synchronizing Class Trees for more information.
The Instance Browser
The Instance Browser shows all the instances, if any, for the class selected in the Class Browser at the Instances tab. It also allows you to view, edit, create, and delete instances. If the class you want is not currently displayed, you may need to navigate to it via the class hierarchy.
Note: To ensure that the class is the same as the last class selected at the Classes tab, you can synchronize class trees.
A direct instance is an instance that has been created directly under the class. However, because of inheritance, an instance of a class is also an instance of all that class's superclasses. Therefore, an instance can be an instance of many classes of which it is not a direct instance.
This pane has the following components:
The Instance buttons allow you to edit, view references to, create, copy, and delete instances.
The Instance menu allows you to control the text that is displayed in the Instance window.
The Instances window displays an alphabetical list of the instances for the selected class.
The Instance search bar allows you to find an instance in the Instance Browser, by typing the instance name and clicking the Search for Instance (
 ) button.
The Types pane allows you to assign a single instance to multiple classes.
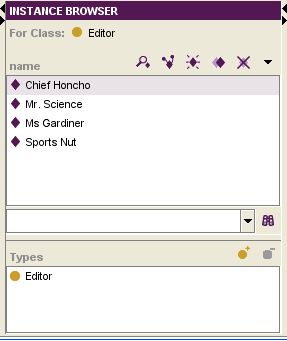
The Instances Window
When a single class is selected in the Class Browser at the Instances tab, the Instances window shows all of the instances belonging to that class.

The Instances window shows the following information:
Instances are displayed by the text in the display slot, which is the slot that has been designated as the identifying slot for the class. If no display slot has been selected, Protege-Frames uses a default display slot, <instance name>, which is displayed as a number, such as newspaper_0017. See The Display Slot menu for more information.
When a single instance is selected, the information for that instance is shown in the Instance Editor, to the right.
When Show Subclass Instances is selected from the Instance menu, all instances (not just direct instances) are shown for the selected class; the class where the instance was created is shown in parentheses, to the right of the instance name.
The color of the icon to the left of the instance name gives information about the instance:
|
|
The instance can be edited.
You can enter your edits directly to the right,
or click the View Instance
( |
|
|
The instance cannot be edited. Instances cannot be edited if they are included from another project. See Including a Project for more information. |
The Instance Buttons
The Instance buttons, located at the top right of the Instance Browser, allow you to view/edit, view references to, create, copy, or delete an instance. Note that these icons have a similar action wherever they appear.
The buttons have the following actions:
|
|
View Instance: Opens the Instance Editor for the highlighted instance. See Displaying an Instance. |
|
|
View References to Instance: Shows all the objects that reference the highlighted instance. See Viewing References. |
|
|
Create Instance: Creates a new instance for the class highlighted in the Class Browser at the Instances tab. See Creating an Instance Directly. |
|
|
Copy Instance: Copies the selected instance. See Copying an Instance. |
|
|
Delete Instance button: Deletes the highlighted instance. See Deleting an Instance. |
If the View Instance or Delete Instance button is grayed out, this indicates that the current instance cannot be edited or deleted. Such an instance always has a pale icon to its left. Instances cannot be edited if they are included from another project.
If the Create Instance button is grayed out,
no instances can be created for the class selected
in the Class Browser.
This is the case if the class is
abstract,
shown by a class icon with a hole
(e.g., ![]() ,
,
![]() ).
).
Additional Buttons
The buttons above have the same operation wherever they appear. Additional buttons in the Protege-Frames interface allow you to add and remove the instances specified for a relationship.
|
|
Add Instance: Displays a dialog box that allows you to select one or more existing instances. |
|
|
Remove Instance: Removes the instance from the current relationship without deleting it from the knowledge base. |
The Instance Menu
The Instance menu is located to the right of the Instance buttons, at the top of the Instance Browser.

The Instance menu allows you to control the display of instances in the Instance window:
Set the Display Slot: selects which slot(s) are used to list instances in the Instance Browser.
Show Subclass Instances: when selected (shown with a check), all instances subordinate to a class (including instances of subclasses) will be shown in the Instance window. When deselected (as above), only direct instances are shown.
The Types Pane
The Types pane in the Instance Browser allows you to add and remove class types for an instance, that is, the classes for which the selected instance is a direct instance. A multi-type instance is shown in the Instance Browser whenever one of its class types is selected.

Multi-type Instances
Assigning multiple types to an instance allows you to build an instance which combines the field characteristics from two or more classes. For a multi-type instance, the Instance Editor for an instance shows a separate entry form for each class type; these forms can be shown one above the other in the same window or they can be shown in individual tabs. If two or more classes share a slot, the value entered in a shared field is the same for all class forms.
Type Buttons
|
|
Add Class: Displays a dialog box that allows you to select one or more additional class types. |
|
|
Remove Class: Removes the direct instance relationship between the instance and the class. If the instance has only one class type, the relationship cannot be removed. |
See Working with Instance Types for more information.
The Instance Editor
The Instance Editor can be used to define and edit the slot attributes of the instance selected in the Instance Browser. If a single class is selected in the
Class Browser at the Instances tab,
the Instance Editor is displayed at the right of the Instances tab. To ensure that the class is the same one that was selected at the Classes tab, you can synchronize class trees.
The Instance Editor is also displayed separately in a free-standing window
whenever you click on the View Instance
(![]() ) button
in the Instance Browser
or anywhere else it appears.
) button
in the Instance Browser
or anywhere else it appears.
Protege-Frames automatically creates an initial layout of the Instance Editor for you, based on the slots and slot types of the class. You can customize the Instance Editor for a class, using the Forms tab.
Whenever you enter changes into the Instance Editor, they take effect immediately. To save the changes to disk, select Save from the Project menu.

Note Icons
The note icons
(![]() ,
,
![]() ,
,
![]() )
at the upper right of the form,
allow you to hide, add, and remove yellow sticky notes.
The note, which is not part of your knowledge base,
is always displayed when the instance is selected at the Instance tab.
For information on how to add notes to any frame
(class, instance, or slot),
see Working with Notes.
)
at the upper right of the form,
allow you to hide, add, and remove yellow sticky notes.
The note, which is not part of your knowledge base,
is always displayed when the instance is selected at the Instance tab.
For information on how to add notes to any frame
(class, instance, or slot),
see Working with Notes.
Entry Fields
For each slot in the instance, the Instance Editor displays a field where you can enter the information for that slot. The different field types are based on the value type of the corresponding slot. For example, a slot of value type String is represented by a String entry field. The display and options for the field depend on the type of information that is included in the field. See The Standard fields, as well as the individual topics for the various field types, for more information.
The Standard Field Types
Template slots for a class are translated to entry fields for an instance of that class. For each slot in the class, the Instance Editor displays a field where a user can enter information corresponding to that slot. For example, the headline slot for the Article class becomes a field where the user can enter a headline for an instance. The display and options for the field depend on the type of information that can be entered in the field.
The different field types are based on the value type of the corresponding slot. For example, a slot of value type String is represented by a String entry field.
Note: These topics describe the default fields only. You can select different formats for some fields, using the Forms tab.
Protege-Frames provides the following fields for both Single and Multiple cardinality. For simplicity, only the Single cardinality is shown:
| Field Type | Default Field |
|---|---|
|
a checkbox field that is true or false
| |
|
a display field and buttons that allow you to specify a class as the field value
| |
|
an entry field that verifies that the entered value is a valid decimal number
| |
|
a display field and buttons that allow you to create or specify an instance as the field value
| |
|
an entry field that verifies that the entered value is a valid whole number
| |
|
an entry field that verifies that the entered value is a valid string
| |
|
a drop-down list that displays the Symbol's preset list of values
|
Fields with Multiple Cardinality
If the slot corresponding to a field has Multiple Cardinality, then the field allows multiple entries. How the information is entered and displayed depends on the field type.
For Boolean, Float, Integer, String, and Symbol entry fields, the field is shown as a display list with three field buttons at the top right:

For these fields, the field buttons do the following:
|
|
View Value: Opens an entry box for any highlighted value(s) and allows you to make changes. |
|
|
Create Value or Add Value: Opens an entry box for a new value and allows you to edit it. |
|
|
Remove Value: Removes any highlighted value(s). |
For Boolean fields, viewing or creating a value displays a dialog box with a drop-down menu containing two choices: true or false. Select one and click OK.
For Float,
Integer,
String,
and Symbol entry fields,
viewing (![]() )
or creating/adding (
)
or creating/adding (![]() ) a value
displays a dialog box where you can type.
Enter a valid value in the dialog box and click OK.
Removing (
) a value
displays a dialog box where you can type.
Enter a valid value in the dialog box and click OK.
Removing (![]() )
removes the highlighted value.
)
removes the highlighted value.
For Class
and Instance entry fields,
single and multiple cardinality fields have the same buttons
and the same methods for viewing
(![]() ,
,
![]() ),
creating (
),
creating (![]() -
Instance only),
adding (
-
Instance only),
adding (![]() ,
,
![]() ),
and removing (
),
and removing (![]() ,
,
![]() ) values.
The only difference is that multiple values can be stored in the field.
) values.
The only difference is that multiple values can be stored in the field.
The Boolean Fields
When an instance is created for a class with a slot of Boolean value type, the entry field corresponding to the slot is a Boolean field, and contains a value which is either true or false.
Single Cardinality
An instance with a Boolean field with Single cardinality displays as a checkbox. To set or change the value for a Boolean/single slot, click in the box to add or remove the checkmark.
For example, the Personals_Ad class contains the Boolean slot Urgent; the Silly instance of Personals_Ad is not Urgent, while the M137 instance is:
|
Boolean (unchecked) |
Boolean (checked) |
The Class Fields
When an instance is created for a class with a slot of Class value type, the entry field corresponding to the slot is a Class entry field, and contains values which are descendants of the classes specified as allowed superclasses for the slot. For an example, see the Class Value Type topic.
Single Cardinality
The entry field corresponding to a slot of value type Class with Cardinality Single can contain a single class. It appears as a display bar; three standard class buttons let you edit, add, or remove a class:

Multiple Cardinality
An instance with a Class field with Cardinality Multiple shows a display list. The value of this field is a list of classes:

Note the following:
To select multiple classes to view or remove, use the CTRL (Cmd) key; use the Shift key to select a range.
Adding a class does not replace a previous one.
If the at most value is set in the Cardinality field for the slot, there is a limit on the number of classes you can enter.
Adding a Class
To select a class as the value of the slot, or to change the existing value:
Click the Add Class (
) button.
A Select Classes dialog box will be displayed.
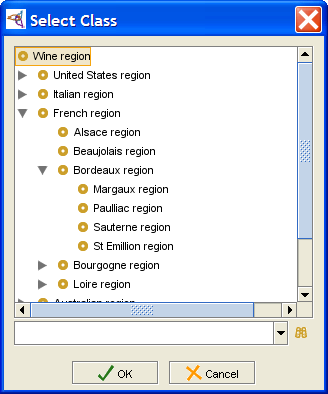 Select Classes dialog, "Wine region" selected
Select a single class as the value of the slot.
Click OK.
The class you selected will be shown in the display bar. If another class was displayed previously, it will be gone now.
Removing a Class
To remove a class:
Click the Remove Class (
) button.
The display bar will be cleared.
The Float Fields
When an instance is created for a class with a slot of Value Type Float, the entry field corresponding to the slot is a Float entry field, and takes numbers as values. These numbers may include a decimal point. Values of type Float are stored on your system as floating-point values, and are only as accurate as your system allows.
Entering Floating-Point Numbers
When entering a Float value for an instance, you can use decimal point or exponential representation. You can enter positive and negative values. For example:
| Representation | Description |
|---|---|
|
1234.56 |
Standard decimal notation. |
|
1.23456E3 or 1.2345e3 |
Exponential notation; the example is shorthand for 1.23456 · 103. Represents 1234.56 |
|
-1234.56 |
Negative number. |
|
1.23456E-3 or 1.2345e-3 |
Exponential notation with a negative exponent, shorthand for 1.23456 · 10-3. Represents 0.00123456. |
For convenience in typing, when using exponential notation, you can enter either e or E.
Single Cardinality
The entry field corresponding to a slot of value type Float with Cardinality Single can contain a single floating-point number. It appears as an entry bar:
To set or edit the value, simply click in the entry field and make your edits.
To clear the slot, delete the value in the entry bar.
Invalid entry in a Float field
If you enter text or other invalid information (e.g., values less than the minimum or greater than the maximum) in a Float entry field, the entered information will be displayed in red and will not saved by the system. The previous value (if any) will be used, instead.
Multiple Cardinality
An instance with a Float/Multiple slot shows a display list with three buttons. This field contains a list of floating-point values. If the at most value is set in the Cardinality field for the slot, there is a limit on the number of values you can enter.
To edit a pre-existing value for a Float/Multiple slot:
Select the value you want to edit.
Click the View Value (
) button.
An Edit Float Value dialog box will be displayed.
Edit the number directly in the dialog box.
Click OK.
To add a value to a Float/Multiple slot:
Click the Create Value (
) button.
A Create Float Value dialog box will be displayed.
Enter the number you want in the entry bar. The number may include a decimal point.
Click OK.
To remove a value from a Float/Multiple slot:
Select the value(s) you want to remove. You can select multiple values by holding down the Ctrl (Cmd) key.
Click the Remove Value (
) button.
The selected values will be removed.
The Instance Fields
When an instance is created for a class with a slot of Value Type Instance, the entry field corresponding to the slot is an Instance entry field. It contains values which are direct or indirect instances of the classes specified as allowed classes for the slot. (Direct instances are instances of the class; indirect instances are instances of a class subordinate to the class, e.g., a subclass.)
Single Cardinality
An instance with an Instance/Single slot shows a display field and four buttons that let you edit, create, add, and remove instances. The value of this slot is a single instance:
Multiple Cardinality
An instance with an Instance/Multiple slot shows a display list. The value of this slot is a list of instances:

Note the following for fields of multiple cardinality:
To select multiple instances to view or remove, use Ctrl (Cmd); use Shift to select a range.
Adding an instance does not replace a previous one.
If the at most value is set in the Cardinality field for the slot, there is a limit on the number of instances you can enter.
Editing an Instance
To edit an existing instance:
Click the View Instance (
) button
to open the Instance Editor
for the instance that is displayed or selected.
If no instance is currently displayed,
the View Instance button will be grayed out.
Enter the updated information directly in the Instance Editor.
Note that any edits you make to this instance will appear in all locations where this instance occurs. You should be sure that you want the change to be global before editing an existing instance. In some cases, it may be more appropriate to create a new instance, instead.
Creating an Instance
To create a new instance:
Click the Create Instance (
 ) button.
If there is more than one allowed class, or if the allowed class has subclasses, a dialog box will appear, asking you to select a Concrete class, displayed with a solid icon (
 ).
Select a class and click OK.
).
Select a class and click OK.
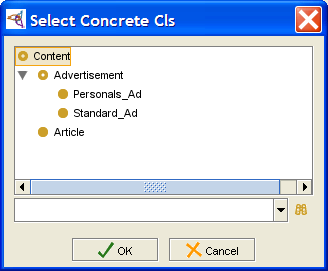 Select Concrete Cls dialog, "Content" selected
A direct instance of the selected class will be created and a blank Instance Editor will be displayed. Fill in the editor for the new instance, as desired.

Adding an Instance
To add an existing instance to the value of the field:
Click the Add Instance (
 ) button.
A Select Instance dialog box will be displayed.
) button.
A Select Instance dialog box will be displayed.
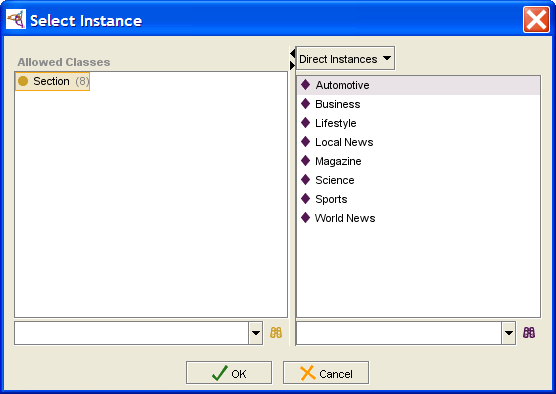 Select Instance dialog, "Section" selected
In the Allowed Classes pane, select the class where the instance you want is located.
If the class has subclasses, use the menu at the top of the Instances pane to choose the instances you want to see:
Direct Instances limits the display to direct instances of the class
All Instances displays the instances of the class and all of its descendants (subclasses, subsubclasses, etc.)
Select a single instance.
Click OK. The instance you selected will be displayed. If another instance was displayed previously, it will now be gone.

This selects a pre-existing instance as the value of the field. This instance can also be viewed in the Instance Browser and may also appear as a value for other instances. Note that any edits you make to this instance will appear in all locations where this instance occurs. You should be sure that you want the change to be global before editing an existing instance. In some cases, it may be more appropriate to create a new instance instead.
Removing an Instance
To remove an instance:
Click the Remove Instance (
 ) button.
The instance will be removed.
) button.
The instance will be removed.
This removes the instance as a value of the current field,
but does not remove it from the project.
The instance can still be viewed
via the Instance Browser
for the correct class,
and still appears in any other field where it has been selected.
To delete
an instance from the knowledge base,
use the Delete Instance
(![]() ) button
in the Instance Browser.
) button
in the Instance Browser.
The Integer Fields
When an instance is created for a class with a slot of Value Type Integer, the entry field corresponding to the slot is an Integer entry field, taking whole numbers as values.
Single Cardinality
The entry field corresponding to a slot of value type Integer with Cardinality Single can contain a single integer number. It appears as an entry bar:
To edit a value, click in the entry field and make your edits.
To create a value, enter a whole number in the entry field.
To clear a value, delete the value in the entry field.
Error Detection
The information in a Integer field must be a whole number. If you enter text or other invalid information, such as values less than the minimum or greater than the maximum, the entered value will be displayed in red and will not be saved by the system. The previous value (if any) will be used instead. The following example shows such an invalid entry ("four") in an Integer field:
Multiple Cardinality
The entry field corresponding to a slot of type Integer with Cardinality Multiple shows a display list with three buttons. This field takes a list of integer values. If the at most value is set in the Cardinality field for the slot, there is a limit on the number of values you can enter.

To edit a pre-existing value:
Select the value you want to edit.
Click the View Value (
) button.
An Edit Integer Value dialog box will be displayed.
Edit the number directly in the dialog box.
Click OK.
To add a value:
Click the Create Value (
) button.
A Create Integer Value dialog box will be displayed.
Enter a whole number in the entry bar. You can enter positive or negative values.
Click OK.
To remove a value:
Select the value(s) you want to remove. You can select multiple values by holding down the Ctrl (Cmd) key.
Click the Remove Value (
) button.
The selected values will be removed.
The String Fields
When an instance is created for a class with a slot of String Value Type, the entry field corresponding to the slot is a String entry field. It takes ASCII characters as values, including upper and lowercase letters, numbers, and the basic symbols on the keyboard, such as !, _, and %. String values can also include spaces.
Single Cardinality
The entry field corresponding to a slot of value type String with Cardinality Single can contain a single ASCII string. It appears as an entry bar:
To edit a value, click in the entry field and make your edits.
To create a value, enter a string in the entry field.
To clear a value, delete the value in the entry field.
Multiple Cardinality
The entry field corresponding to a slot of type String with Cardinality Multiple shows a display list with three buttons. This field takes a list of string values. If the at most value is set in the Cardinality field for the slot, there is a limit on the number of values you can enter.

To edit a pre-existing value:
Select the value you want to edit.
Click the View Value (
) button.
An Edit String Value dialog box will be displayed.
Edit the string directly in the entry field in the dialog box.
Click OK.
To create a value:
Click the Create Value (
) button.
A Create String Value dialog box will be displayed.
Enter a string in the entry field. You can enter ASCII characters, including upper and lowercase letters, numbers, and the basic symbols on the keyboard, such as !, _, and %. String values can also include spaces.
Click OK.
To remove a value:
Select the value(s) you want to remove.
Click the Remove Value (
) button.
The selected values will be removed.
The Symbol Fields
When an instance is created for a class with a slot of Value Type Symbol, the entry field corresponding to the slot is a Symbol entry field. It takes values from the list of symbols created for the slot.
Single Cardinality
The entry field corresponding to a slot of value type Symbol with Cardinality Single can contain a single value. It appears as a drop-down list:

To create the value of the slot, click on the list and double-click to select your choice.
To change the value of the slot, make a different choice from the list.
To remove the value of the slot, select the blank value at the top of the list.
Multiple Cardinality
The entry field corresponding to a slot of value type Symbol with Cardinality Multiple shows a display list with three buttons. This field takes a list of symbol values. If the at most value is set in the Cardinality field for the slot, there is a limit on the number of values you can enter.

To edit a pre-existing value:
Select the value you want to edit.
Click the View Value (
) button.
An Edit Symbol dialog box will be displayed.
Select the value from the menu.
Click OK.
To add a value:
Click the Create Value (
) button.
A Create Symbol dialog box will be displayed.
Select the value from the menu.
Click OK.
To remove a value:
Select the value(s) you want to remove. You can select multiple values by holding down the Ctrl key.
Click the Remove Value (
) button.
The selected values will be removed.
Creating an Instance
Creating instances is part of the iterative process of developing a Protege-Frames project. Before you create instances, you need to have created and organized the classes and slots that model your knowledge base structure.
Creating instances can give you valuable information about the project structure and its applicability. As you add instances to your project, you may expose missing or redundant areas which tell you that you need to redesign some of the class/slot structure. However, as you move classes and create and delete slots, you may lose information in your instances. In addition, it is difficult to split a single instance into two or more instances. Therefore, you should not add an extensive base of instances until you believe the structure of your project is fairly stable.
This topic describes creating an instance from the Instance Browser, which creates the instance directly in the selected class. The following additional topics describe other ways to create an instance:
See the Instance fields for how to create an instance using the Create Instance (
) button
in an instance field.
See Creating Multiple Instances for how to create several instances at once, using the wizard on the Tools menu.
See Copying an Instance for how to copy an instance, using the Copy Instance (
 ) button.
To create a new instance from the Instance Browser:
Display the Instances tab.
In the Class Browser, highlight the class where you want the instance to appear.
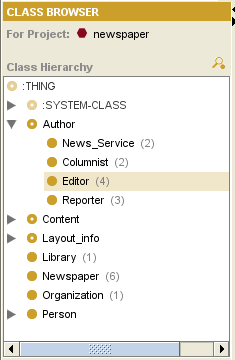 Class Browser, "Editor" selected
Click the Create Instance (
)
button at the right
of the Instance Browser.
The new instance will appear in the Instance Browser.
It will have a default name, such as project_instance_1.
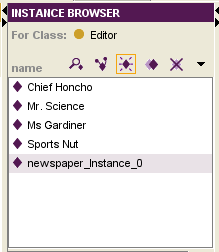 Instance Browser, "newspaper_Instance_0" selected
The Instance Editor at the right will display entry fields corresponding to the slots of the class where the instance was created. To create values for the fields, enter the desired information. For more information on how to edit field values, see the Standard fields.


Creating Multiple Instances
Protege-Frames supplies a wizard that lets you quickly create multiple direct instances of a selected class.
Select Tools | Wizards and select Create multiple instances from the submenu. The wizard will display the class hierarchy of your project:
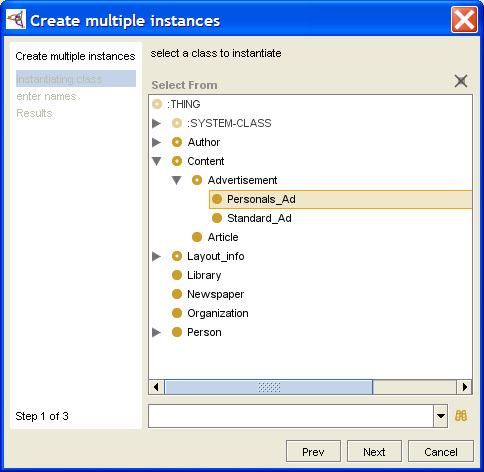 Create multiple instances dialog, "Personals_Ad" selected
Select the class for which you want to create instances and click Next. The wizard will show the instance entry screen:
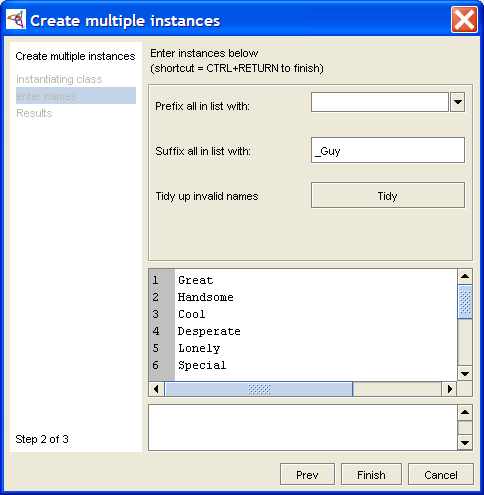 Create multiple instances dialog with instance entry screen
Set your options:
To have all instances you create begin the same way, enter an optional prefix.
To have all instances you create end the same way, enter an optional suffix.
Enter your instance names:
Type the name of a instance, then press Enter/Return to begin entering a second instance.
You can edit or delete the name of any instance you have already entered by moving the cursor to that name. You can also cut and paste text within and between instance names.
If you enter an invalid character (e.g., /) in an instance name, the name will be highlighted in red. You can edit the instance name from the keyboard, or you can click Tidy to have Protege automatically substitute an underscore (_) for each invalid character.
Click Finish or type Ctrl-Enter (Cmd-Enter). The wizard will display a list of instances that have been added. This is informational only: you cannot cancel at this point.
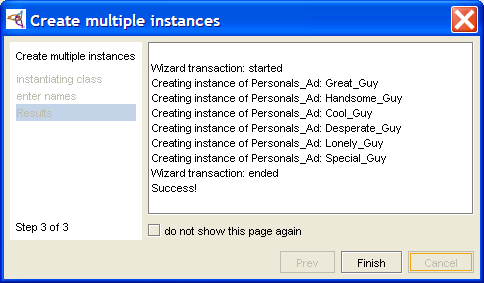 Create multiple instances dialog, result
Click Finish to exit the wizard.
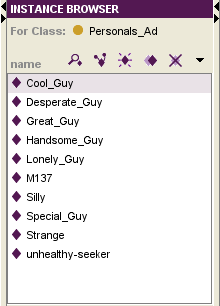 Instance Editor, "Cool_Guy" selected
Fill out the properties for each instance in the corresponding Instance Editor.


If you prefer, you can create instances with the field entries already filled by copying an instance. See Copying an Instance.
Displaying the Instance Editor
You view or edit an existing instance using the Instance Editor.
Note: If the class is a system class or has been included from another project, it cannot be edited. Included classes are shown with a pale class icon to the left.
Using the Instances Tab
To view or edit an existing instance from the Instances tab:
In the Class Browser at the Instances tab, select the class which contains the instance you want to edit. If the class is not currently displayed, you may need to navigate to it via the class hierarchy. To ensure that the class is the same one that was selected at the Classes tab, you can synchronize class trees. When a class is selected, all instances for the selected class are displayed in the Instance Browser.
Select the instance you want to edit in the Instance Browser.
Enter the updated information directly in the Instance Editor to the right.
Displaying a Free-standing Window
You can open the Instance Editor to view
or edit an instance anywhere the View Instance
(![]() ) button appears,
including the following locations:
) button appears,
including the following locations:
the Search Results pane at the Queries tab
To view or edit a class using the Instance Editor:
Select the instance you want to edit. At the Instances tab, first select the class that contains the instance, as described above.
Click the View Instance (
) icon
at the upper right of the pane
to open the Instance Editor
as a free-standing window.
To view or edit the information for several instances at once, open a new Instance Editor for each instance. Opening a new Editor does not close the previous editor. This allows you to compare the attributes for two or more instances. Edits can be made directly in any open Editor. For managing multiple windows, see Cascading Open Forms and Closing All Windows.
Any changes you enter into the Instance Editor take effect immediately. To make the changes permanent, save the knowledge base by selecting Save from the Project menu. To revert to the last saved version, close Protege without saving changes. If you have made extensive changes to your knowledge base during the current session, you may wish to save before editing instances.
You can also edit an instance from a field. See Instance fields for more information.
Setting the Display Slot
Showing Subclass Instances
The Instance menu, at the top of the Instance Browser allows you to choose the level of instances - direct instances or subclass instances - you want to see for a selected class. These choices are also available when you are choosing instances in a dialog box.
About Subclass Instances
There are two types of instances subordinate to a class:
A direct instance is an instance that has been created directly under the class.
A subclass instance is any instance that is subordinate to the class. Because of inheritance, an instance of a class is also an instance of all of that class's superclasses. Therefore, an instance can be an instance of many classes of which it is not a direct instance.
In the newspaper example, the Manager class has three direct instances: Jane, Joe, and Mary. The Manager class also has a subclass, Director, which has a direct instance Tim. Tim is a subclass instance of Manager.
Showing Subclass Instances
By default, the Instance window shows only the direct instances for a class.

You can change this, using the Instance menu. To show all instances for a class, including subclass instances:
Select Show Subclass Instances from the Instance menu at the top of the Instance Browser, to the right of the instance buttons. The display will change to show all instances subordinate to the class. The class for which the instance was created is shown in parentheses after the instance name.
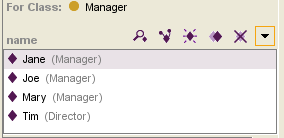 Instance window, showing subclass instances

Notes:
It is possible to attach an instance to more than one class (see Adding a Class Type to an Instance), so that the instance appears directly under two or more classes. In this case, the class name displayed after the instance will be the class where the instance was first created.
By definition, abstract classes cannot have direct instances, but they can have subclass instances. This selection allows you to see all the subclass instances for an abstract class.
Showing Direct Instances Only
If subclass instances are shown, you can choose to show only direct instances.
Click on the the Instance menu at the top of the Instance Browser, to the right of the instance buttons. You will see that Show Subclass Instances is checked.
 Show Subclass Instances checkbox (checked)
Select Show Subclass Instances from the menu to deselect this setting and show only direct instances.
Editing an Instance
To edit an instance once it has been created, enter the desired information in each entry field. The entry method and type of information will depend on the field type. See the Standard fields for more information.
Invalid Entries
If the type of information you enter is invalid (ie, not appropriate for the slot), the entry will be shown in red. For example, entering words in an Integer slot is not allowed:
Values that violate other slot conditions, such as values less than the minimum or greater than the maximum, will also be shown in red.
Required Values
If a value is required for the slot (cardinality at least 1) and there is currently no value, the field is outlined in red.

Default Values
If a slot specifies a default value, that value will automatically be entered in the corresponding field when an instance is created. The default value can be edited.
Template Values
If a slot specifies a template value, that value will automatically be entered in the corresponding field when an instance is created. The template value cannot be edited.
Copying an Instance
You can copy an existing instance,
using the Copy Instance
(![]() ) button.
Copying an instance is useful when you want to create multiple instances
that share some field values.
You can create the first instance, fill out the shared values,
then copy the instance and fill out or change the remaining values.
) button.
Copying an instance is useful when you want to create multiple instances
that share some field values.
You can create the first instance, fill out the shared values,
then copy the instance and fill out or change the remaining values.
Unless you select Deep Copy, copying an instance duplicates the instance with identical field values. Only the internal name stored by Protege is changed. If you are working with deep copies, you may want to temporarily clear the display slot, so that it displays the internal name.
Making Copies
At the Instances tab, select the instance that you want to copy.
Click the Copy Instance (
) button.
In the Copy Frames dialog box, enter the number of copies that you want to make.
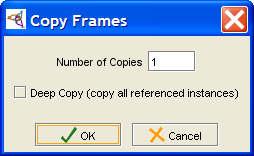 Copy Frames dialog
To have Protege-Frames perform a "deep copy", select the deep copy option. This is described more fully below. Otherwise, the instance is duplicated with identical field values; only the instance name is changed.

What is a Deep Copy?
You can select to "deep copy" an instance. A deep copy is a recursive copy that creates a copy of:
the selected instance
any instance that appears as a value for an Instance entry field in any copied instance
Note the following:
The copy is recursive. As long as a new instance appears as a value for a copied instance, a copy of it is created.
It is possible for an instance to appear more than once in the chain. If this happens, only one copy is created.
Other referenced instances do not get copied.
For example, if you deep copy the instance M137 for the class Personals_Ad, then all of the following are copied:
the instance M137 (class = Personals_Ad)
all the instances which appear as instance values for M137, specifically:
the instance 08/19/97 (class = Newspaper), which appears as the value for the Published In field of M137
all the uncopied instances which appear as values for 08/19/97, specifically:
Tuesday (class = Prototype_Newspaper), which appears as the value for the Prototype field
all the instances which appear as values for Tuesday:
Weekday Ads (class = Billing_Chart) in the Prototype Billing Chart field
Lifestyle, Local News, Magazine, Science, Sports, and World News (class = Section) in the Sections field
None of these instances have any instance fields, so the copy stops here.
M137 appears again as an instance of 08/19/97. However, as it has already been copied, no additional copy is created.
M137 appears as a value for San Jose Mercury News (class = Library). This is not copied.
Deleting an Instance
To delete an instance from the knowledge base:
Display the Instances tab.
In the Class Browser, select the class which contains the instance you want to delete. If the class is not currently displayed, you may need to navigate to it via the class hierarchy. The instances for the selected class are displayed in the Instance Browser.
In the Instance Browser, select the instance that you want to delete. To highlight multiple instances, use the Ctrl (Cmd) key; to highlight a range of instances, use the Shift key.
Click the Delete Instance (
 )
instance button.
You will be prompted for confirmation.
)
instance button.
You will be prompted for confirmation.
Once an instance has been deleted, it cannot be recovered. You may wish to save or archive your project before deleting instances.
You can also remove a value from a field of type Instance. This does not remove the instance from the knowledge base. See Instance fields in the Standard fields for more information.
Finding an Instance
To find an instance in the Instance Browser:
Display the Instances tab.
Select the class that contains the instance in the Class Browser.
In the Instance Search Bar at the bottom of the Instance Browser, type the beginning of the display slot text for the instance. (The display slot is the slot used to list the instances in the Instance Browser.) Comparison is case-insensitive.
 search text entry field
Press Enter/Return or click the Find Instance (
) button.
If there is only one match, the selection in the Instance Browser will move to the instance which contains the entered text. If there is more than one match, a dialog will be displayed asking you to choose the instance you want. Select an instance and click OK.

If you are unable to find the instance you are looking for, it may be in a different class. You can use the lookup bar at the bottom of the Class Browser to look for classes.
Changing the Class of an Instance
You can change the class of an instance, using drag-and-drop in the Instances tab. To change the class of an instance:
Select the instance you wish to move:
Display the Instances tab
Select the class that contains the instance in the Class Browser.
Select the instance you want to move in the Instance Browser.
Hold down the mouse button and drag the instance from the Instance Browser to the Class Browser, until it is on top of the desired class.
Release the mouse. The instance will now have the selected class as its direct type. Note that the slots of the dragged instance will automatically change to reflect the inheritance from the new class.
When you drag an instance to a new class, the fields in the instance will change to match the slots in the class. If you drag an instance, you may lose some of the information in your instance. This loss is permanent. You cannot restore the information by dragging the instance back to the original class. Therefore, you should be sure that you want to make these changes before you drag an instance to a new class. You may also wish to archive the project before you move instances.
In addition, any changes you make will be evident
wherever that instance is referenced -
for example, if that instance appears as the value of a field,
the change will also occur in the field.
You can use the View References to Instance
(![]() ) button
to see where this instance is referenced,
before changing its class.
) button
to see where this instance is referenced,
before changing its class.
Working with Instance Types
The Types pane, in the Instance Browser, allows you to add and remove types for an instance; that is, the classes for which the selected instance is a direct instance. Assigning multiple types to an instance allows you to build an instance which combines field characteristics from two or more classes.
Adding a Type
To add a class type to an instance:
At the Instances tab, select the class and instance you want. The classes where this instance is direct will be shown in the Types pane, at the bottom of the Instance Browser.
 Types pane
Click the Add Class (
) button
at the top of the Types pane.
In the Select Classes dialog box, select the additional class(es) where this instance will be a direct instance and click OK.
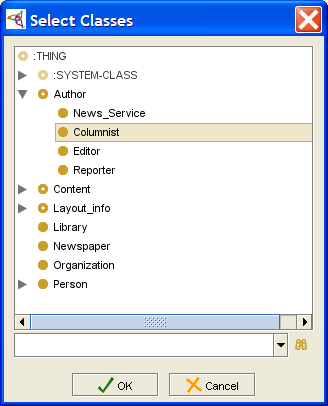 Select Classes dialog, "Columnist" selected
The class(es) are added to the direct superclasses of the instance. The Instance Editor will change to display multiple forms, one for each class type. Any shared fields will contain identical values. Editing a field value in one form edits the same field in all the forms where it appears.
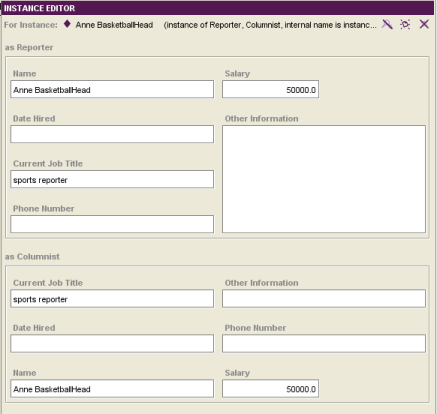 Instance Editor


Deleting a Type
For a multi-type instance, you can delete types. To do this:
At the Instances tab, select the class and instance you want. The classes where this instance is direct will be shown in the Types pane at the bottom of the Instance Browser.
Click the Delete Class (
) button
at the top of the Types pane.
Configuring the Instance Editor
You can choose how to display multi-type instances in the Instance Editor. Forms can be displayed one below the other on a single screen, or they can be displayed in a tabbed format. To configure the display for multi-type instances:
Select Project | Configure from the menu.
To display forms in separate tabs, make sure that Use Tabbed Forms for Multi-type Instances is selected. To display forms one below another in a single window (the default), make sure this option is deselected.
 Configuration dialog, Options tab
If the current instance is multi-type, you may need to click on another instance and then back on this instance to see the change.
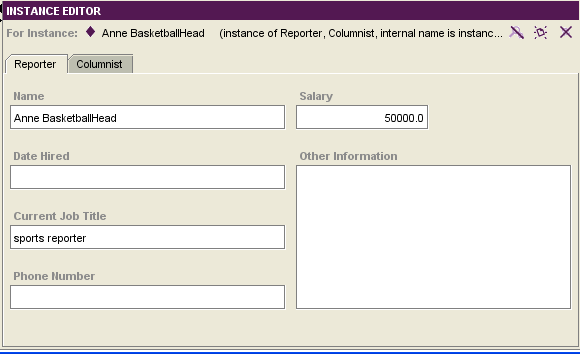 Instance Editor, "Reporter" tab


The Instance Icons
The icons in the Instances Browser give information about the instances.
Instance Icons
These icons give information about a slot. When a class inherits a class from a superclass, icons in the Template Slots pane give information related to the inheritance and overrides; these icons are not shown anywhere else.
|
|
A solid icon means that the instance is part of this project. |
|
|
A pale icon indicates an instance that has been included from another project. These instances cannot be edited. |
Queries
This section of the User's Guide covers the concepts of understanding, creating, and using Protege-Frames queries.
Note: Before you create and use classes, you should be confident with the basic Protege-Frames interface. You should also be comfortable with Protege-Frames projects, project types, windows, classes, slots, forms, and instances.
To return to the main table of contents, click the Protege-Frames User's Guide link (located at the top of the table of contents on the right-hand side of this page).
The Queries Tab
The Queries tab allows you to create, run, and save queries. Queries are not part of your knowledge base, but are a way to identify (i.e., select) the instances in your project, based on class and slot properties.
The Queries tab consists of the following:
The Query Editor, where you enter or modify your query. You can also combine multiple queries.
The Find button, which runs a query:
 Find button
The Search Results pane, which displays the query results when you click Find.
The Save Query bar, which allows you to name and save a query.
The Query Library, which allows you to view, delete, and retrieve saved queries. Saved queries can be modified or combined.
Note: If you are working on a smaller screen, you may not see all of these panes. To view or enlarge the Query Library pane, drag the slider bar near the bottom of the Queries tab. To view or enlarge the Search Results pane, drag the slider bar between the Search Results pane and the Query Editor. See Working With a Small Window for more information.
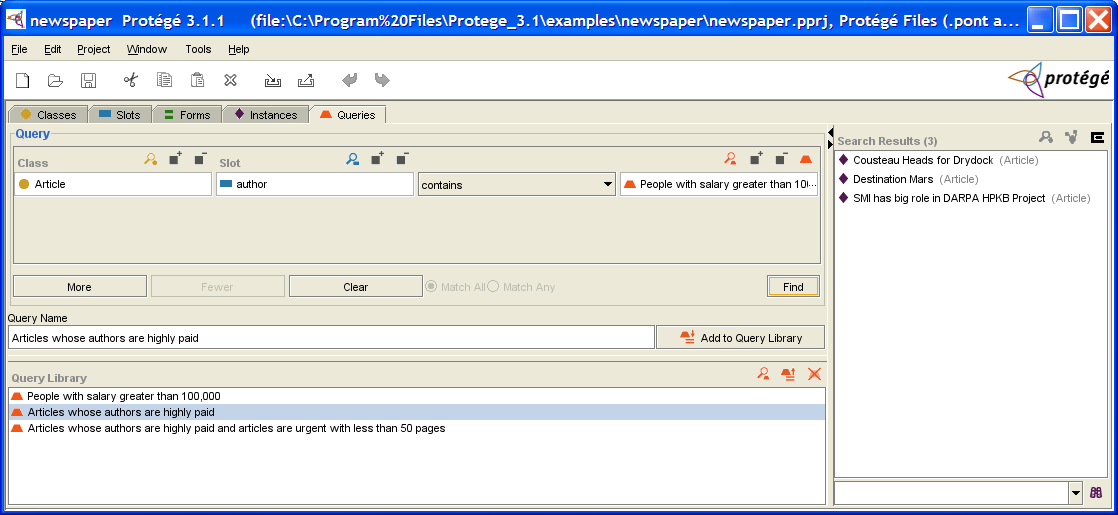
The Query Editor
The Query Editor allows you to enter, modify, or save your queries. The Query Editor has the following components:
One or more query bars, where you can construct a query by selecting a class, slot, criterion, and value.
The Combined Query buttons, which allow you to add and remove additional query bars, and to specify how they are combined.
The Find button, which allows you to run your query.
Query Bar(s)
Each query bar has:
A Class entry field, which allows you to specify a class by clicking the Select Class (
) button.
If a class is already shown,
using the Select Class button replaces it.
You can also view the selected class by clicking the View Class
() button,
or remove it by clicking the Remove Class
() button.
A Slot entry field, which allows you to specify a slot by clicking the Select Slot (
) button.
If a slot is already shown,
using the Select Slot button replaces it.
You can also view the selected slot by clicking the View Slot
() button,
or remove it by clicking the Remove Slot
() button.
A criteria menu, which allows you to set the criteria for the query, based on the slot.
A value entry bar or menu, which allows you to set the value for comparison. The entry type is based on the slot value type.
Choices for the criteria menu and value are as follows:
| Slot Type | Criteria Menu | Action |
|---|---|---|
|
|
Verifies whether or not the Boolean value is true or false, as selected from the menu at the right. | |
|
|
The selected criterion is compared to a class selected at the right.
To select a class, click the Select Class
( | |
|
|
The selected criterion is compared to the value typed in the Float entry bar at the right. | |
|
|
The selected criterion is compared to an instance or query selected at the right.
| |
|
|
The selected criterion is compared to the value typed in the Integer entry bar at the right. | |
|
|
The selected criterion is compared to all or part of a string typed in the entry bar to the right. For example, selecting begins with and typing M in the String entry bar will find all instances of the selected class/slot combination that begin with M. | |
|
|
The Symbol entry bar to the right becomes a drop-down menu that displays all possible values for the slot. The selected criterion is compared to the value. |


Combined Query Buttons
|
More |
Click this button to create an additional query bar, which can then be set with class, slot, and criterion. |
|
Fewer |
If there are two or more query bars, click this button to remove the bottom-most query bar. |
|
Clear |
Click this button to clear all query bars and reduce the Query Editor to a single, blank query bar. |
|
Match All |
For two or more query bars, click this button to specify that any instance found must match all of the criteria (the intersection or AND) specified in the query bars. |
|
Match Any |
For two or more query bars, click this button to specify that any instance found must match at least one of the criteria (the union or OR) specified in the query bars. |
The Search Results Pane
The Search Results pane, at the right of the Query tab, displays the query results when you click Find.
Note: If you are working on a smaller screen, you may not see this pane. To view or enlarge the Search Results pane, drag the slider bar. See Working With a Small Window for more information.

The Search Results pane has the following components:
A list box which shows all instances that match the most recent query.
Buttons which allow you to get more information about a selected instance.
A Find bar which allows you to find an instance in a long list.
The buttons at the top right of the pane have the following actions:
|
|
View Instance: Opens the Instance Editor for a selected instance. |
|
|
View References to Instance: Opens the References window to show all references to the selected instance. |
|
|
Export Slot Values: Exports the list of instances and the values of selected slots to a text file. |
The Query Library Pane
The Query Library pane lists saved queries and allows you to view, retrieve, and delete them.

Note: If you are working with a smaller screen, you may not see this pane. To view or enlarge the Library pane, drag the slider bar near the bottom of the Query Editor (above the Query Library pane), or click the up button at the bottom of the Query Editor. See Working With a Small Window for more information.
The Query Library pane has the following components:
A list of all saved queries.
Buttons that allow you to view, retrieve, or delete a query.
The buttons at the right of the pane have the following actions:
|
|
View Query: displays the Query Editor for a selected query. |
|
|
Retrieve Query: retrieves the query, displaying it in the Query Editor ready for modification or for finding instances. |
|
|
Delete Query: deletes the highlighted querie(s) from the Query Library. |
Creating a Single Query
The Queries tab allows you to query your project and locate all instances that match the criteria you specify. You can create a simple query, or combine multiple criteria to restrict or expand your results.
You can create a simple query based on a class, a slot, or both. When you specify a slot, you also specify the criteria for matching the slot:
A query based solely on a class will find all instances of the selected class and all of its subclasses.
A query based solely on a slot will find all instances whose value at the slot match the criteria you specify.
A query based on a class and a slot will find all instances of the class that match the criteria at the selected slot.
Note: Sometimes the query buttons or query entry bar will not display correctly. You can refresh the query entry by clicking on another tab and then returning to the Query tab.
The directions below show how to select a class first, then a slot. You can also select the slot first and then the class; this is useful if you remember the slot name, but are not certain of the classes that it is attached to. To do this, select the slot as in Steps 3 and 4, then select the class as in Steps 1 and 2. In this case, the Select Classes dialog box will show only those classes that have the selected slot.
To create a query:
To specify a class, click the Select Class (
) button
above the Class entry bar.
(If you wish to create a query based solely on a slot, start at Step 3.)
 Class entry bar
Select the class you want from the Select Classes dialog box, then click OK. (If you wish to create a query solely on that class, you are now ready to run it.)
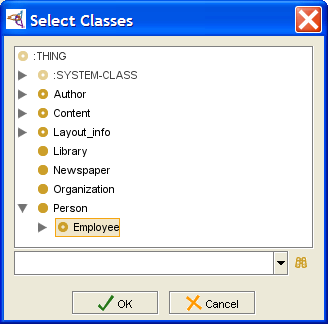 Select Classes dialog, "Employee" selected
Click OK.
 Class entry bar
To specify a slot, click the Select Slot (
) button,
above the Slot entry bar.
 Slot entry bar, empty
Select a slot from the Select Slot dialog box. If you selected a class, only slots attached to that class will be shown. If no class is selected, all slots are available.
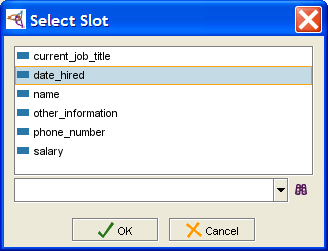 Select Slot dialog, "date_hired" selected
Click OK. The slot will be filled in and the criteria menu immediately to the right will be displayed.
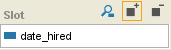 Slot entry bar, filled
Make a selection from the pull-down criteria menu. This menu becomes active after you select a slot; the choices are based on the slot's Value Type.
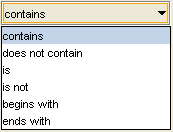 pull-down criteria menu
Enter a value for comparison at the entry bar to the right. The entry method for this value depends on the slot value type.
For Boolean value type, select whether the slot value is true or false.
For Class value type, click the Select Class (
) button
and select a class from the dialog.
The query will find all instances where the slot value
contains (or does not contain) the selected class.
For Float or Integer value type, enter the number to which you want to compare the slot value.
For Instance value type, click the Select Instance (
)
or Select Query
( ) button
and select a value from the dialog box.
) button
and select a value from the dialog box.
For Symbol value type, the possible values are displayed as a drop-down list. Select a symbol from this list.
Note: Sometimes the query buttons or query entry bar will not display correctly. You can refresh the query entry by clicking on another tab and then returning to the Query tab.


To run the query, click the Find button:
To save the query in the Query Library,
give it a name and click the Add Query to Library
(![]() ) button.
) button.
Combining Multiple Queries
The More button, at the bottom of the Query Editor, allows you to combine multiple query bars into a single query. To combine multiple queries:
Create the first query, as described in Creating a Single Query or Retrieving a Query.
Click the More button. An additional query bar will be displayed.
 More button
Fill in the new query bar, either manually or by retrieving another query. You may use the same class or slot, but you do not have to.
Continue to click the More button, creating query bars as necessary to add more criteria to your query.
Specify how the criteria should be combined:
To see instances that match all the criteria specified (Boolean AND), click Match All.
To see all instances that match at least one of the different query bars (Boolean OR), click Match Any.
To run your query, click the Find button:
Find button
If you are combining multiple queries, and wish to remove the criteria in the last (bottom-most) query bar:
Click Fewer. The bottom-most query bar will be removed.
Chaining Multiple Queries
Queries saved in the Query Library can be used as matching values for slots of type Instance. When you do this, the resulting query looks for instances where the slot value is a search result for the specified query.
Often, when you need to create a query of this type, you will look at a class that has a slot of type Instance and want to know which of those instances have a certain property. When you create the combined query, you need to create the query for the property first, and then create the query for the class.
For example, the query "Articles whose Authors are highly paid" looks for instances of the Class Article whose value at the slot author is also a valid result of the query "People with salary greater than 100,000".

You do not have to use a slot in either query. If you just use a class, you will find all instances of that class and its subclasses.
To create a query of this type, you need to make sure the two queries satisfy the following:
The slot value for Query B, the query that contains another query, must be one of the following:
a slot of type Instance
empty (in this case, you must select a class)
For the final chained query to be meaningful, Query A (the query that will be used inside the other query) must have results that intersect the possible inputs for Query B. If Query A has a slot, the domain for the slot should intersect the Allowed Classes for the slot of type Instance in Query B. If Query A does not have a slot, the subclasses of the class in Query should intersect the subclasses of the Allowed Classes for the slot of type Instance in Query B.
To create a query of this type
Create an initial query.
Save this query in the Query Library.
Clear the current query.
Select the Class and/or Slot you want for the second query.
Select contains or does not contain from the menu.
Click the Add Query (
) button.
Note: You may have some trouble getting this to display. If you do, try switching to another tab and then returning to the Queries tab. If that doesn't work, try retrieving the "Articles whose authors are highly paid" query from the Query Library, then clearing it and recreating your query. You may still have to switch to another tab after you have entered your slot, but this should work.
A Pick Query dialog displays the saved queries.
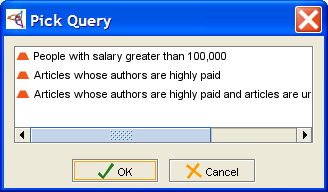 Pick Query dialog
Select the query you want and click OK.

You can also combine chained queries with other queries.
Running a Query
The Find button, at the bottom of the Query Editor, allows you to run your queries and find all instances that match the criteria currently in the Query Editor.
To run a query:
Make sure that the query is filled out as desired. See Creating a Query or Combining Multiple Query Bars.
If the query is a combination of several query bars, specify how the criteria should be combined:
to see instances that match all the criteria specified (Boolean AND), click Match All.
to see all instances that match at least one of the different query bars (Boolean OR), click Match Any.
Click the Find button. The matching instances will be displayed in the Search Results pane:
Find button
Saving a Query
Once you have a set up a query the way you like, as described in Creating a Query or Combining Multiple Query Bars, you can save it in the Query Library to retrieve it later. This is especially useful for complex queries or for queries that you use often.
To save a query:
Enter a name for the query in the Save Query bar. It is a good idea to use a name that describes the query, such as "Articles that are urgent".
 Save Query bar
Click the Add to Query Library (
 ) button.
The query will be saved in the Query Library.
) button.
The query will be saved in the Query Library.
See Retrieving a Query for information on running a saved query.
Retrieving a Query
Once you have saved a query in the Query Library, you can retrieve it at any time.
To retrieve a query:
Select the query you want from the list in the Query Library. (If you are working on a smaller screen, you may not see this pane. To view or enlarge the Library pane, drag the slider bar near the bottom of the Query Editor or click the up arrow button at the bottom of the Query Editor.)
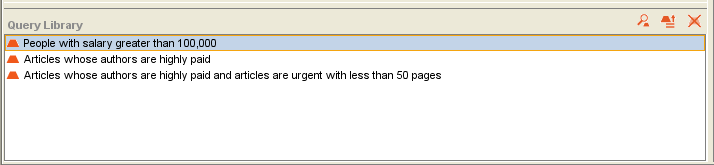 Library pane
Click the Retrieve Query (
 ) button.
Any query information currently in the Query Editor will be cleared.
The highlighted query will be loaded into the Query Editor.
) button.
Any query information currently in the Query Editor will be cleared.
The highlighted query will be loaded into the Query Editor.
If you wish to make any changes, or combine this query with additional query information, you can modify it. See Combining Multiple Query Bars for more information.
If the query is a combination of several query bars, you can change how the criteria should be combined:
To see instances that match all the criteria specified (Boolean AND), click Match All.
To see all instances that match at least one of the different query bars (Boolean OR), click Match Any.
Click Find to run the query and see all matching instances:
Find button
Clearing a Query
You can clear all of the information in the Query Editor. This allows you to create a new query.
To clear a query, click the Clear button. All information in the Query Editor will be cleared:
Exporting Query Results
You can export the results of a query to a text file, protege_query_results.txt, which is saved in the same folder as your Protege .pprj project file. To export the results:
Click the Export Slot Values (
 ) button
at the top right
of the Query Results pane.
) button
at the top right
of the Query Results pane.
By default, the text file will list each instance and its class. A dialog box will prompt you to choose any additional slot values of the instance that you wish to export. Select those you want and click OK.
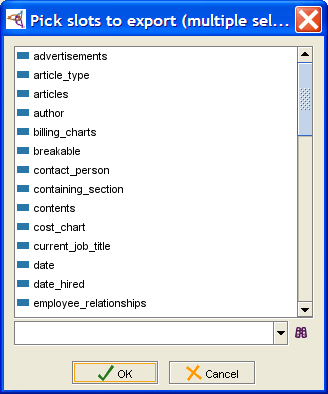 Pick slots to export dialog
The information will be exported to a text file, with slot values separated by tabs.
Cousteau Heads for Drydock               Article
Destination Mars                         Article
SMI has big role in DARPA HPKB Project   Article

Note:
If you wish to export the results for more than one query,
make sure to rename the text file so that it will not be overwritten.
Metaclasses
This section of the User's Guide covers the concepts of understanding, creating, and using Protege-Frames metaclasses.
Note: Before you create and use classes, you should be confident with the basic Protege-Frames interface. You should also be comfortable with Protege-Frames projects, project types, windows, classes, slots, forms, instances, and queries.
To return to the main table of contents, click the Protege-Frames User's Guide link (located at the top of the table of contents on the right-hand side of this page).
Understanding Metaclasses
 Overview
Metaclasses are part of the way Protege-Frames internally handles and constructs classes. A metaclass is a template, that is, a class whose instances are themselves classes. For example, the default metaclass used by Protege-Frames to create new classes is :STANDARD-CLASS; by default, all classes you create are instances of it.
Metaclasses allow you to attach additional information to your class at the class level. This is especially useful if you have several classes, each of which has a similar structure. This also allows you to give your classes more complex properties and to greatly extend the power of your Protege-Frames projects.
Because of the power of metaclasses, you may want to be particularly cautious how much you experiment with a current project. It is a good idea to work on a copy or to archive your project beforehand.
Metaclasses in the Class Hierarchy
Metaclasses are created as part of the :SYSTEM-CLASS hierarchy, which is included in every project. Metaclasses appear under the :CLASS class. Every class that is created subordinate to :CLASS is a metaclass. Just like regular classes, metaclasses can be concrete or abstract and can have more than one superclass.

Metaclasses and the Class Editor
When you attach a template slot to a metaclass, it appears as an entry field on the Class Editor for all classes that you create with that metaclass. For example, :STANDARD-CLASS has the slot :NAME; this slot appears as the Name field in that standard Class Editor. In the Wines project, which is used as an example throughout this section, the Wine Template has a slot best_wineries; this translates to a field Best Wineries on the Class Editor for classes created with that template:
| Facet in Metaclass | Facet in Class Editor for classes created with that metaclass |
|---|---|
|
best_wineries slot |
Best Wineries field |
|
|
|


By creating your own metaclasses and defining their slots - for example, by creating a subclass of :STANDARD-CLASS and then creating new slots or overriding existing ones - you can create additional templates for your classes. You can then create all or some of the classes in your project using the new metaclass as a template instead of :STANDARD-CLASS.
Example: Creating and Using a Metaclass
This example gives an overview of how to create and use a metaclass.
Suppose you are creating a knowledge base of wines and wineries. In this knowledge base, a type of wine, such as Chardonnay, is a class, while a specific label is an instance of that class. Suppose that, for each class of wine, you wanted to be able to enter the wineries that are, in your opinion, the best producers of that type of wine. You could do this using metaclasses, as described below.
Creating a Metaclass
First, set up your metaclass:
Create a metaclass, Wine Template, to use for wines. You create this subordinate to :STANDARD-CLASS, so that it inherits all the structure of a typical class.
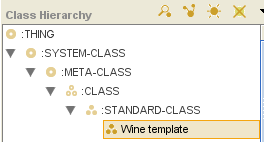 Class Browser, "Wine template" selected
Create an additional template slot, best wineries, that allows you to enter a list of wineries.
Configure best wineries as follows:
Set the Value Type to Instance, so that the values of this slot can be instances in the knowledge base.
Set the Allowed Classes to Winery, so that, specifically, these instances are wineries.
Set the Cardinality to Multiple to allow more than one winery on the list for each class.
 Template Slots, configured
Attach Best Wineries to Wine template as a template slot, if you have not already done so.
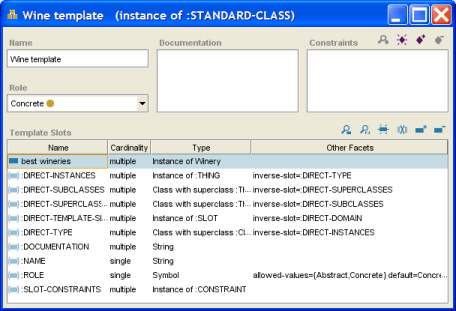 Wine template instance dialog


Using the Metaclass
Once you have created the metaclass, you can use it as follows:
Create a class, such as Chardonnay, using Wine template as the metaclass. Or, if you have already created the classes for your wines, change the metaclass to Wine template. When you do this, the best wineries slot that you attached to the template shows up as a new field (located at the lower left) in the Class Editor for your class.
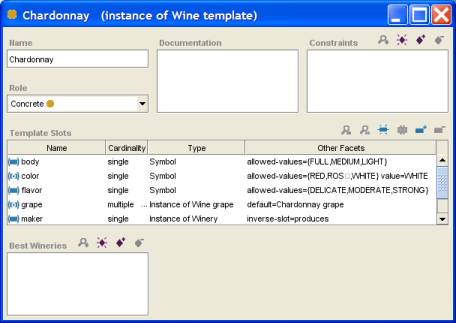 Chardonnay instance dialog
You can now use the Best Wineries field to select one or more wineries from your instances.

Looking at :STANDARD-CLASS
By default, when a class is created as part of a project, Protege-Frames; treats that class as an instance of the metaclass :STANDARD-CLASS. The slots of :STANDARD-CLASS define generic properties of the class. For example, :NAME is a slot of type String which you use to name your class; :ROLE is a slot of type Symbol which can take the values Abstract or Concrete.

Some template slots for :STANDARD-CLASS are translated to entry fields in the Class Editor. The :NAME slot becomes the Name entry field, while the :ROLE slot becomes the Role menu. When you create or attach a template slot to a metaclass, it also becomes an entry field in the Class Editor.

The other slots are more complex. For example, consider the :DIRECT-SUPERCLASSES slot. This slot keeps track of the direct superclasses of a class by storing them as a list of instances. Internal programmatic operations add (delete) instances to (from) the appropriate slot value whenever you make changes to a Protege-Frames project. In this way, Protege-Frames represents the structure of your project using its tools for storing and representing structure, in much the same way you create the project structure.
Since any new class is by default created using :STANDARD-CLASS, the Class Editor itself reflects the structure and layout specified for :STANDARD-CLASS at the Forms tab. If you create a new project, then modify the Class Editor at the Forms tab, your modifications will show up for every class, whether existing or new.
Creating a Slot Metaclass
Note: Before you create and use metaclasses, you should be confident with the basic Protege-Frames interface and be comfortable designing a project, and creating and modifying classes, slots, forms and instances.
Creating a slot metaclass is almost identical to creating a metaclass. You simply have to make sure the class is created subordinate to :SLOT. Usually, it is desirable to create a slot metaclass subordinate to :STANDARD-SLOT, so that the slot created using the slot metaclass will have the various properties defined by :STANDARD-SLOT.
To create a new slot metaclass:
Click on the desired superclass in the Class Browser. The selected superclass must itself be a slot metaclass. As mentioned above, this will be true only if the selected superclass is subordinate to :SLOT.
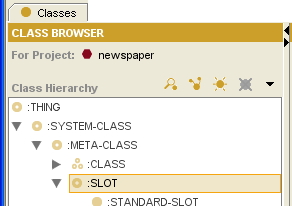 Class Browser, ":SLOT" selected
Click the Create Class (
) button
at the right of the Class Browser,
or click the right mouse button and select Create subclass
from the Class menu.
The new class will be added under the highlighted class.
It will inherit the properties of the selected metaclass.
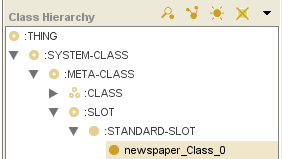 Class Browser, "newspaper_Class_0" selected
Use the Class Editor to name the slot metaclass, create constraints, and create and edit template slots. For example, click the Create Slot (
) button
at the right of the Template Slots pane to create a new slot.
This slot will show up as an entry field
in the Slot Editor
for any slot that uses the slot metaclass.

Creating a Class Using a Metaclass
If you have non-standard metaclasses in your project, you can select the metaclass you want to use when you create a class. You can add metaclasses either by creating them directly, or by including a project that already has metaclasses.
By default, when you create a class using the Create Class
(![]() ) button,
you use the metaclass of the direct superclass as the metaclass for the new class.
(Unless you have made changes, this is the default :STANDARD-CLASS.)
If you have used a non-standard metaclass for a class,
every new subclass you create for the class will also use the selected metaclass.
When you create a class using a non-standard metaclass,
the class is given the attributes specified by the selected metaclass.
) button,
you use the metaclass of the direct superclass as the metaclass for the new class.
(Unless you have made changes, this is the default :STANDARD-CLASS.)
If you have used a non-standard metaclass for a class,
every new subclass you create for the class will also use the selected metaclass.
When you create a class using a non-standard metaclass,
the class is given the attributes specified by the selected metaclass.
To create a class using a specified metaclass:
In the Class Browser, select the class that you want as the superclass of the new class.
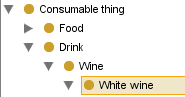 Class Browser, "White wine" selected
Click the right mouse button and select "Create subclass using metaclass..."
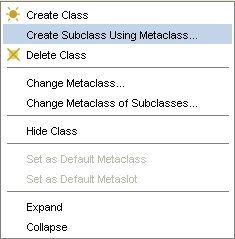 "Create subclass using ..." selected in menu
A dialog box will display the Concrete metaclasses, which are the classes you can use when creating a class. You cannot create a class as an instance of an Abstract metaclass.
[[Image:PrF_UG_meta_select_metaclass.png|frame|none| Select Metaclass dialog, "Wine template" selected]Select the metaclass that has the properties that you want and click OK. The new class will be added under the highlighted class. It will have the Class Editor from the selected metaclass, with entry fields determined by the template slots of the metaclass. In the Wineries example, there is an extra entry field called Best Wineries, displayed below the Template Slots pane in the Class Editor. The name of the metaclass you used will be displayed at the top of the Class Editor, immediately after the name of the class.
 Class Browser, "wines_Class_2" selected
Use the Class Editor to name the class, choose its role, create constraints, and create and edit slots.


Changing the Metaclass of a Class
For any existing class in your project, you can change the metaclass used for that class. This gives the class and the Class Editor the attributes defined by the newly-assigned metaclass. New classes that you create as subclasses of the class will also use the new metaclass. However, each existing subclass will continue to use its previously assigned metaclass unless you specifically change it.
This example uses the wines project, which includes a Wine template that supplies metaclass structure.
To change the metaclass of an existing class:
In the Class Browser, click on the class that you want to change.
Class Browser, "White wine" selectedClick the right mouse button and select "Change metaclass...".
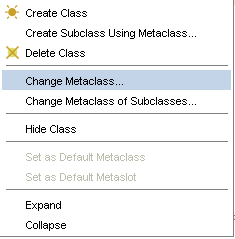 "Change Metaclass..." selected
A dialog box will display the Concrete metaclasses, which are the classes you can use. You cannot use Abstract metaclasses in this way. Note that if the class currently uses a non-standard class, you can revert to :STANDARD-CLASS.
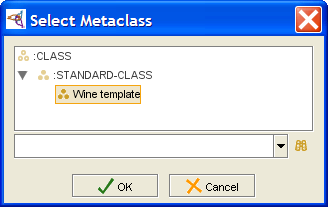 Select Metaclass dialog, "Wine template" selected
Select the metaclass that has the properties you want and click OK. The highlighted class will now have the Class Editor from the selected metaclass, with entry fields determined by the template slots of the metaclass. The name of the metaclass you used will be displayed at the top of the Class Editor, immediately after the name of the class.


Changing the Metaclass of Subclasses
When you change the metaclass of a class, all of its subclasses will retain their previous metaclass. This ensures that you do not propagate changes when you do not want to. However, often you will want existing subclasses to have the same metaclass as their superclass. Protege-Frames provides an option to quickly change the metaclasses of all the classes subordinate to a given class. Note that you only have to do this once; by default, new classes use the metaclass of their direct superclass.
To change the metaclass of all existing subclasses of a given class:
In the Class Browser, find the class whose subclasses you want to change.
Class Browser, "White wine" selectedClick the right mouse button and select "Change metaclass of subclasses". This will change all of the classes below this one to have the same metaclass as the selected class.
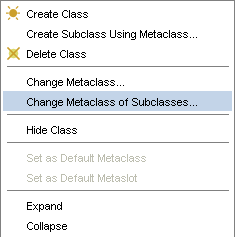 "Change Metaclass of Subclasses..." selected
A dialog box will ask you for verification. Click OK to continue.
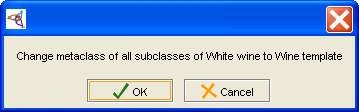 verification dialog
The change will be made: all subordinate classes will now have the metaclass of the selected class.


Setting the Default Metaclass
If you have multiple metaclasses in your project, Protege-Frames allows you to choose which metaclass you want to use as the default for every new class you create.
To set a metaclass as the default:
In the Class Browser, click on the metaclass you want to use. This must be a class that is subordinate to :CLASS.
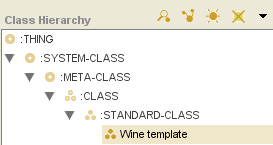 Class Browser, "Wine template" selected
Click the right mouse button and select Set as default metaclass from the Class menu. This option is available only when a metaclass is selected.
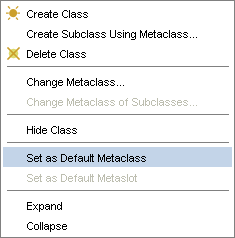 "Set as Default Metaclass" selected in menu
The selected metaclass will become the default. Now, unless you choose otherwise, every new class you create will use the new default metaclass as its template and inherit the properties defined by the default.


Customizing the Class or Slot Editor
Using metaclasses, you can customize the layout of the Class Editor or the Slot Editor at the Forms tab. You can hide entry fields and resize and reposition fields. Normally you do not want to change widgets, as the Class Editor and Slot Editor use special widgets for the standard fields.
To customize the standard Class Editor, select :STANDARD-CLASS at the Forms tab and then make your desired edits. Since any new class is (by default) created using :STANDARD-CLASS, the Class Editor itself reflects the structure and layout specified for :STANDARD-CLASS at the Forms tab. Your modifications will show up for every class, whether existing or new. Similarly, to customize the standard Slot Editor, select :STANDARD-SLOT at the Forms tab and make your desired edits.
If you have non-standard metaclasses or slot metaclasses in your project, you can create custom editors for classes or slots that use these. For example, when you add a field, you may want to reposition it or resize it in the editor.
Example
For example, you could customize the Class Editor for classes that used the Wine template to an InstanceTableWidget that shows the location and the name of the best wineries:
At the Forms tab, select the Wine template.
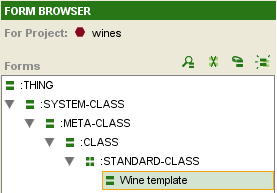 Forms tab, "Wine template" selected
Select the Best Wineries widget.
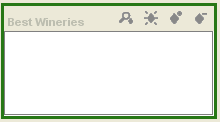 Best Wineries widget
Select InstanceTableWidget from the Select Widget Type menu at the top right of the Form Editor.
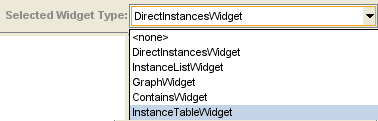 InstanceTableWidget selected in menu
This will change the widget display, adding field headings.
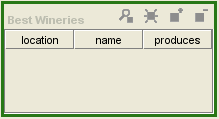 Best Wineries widget, with field headings
You can further configure the widget by double-clicking on it to open the Configure widget dialog. To delete the produces column, select the Define columns of instance table tab, click on the slot name produces, click the Remove the currently selected column (
) button
and click OK.
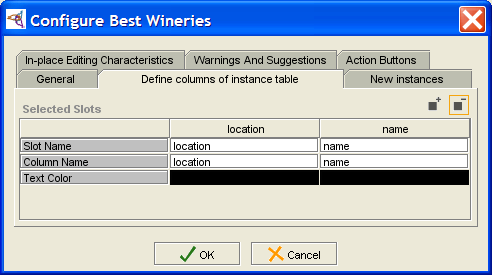 Configure Best Wineries dialog
You can also resize the widget by dragging.
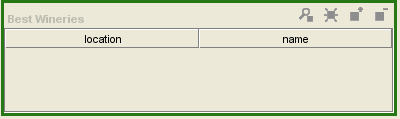 Best Wineries widget, resized


See the Forms Table of Contents for more information about customizing forms.
Understanding Slot Metaclasses
Slot metaclasses are similar to metaclasses, except that they determine the properties of slots instead of classes. Therefore, a slot metaclass is a metaclass that can be used as a template to determine the way Protege-Frames constructs a slot. By creating a new slot metaclass, you can create a different template for selected slots and attach additional information to your slot at the class level.
Note that slot metaclasses appear at the Classes tab as the :SLOT hierarchy. This is because every slot is an instance of a slot meta class. Slots are not values or subslots of a global slot. As with metaclasses, every subclass of a slot metaclass is also a slot metaclass.
Similar to metaclasses, slots are normally created using :STANDARD-SLOT, which provides the structure for slot attributes such as name, value type, etc. When you create a new slot metaclass, you will most often want to create it subordinate to :STANDARD-SLOT, so that any slots created using the slot metaclass will have the various properties defined by :STANDARD-SLOT.

Creating a Metaclass
Despite the power of metaclasses, their basic interface is very simple. Creating a metaclass is almost identical to creating a class. You simply have to make sure that the class is created subordinate to :CLASS. Every metaclass is subordinate to :CLASS. By default, every class subordinate to :CLASS is a metaclass, unless you change it.
Most often, it is desirable to create a metaclass subordinate to :STANDARD-CLASS, so that the classes created using the metaclass will have the various properties defined by the :STANDARD-CLASS slots. Without these properties, you cannot name the class or add template slots.
To create a new class as a metaclass:
Click on the desired superclass in the Class Browser. The selected superclass must itself be a metaclass. As mentioned above, this will be true only if the selected superclass is subordinate to :CLASS.
 Class Browser, ":STANDARD-CLASS" selected
Click the Create Class (
) button,
at the right of the Class Browser.
The new class will be added under the highlighted class.
It will inherit the properties of the selected metaclass,
including any template slots.
 Class Browser, "wines_Class_0" selected
Use the Class Editor to name the class, create constraints, and attach and edit template slots. Remember that the template slots you attach to the metaclass appear as entry fields on the Class Editor for the classes you create using this metaclass. For example, the :NAME slot for :STANDARD-CLASS becomes the Name entry field when you create a class. In the Wineries example, there is an additional slot named best_wineries.
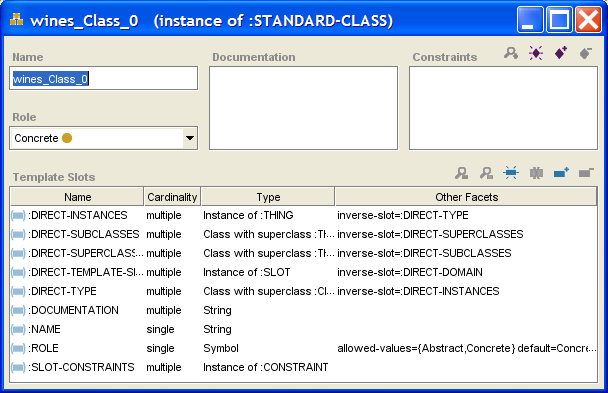 wines_Class_0 instance dialog


Changing the Slot Metaclass of a Slot
If you have multiple slot metaclasses in your project, then for any existing slot, you can change the slot metaclass you use for that slot. This gives the slot and the Slot Editor the attributes defined by the new slot metaclass. Subslots that you create subordinate to the slot will also use the new slot metaclass. However, any existing subslots will continue to use their previously assigned slot metaclass unless you specifically change it.
Unlike metaclasses, you cannot create a slot using the slot metaclass. If you want to have a slot that uses a specfic slot metaclass, you must first create the slot, then change the slot metaclass.
To change the slot metaclass of an existing slot:
In the Slots tab, click on the slot that you want to change.
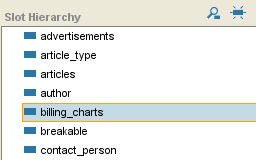 Slots tab, "billing_charts" selected
Click the right mouse button and select Change slot metaclass....
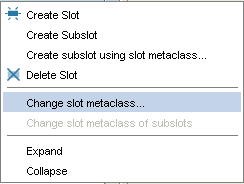 "Change slot metaclass..." selected
A dialog box displays the slot metaclasses. Note that if the slot currently uses a non-standard slot metaclass, you can revert to :STANDARD-SLOT.
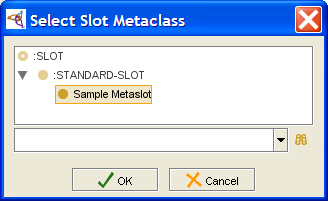 Select Slot Metaclass dialog, "Sample Metaslot" selected
Select the slot metaclass that has the properties that you want and click OK. The highlighted slot will now have the Slot Editor and properties determined by the selected slot metaclass.


Creating a Subslot Using a Slot Metaclass
Once you have added one or more slot metaclasses to your project, you can select the slot metaclass you want to use to create a subslot. When you create a subslot using a non-standard slot metaclass, the slot is given the attributes specified by the selected slot metaclass.
If you create a top-level slot, you must first create the slot, and then change its slot metaclass.
To create a subslot using a non-standard slot metaclass:
In the Slots tab, find the slot that you want as the superslot of the new slot.
Slots tab, "billing_charts" selectedClick the right mouse button and select "Create subslot using slot metaclass...".
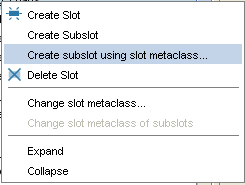 "Create subslot using ..." selected in menu
A dialog box displays the slot metaclasses.
Select Slot Metaclass dialog, "Sample Metaslot" selectedSelect the slot metaclass that you want and click OK. The new slot will be added under the highlighted slot. It will have the Slot Editor determined by the selected slot metaclass. The name of the slot metaclass you used is displayed at the top of the Slot Editor, immediately after the name of the slot. The Slot Editor may include additional widgets that are not part of :STANDARD-SLOT.
Use the Slot Editor to name the slot, choose its value type, and set its other properties.

Changing the Slot Metaclass of Subslots
When you change the slot metaclass of a slot, all of its subslots will retain their previous slot metaclass. This ensures that you do not propagate changes when you do not want to. However, often you will want existing subslots to have the same slot metaclass as their superslot. Protege-Frames provides an option to quickly change the slot metaclass of all the slots subordinate to a given slot. Note that you only have to do this once; by default, new slots use the slot metaclass of their direct superslot.
To change the slot metaclass of all existing subslots of a given slot:
In the Slot Browser, find the slot whose subslots you want to change.
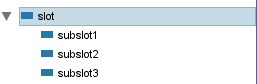 Slot Browser, "slot" selected
Click the right mouse button and select "Change slot metaclass of subslots". This will change all the slots below this one to have the same slot metaclass as the selected slot.
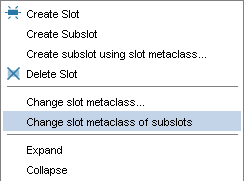 "Change slot ... subslots" selected in menu
A dialog box will appear, asking you for verification. Click OK to continue.
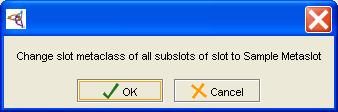 verification dialog
The change will be made; all subordinate slots will now have the slot metaclass of the selected slot.


Setting the Default Slot Metaclass
If you have multiple slot metaclasses in your project, Protege-Frames allows you to choose which slot metaclass you want to use as the default for every new slot you create.
Setting the Default Slot Metaclass
To set a slot metaclass as the default:
Click on the slot metaclass you want to use in the Class Browser. This must be a class that is subordinate to :SLOT.
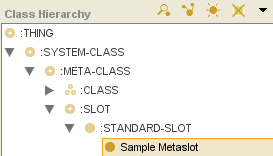 Class Browser, "Sample Metaslot" selected
Click the right mouse button and select Set as default metaslot from the Class menu. This option is available only when a slot metaclass is selected.
 "Set as Default Metaslot" selected in menu
The selected slot metaclass will become the default. Now, unless you choose otherwise, every new slot you create will use the new default slot metaclass as its template and inherit the properties defined by the default.


Unsetting the Default Slot Metaclass
It is also possible to remove the default property from a slot metaclass. If you do this, the new slot will be created with no fields in the Slot Editor. To unset the default metaslot:
Select the default slot metaclass in the Class Browser.
Click the right mouse button and select Unset as default slot metaclass.
 "Unset as Default Metaslot" selected in menu

Glossary
This Glossary defines terms used in this description of Protege. It is not meant to be an exhaustive list of terminology associated with object-oriented modeling.
Abstract Class
An abstract class cannot have instances.
It is identified with a hollow round icon
(e.g., ![]() or
or ![]() ).
).
Allowed Classes
A constraint on the values of a type-instance slot. The value of the slot can only be an instance of the class (or any of its children) in the Allowed Classes list.
Application
The program that combines the Protege knowledge base with a problem-solving method, so that end users can use a Protege knowledge base to solve a problem.
Boolean
A type of slot with a true or false value. Boolean slots appear as checkboxes in Protege-Frames. A checked box signifies a true value.
Browser Key
The browser key of a class is one of its slots whose value is displayed when instances of this class are referred to by other instances' forms.
Cardinality
A slot facet that describes whether the slot has just one value (single) or more than one value (multiple). In Protege-Frames, Single is the default.
Class
An abstract representation of a concept in a domain as a collection of related classes.
For example, a medical model might have protocol, guidelines,
and patient data as classes.
A class appears with a round gold icon in Protege-Frames
(e.g., ![]() ,
,
![]() ,
,
![]() ,
or
,
or
![]() ).
A class can have a set of slots that represent the attributes of the class.
).
A class can have a set of slots that represent the attributes of the class.
Classes Tab
The Protege-Frames part used to create, view, revise, and save classes.
Concrete Class
Concrete classes can have instances.
They are identified by a solid round icon
(e.g., ![]() or
or ![]() ).
).
Direct Slot
A slot which is attached directly to a class (in contrast to a slot which is inherited).
Domain
A particular field of knowledge, such as breast cancer.
Facet
An attribute of a slot. Some facets depend on the value of the type facet. For example, an integer slot type has facets for Minimum and Maximum.
Float
A positive or negative real numeric value (e.g., 1.0, 3.4e10, -0.3e-3), used as a slot value.
Forms Tab
The Protege-Frames part used to create the forms for acquiring instances of classes. It may also be used to view, revise, and save the forms.
Frame
A frame is a primitive object that represents an entity in the domain of discourse. In Protege-Frames, a frame can represent a class, slot, facet, or instance.
Inheritance
A parent-child (superclass-subclass) relationship between two classes. A child (subclass) inherits the slots of its parent classes (superclasses).
Inherited Slot
A slot that is attached to a class via inheritance from a superclass.
Instance (KB value)
Concrete occurrence of information about a domain that is entered into a knowledge base. For example, Fran Smith might be an instance for a Name slot. An instance is entered via a form generated by Protege-Frames.
Instance (slot type)
A type of slot whose value is the instance of a class.
Instances Tab
The Protege-Frames part used to acquire instances of classes. It may also be used to view, revise, and save the instances.
Integer
A positive or negative whole number (e.g., 1, 2, -4), used as a slot value.
Knowledge-acquisition tool
A tool used to build a knowledge base by acquiring instances. In Protege-Frames, the forms comprise the KA tool.
Knowledge base (KB)
A set of instances of classes which may be used by PSMs.
Knowledge-based system
A computer system that includes a knowledge base about a domain and programs that include rules for processing the knowledge and for solving problems relating to the domain.
Metaclass
A template; that is, a class whose instances are themselves classes.
Ontology
A model of a particular field of knowledge - the concepts and their attributes, as well as the relationships between the concepts. In Protege-Frames, an ontology is represented as a set of classes with their associated slots.
PAL (Protege Axiom Language)
A plugin toolset that comprises engines for checking constraints and running queries on knowledge bases, as well as a set of useful user interface components.
.pins file
A Protege-Frames file in CLIPS format that contains instances.
.pont file
A Protege-Frames file in CLIPS format that contains an ontology.
.pprj file
A Protege file that contains a project. A project file contains the customized form information and references to external sources of the domain information.
Problem-solving method (PSM)
A computer program that is used in conjunction with a knowledge base to answer questions or solve problems.
Slot
An attribute of a class. For example, a physician class might have name, title, and phone number as slots.
Slot Type
A slot facet that identifies the kind of values a slot may have - any, boolean, float, instance, integer, string, or symbol.
Slots Tab
The Protege-Frames part that allows you to create, view, edit, and delete slots.
Symbol
An enumerated list of slot values, such as red, blue, green.