SetUpEclipseForPlugin
Setting up Eclipse for plug-in development
This page is intended for people who want to develop their own plug-in (e.g., tab widget, slot widget, project plug-in, etc.) and who use Eclipse as their Java development environment. This is a step-by-step guide that shows the setup of the Eclipse environment using screen shots. We will use as an example the scenario in which a developer wants to create a tab widget that displays "Hello World!". These steps can be used for developing any plug-in type.
Contents
Prerequisites
Before we start, make sure that you have the latest version of Protege 3.x and Eclipse installed.
- Download and install Eclipse from here.
- Download and install latest version of Protege 3.x from here. Let's say you have installed Protege in:
Setting up Eclipse
Step 1. Create a new Java Project
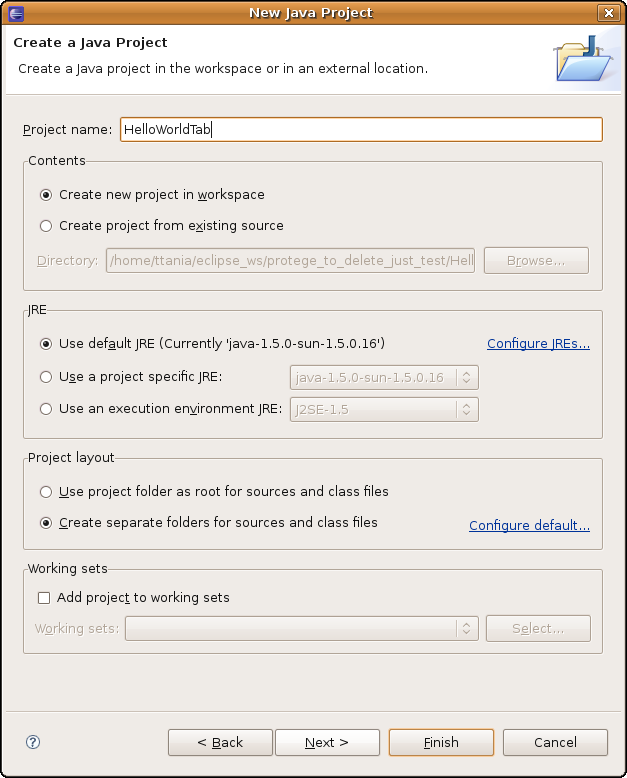
Start Eclipse. Go to File Menu -> New -> Project -> Select Java Project. Click Next. In the next panel choose a project name, say "HelloWorldTab". The screen should look like below:
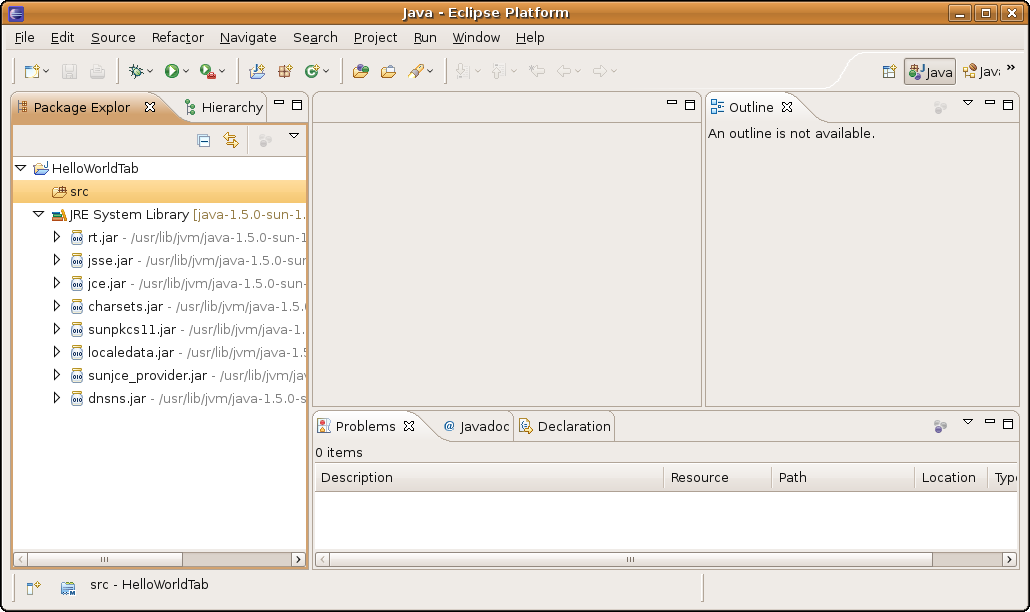
Click Finish. Congratulations! You have created an empty Java project. Your screen should look like:
Step 2. Configure the project build path
This step assumes that you have Protege 3.x installed on your computer. This example assumes that Protege was installed in /work/protege/Protege_3.4 (On Windows machines, the default installation directory would be something like C:\Program Files\Protege_3.4)
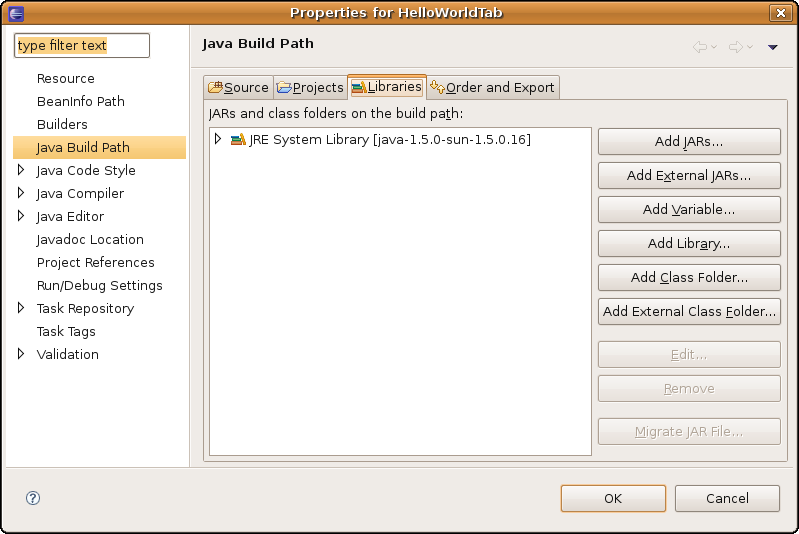
Select the project name, HelloWorldTab', right click, select Build Path -> Configure Build Path.... Switch to the Libraries tab. You should see an something like this:
Click on Add External JARs... and go to the Protege installation directory. Select from there the:
- protege.jar
- looks-2.1.3.jar (version may vary)
Click OK.
If your plug-in is for OWL, you will need to include also all the jars in the protege-owl plug-in folder. Repeat the same operation: Click Add External Jars, go to the Protege installation directory/plugins/edu.stanford.smi.protegex.owl and select all the jar files in that directory.
Note If your plug-in depends on other plug-ins (e.g., on the Change Management plug-in), then you need to add to the build path also all the jars in that plug-in folder.
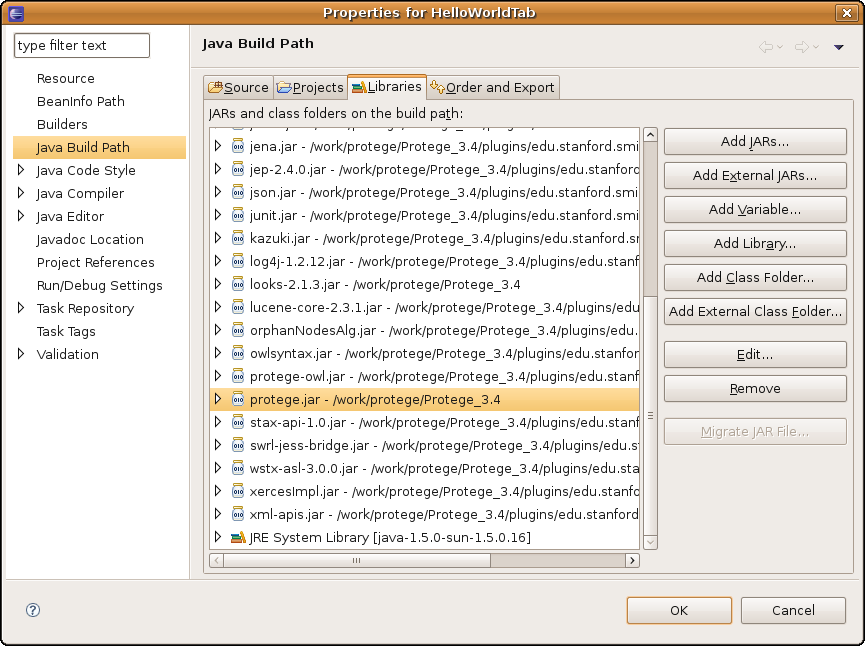
After adding the Protege jars (and the protege-owl jars), the Library tab should look like:
Click OK.
Step 3. Create the Java plug-in class
OK, so now Eclipse is set up, all we need is to create a new tab widget. We have documentation about implementing different plug-in types on our Developer's webpage.
This guide will create a tab widget that displays "Hello World". To create a Tab Widget, you need to extend the class edu.stanford.smi.protege.widget.AbstractTabWidget from the protege.jar and implement the method initialize() that is called when the tab is created.
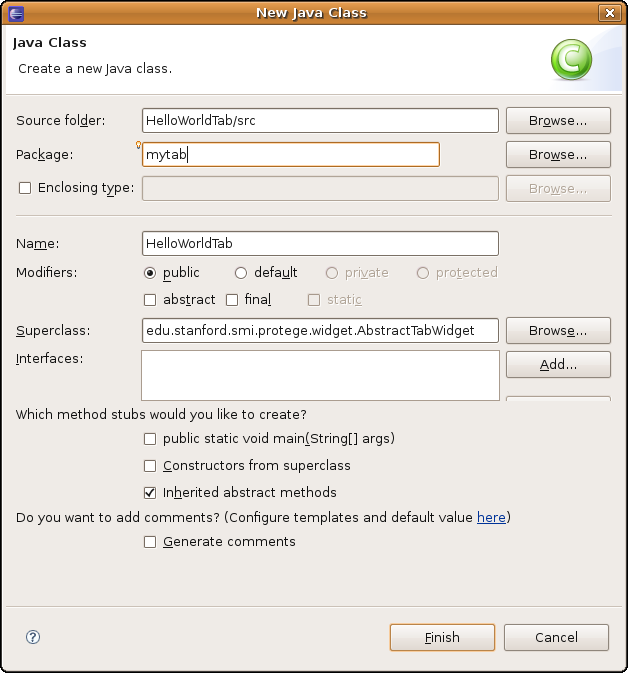
Right-click on src, select New -> Class. In the new class panel:
- Write in the Name field:
HelloWorldTab - Write in the Superclass field:
AbstractTabWidget(auto-completion also works, press Ctrl+Space) - Write in the Package field:
mytab
This is what you should see:
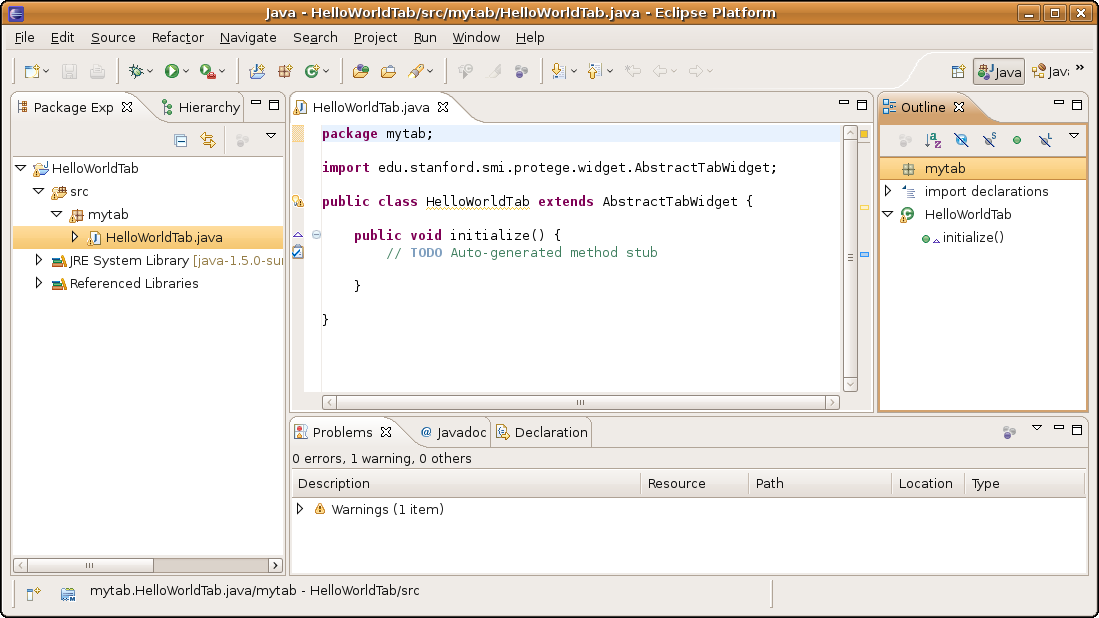
Click Finish. The new class should show up under the src folder. An empty implementation of the initialize method was already created by Eclipse. You should see this:
You can replace the code of the class with the one from below (just prints "Hello World!"):
package mytab;

import javax.swing.JLabel;

import edu.stanford.smi.protege.widget.AbstractTabWidget;

public class HelloWorldTab extends AbstractTabWidget {

	public void initialize() {
		add(new JLabel("Hello World!"));
	}

	public static void main(String[] args) {
		edu.stanford.smi.protege.Application.main(args);
	}

}
Our HelloWorldTab plug-in will display "Hello World!" in a tab.
Step 4. Create the manifest file
To make Protege recognize the new tab widget, you will need to create a manifest file. We have instructions about creating the manifest file here.
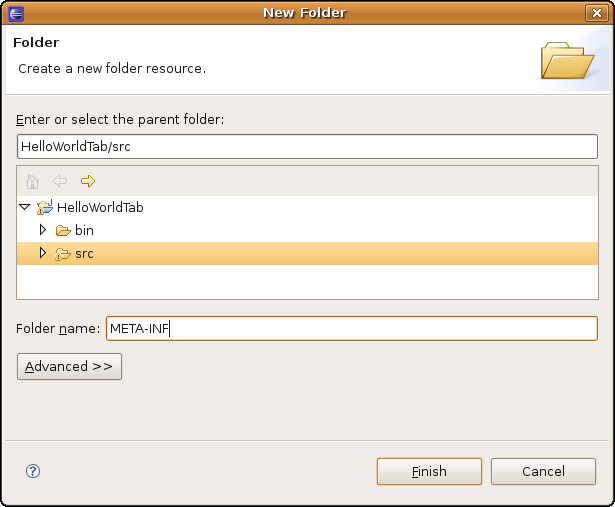
Right-click on src -> New -> Folder. In the panel, select the src node, and folder name: META-INF (capital letters!). This is what you should see:
After you click on Finish, the new folder META-INF is created under src.
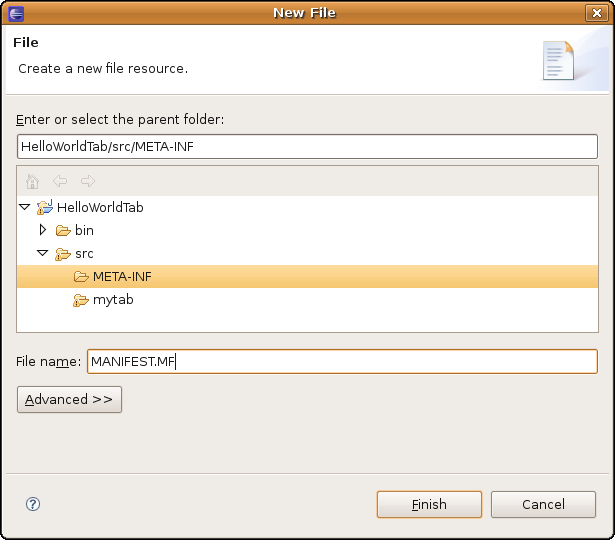
Right-click on the META-INF folder, New -> File. In the panel, select META-INF, and for the file name write: MANIFEST.MF (capital letters!). This is how it should look like:
Click Finish.
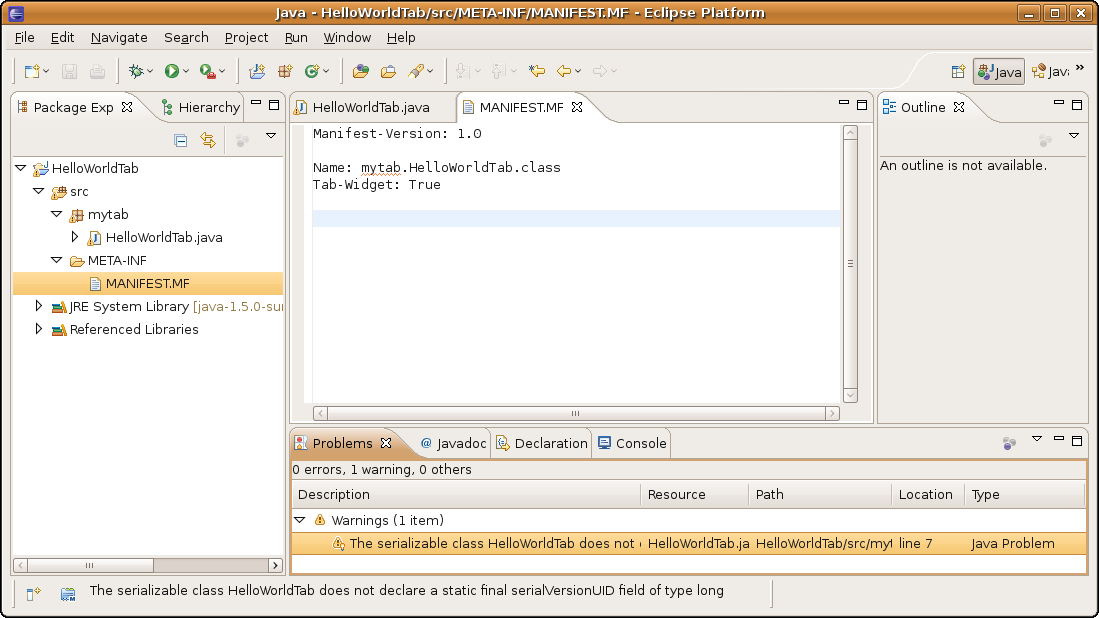
Copy and paste the text from below in the content of the just created MANIFEST.MF:
Manifest-Version: 1.0

Name: mytab.HelloWorldTab.class
Tab-Widget: True
The empty row at the end of the file is very important!
Save the MANIFEST.MF file (by clicking Ctrl+S) and this is what you should see:
