WebProtegeDeveloperHowTo
From Protege Wiki
Revision as of 19:21, April 15, 2008 by JenniferVendetti (talk | contribs) (incremental save of new work)
Jennifer & Tania's selp-help page for developing WebProtege :)
Contents
Checkout, compile, and run WebProtege using Eclipse
Note that WebProtege uses the Google Web Toolkit (http://code.google.com/webtoolkit/) and these instructions assume that you have already installed GWT.
Checkout the source code
- Open Eclipse and go to the SVN Respository Exploring perspective.
- Navigate to the top-level "web-protege-eclipse" directory in the Protege Subversion repository (URL for Protege's SVN is: http://smi-protege.stanford.edu/repos/protege).
- Right-click on web-protege-eclipse and choose Checkout...
- Choose the following options in the Checkout from SVN dialog:
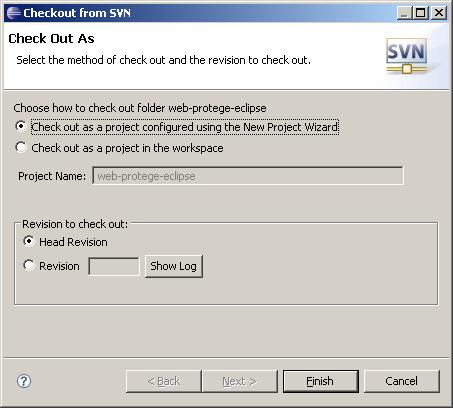
- Click the Finish button.
- In the New Project dialog, select Java Project, and click Next.
- In the resulting New Java Project dialog, give the project a name (like "web-protege" for example) and configure the rest of the options roughly as follows (project options can be changed later):

- Click the Finish button.


At this point, Eclipse will check out the source code and create a new Java project for WebProtege. Once the checkout is complete, you will notice that there are many compilation errors. We will fix these later. For now, close the Eclipse development environment and proceed with the next steps.
Rename the src directory
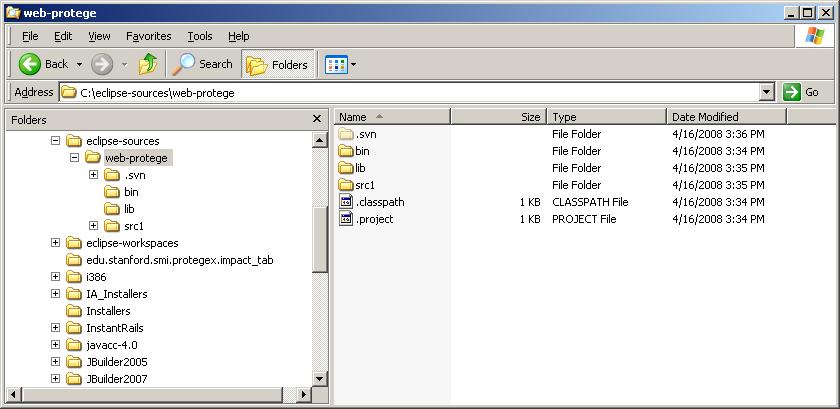
- Open Windows Explorer (or equivalent on other platforms) and navigate to the directory where Eclipse created the "web-protege" project.
- Rename the "src" directory to something else, like "src1" for example. This is a temporary measure that will prevent the source code from getting overwritten when we generate the necessary GWT project and application files. Your file structure should now look something like the following:

Run the GWT projectCreator script
- Open a Command Prompt (or equivalent on other platforms) and change to the root directory of the Eclipse project you just created.
- Run the GWT projectCreator script using the syntax
projectCreator -eclipse <your-project-name> -overwrite. More documentation about the projectCreator tool can be found on the GWT Web site. You should see something like the following after running the script:

Run the GWT applicationCreator script
- In the same directory in the Command Prompt, run the GWT applicationCreator script using the syntax
applicationCreator -eclipse <your-project-name> edu.stanford.bmir.protege.web.client.WebProtege. More documentation about the applicationCreator tool can be found on the GWT Web site. You should see something like the following after running the script: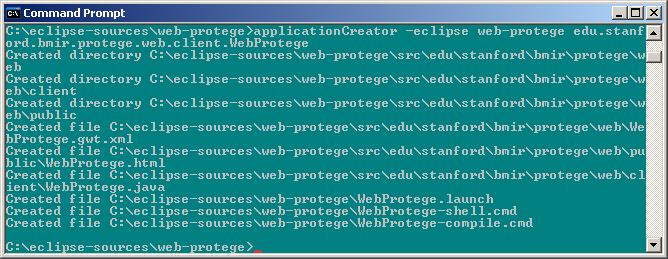

Restore the original src directory
- In Windows Explorer (or equivalent on other platforms), navigate to your project directory and delete the "src" directory that was generated by GWT's applicationCreator script.
- Rename "src1" back to "src".
Import your project into Eclipse
- Reopen the Eclipse development environment.
- Select File | Import...
- In the Import dialog, choose General -> Existing Projects into Workspace and click Next.