Difference between revisions of "WebProtegeDeveloperHowTo"
From Protege Wiki
(incremental save of new work) |
|||
| Line 1: | Line 1: | ||
| − | <span style="font-size:18px; font-weight:bold">Jennifer | + | <span style="font-size:18px; font-weight:bold">Jennifer & Tania's selp-help page for developing WebProtege :)</span><br /><br /> |
| + | |||
| + | __TOC__ | ||
== Checkout, compile, and run WebProtege using Eclipse == | == Checkout, compile, and run WebProtege using Eclipse == | ||
| + | |||
| + | === Checkout the source code === | ||
| + | |||
| + | # Open Eclipse and go to the SVN Respository Exploring perspective. | ||
| + | # Navigate to the top-level "web-protege-eclipse" directory in the Protege Subversion repository (URL for Protege's SVN is: http://smi-protege.stanford.edu/repos/protege). | ||
| + | # Right-click on web-protege-eclipse and choose Checkout... | ||
| + | # Choose the following options in the Checkout from SVN dialog:<br /><br />[[Image:WebProtege-checkout-from-svn.jpg|none]]<br /> | ||
| + | # Click the Finish button. | ||
| + | # In the New Project dialog, select Java Project, and click Next. | ||
| + | # In the resulting New Java Project dialog, give the project a name and configure the rest of the options roughly as follows (project options can be changed later): | ||
Revision as of 16:52, April 15, 2008
Jennifer & Tania's selp-help page for developing WebProtege :)
Checkout, compile, and run WebProtege using Eclipse
Checkout the source code
- Open Eclipse and go to the SVN Respository Exploring perspective.
- Navigate to the top-level "web-protege-eclipse" directory in the Protege Subversion repository (URL for Protege's SVN is: http://smi-protege.stanford.edu/repos/protege).
- Right-click on web-protege-eclipse and choose Checkout...
- Choose the following options in the Checkout from SVN dialog:
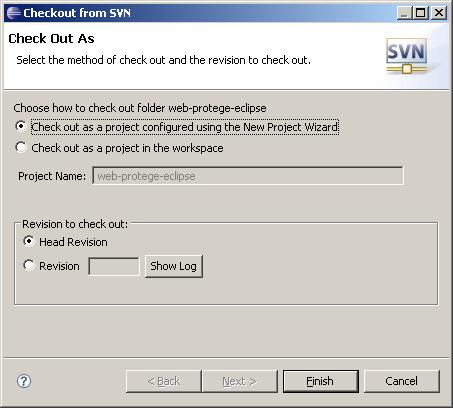
- Click the Finish button.
- In the New Project dialog, select Java Project, and click Next.
- In the resulting New Java Project dialog, give the project a name and configure the rest of the options roughly as follows (project options can be changed later):
