Difference between revisions of "PrF UG files rdf backend"
| (3 intermediate revisions by the same user not shown) | |||
| Line 2: | Line 2: | ||
== Using the {{#var:PrF}} RDF Backend == | == Using the {{#var:PrF}} RDF Backend == | ||
| − | {{PrF_UG_TOC_files}}<div id='prf_ug'> | + | <noinclude>{{PrF_UG_TOC_files}}<div id='prf_ug'></noinclude> |
| − | Although it is recommended to use {{#var:PrO}} for RDF(S) projects, {{#var:PrF}} also has an RDF backend you can use for {{#var:PrF}} projects. | + | Although it is recommended to use {{#var:PrO}} for RDF(S) projects, |
| + | {{#var:PrF}} also has an RDF backend you can use for {{#var:PrF}} projects. | ||
The backend does not work with {{#var:PrO}}. | The backend does not work with {{#var:PrO}}. | ||
| Line 12: | Line 13: | ||
<li><p> | <li><p> | ||
Create a new project, | Create a new project, | ||
| − | either by selecting <b>Create New Project</b> from the start-up dialog or <b>File | Create New</b> in the {{#var:Pr}} window. | + | either by selecting <b>Create New Project</b> from the start-up dialog |
| + | or <b>File | Create New</b> in the {{#var:Pr}} window. | ||
</p> | </p> | ||
| Line 25: | Line 27: | ||
If you are creating a <i>new</i> RDF file, | If you are creating a <i>new</i> RDF file, | ||
leave it unchecked (default). | leave it unchecked (default). | ||
| − | |||
| − | |||
</p> | </p> | ||
| + | <div>[[Image:PrF_UG_files_create_from_existing_checkbox.png|frame|none| | ||
| + | Create from Existing Sources checkbox (checked)]]</div> | ||
<li><p> | <li><p> | ||
| Line 33: | Line 35: | ||
enter the information you want in the <b>Project</b> line of the dialog box. | enter the information you want in the <b>Project</b> line of the dialog box. | ||
Be sure to give the file a <b>.pprj</b> extension. | Be sure to give the file a <b>.pprj</b> extension. | ||
| − | If you do not specify a location for the project, | + | If you do not specify a location for the project, by default, |
| − | |||
the project is saved in the directory where {{#var:Pr}} is installed. | the project is saved in the directory where {{#var:Pr}} is installed. | ||
</p> | </p> | ||
| Line 41: | Line 42: | ||
{{#var:PrF}} will create two files: | {{#var:PrF}} will create two files: | ||
one for the schema (classes and slots) and the other for the instances. | one for the schema (classes and slots) and the other for the instances. | ||
| − | By default, | + | By default, these use the name of the existing <b>.pprj</b> file. |
| − | |||
If you wish to change the name of the schema file, | If you wish to change the name of the schema file, | ||
type the new name in the Classes file name line of the dialog box. | type the new name in the Classes file name line of the dialog box. | ||
| Line 59: | Line 59: | ||
</ol> | </ol> | ||
| − | <b>Note:</b> You should create new RDF classes as subclasses of <tt>rdfs:Resource</tt>. | + | <b>Note:</b> |
| + | You should create new RDF classes as subclasses of <tt>rdfs:Resource</tt>. | ||
=== Converting a {{#var:PrF}} Project to RDF Format === | === Converting a {{#var:PrF}} Project to RDF Format === | ||
| − | <b>Note:</b> Subclasses of <b>:THING</b> from a non-RDF project will become subclasses of <tt>rdfs:Resource</tt> when you save as RDF. | + | <b>Note:</b> |
| + | Subclasses of <b>:THING</b> from a non-RDF project will become subclasses | ||
| + | of <tt>rdfs:Resource</tt> when you save as RDF. | ||
After you have chosen your format, | After you have chosen your format, | ||
| − | choose the name and location for the project, | + | choose the name and location for the project, as follows: |
| − | as follows: | ||
<ol class='a'> | <ol class='a'> | ||
| Line 75: | Line 77: | ||
<li><p> | <li><p> | ||
| − | Select <b>Resource Description Framework (RDF)</b> in the <b>Select Format</b> dialog box. | + | Select <b>Resource Description Framework (RDF)</b> |
| + | in the <b>Select Format</b> dialog box. | ||
</p> | </p> | ||
| Line 87: | Line 90: | ||
enter the information you want in the <b>Project</b> line of the dialog box. | enter the information you want in the <b>Project</b> line of the dialog box. | ||
Be sure to give the file a <b>.pprj</b> extension. | Be sure to give the file a <b>.pprj</b> extension. | ||
| − | To browse for a new location, | + | To browse for a new location, click the <b>Add</b> |
| − | + | ([[Image:PrF_UG_all_object.add.gif|all_object.add]]) button. | |
| − | [[Image:PrF_UG_all_object.add.gif|all_object.add]] | + | If you do not specify a location for the project, by default, |
| − | |||
| − | If you do not specify a location for the project, | ||
| − | |||
the project is saved in the directory where {{#var:Pr}} is installed. | the project is saved in the directory where {{#var:Pr}} is installed. | ||
</p> | </p> | ||
| Line 99: | Line 99: | ||
{{#var:PrF}} will create two files: | {{#var:PrF}} will create two files: | ||
one for the schema (classes and slots) and the other for the instances. | one for the schema (classes and slots) and the other for the instances. | ||
| − | By default, | + | By default, these use the name of the existing <b>.pprj</b> file. |
| − | |||
If you wish to change the name of the schema file, | If you wish to change the name of the schema file, | ||
type the new name in the Classes file name line of the dialog box. | type the new name in the Classes file name line of the dialog box. | ||
| Line 118: | Line 117: | ||
| − | </div> | + | <noinclude></div></noinclude> |
Latest revision as of 17:47, November 13, 2008
Using the RDF Backend
Although it is recommended to use Protege-OWL for RDF(S) projects, Protege-Frames also has an RDF backend you can use for Protege-Frames projects. The backend does not work with Protege-OWL.
Creating an RDF(S) Project with the Protege-Frames Backend
Create a new project, either by selecting Create New Project from the start-up dialog or File | Create New in the Protege window.
Select Resource Description Framework (RDF) as the Project Type.
If you are importing an existing file, make sure to check Create from Existing Sources, located at the top of the dialog box. If you are creating a new RDF file, leave it unchecked (default).
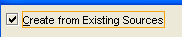 Create from Existing Sources checkbox (checked)
To select or change the name or location of the .pprj file, enter the information you want in the Project line of the dialog box. Be sure to give the file a .pprj extension. If you do not specify a location for the project, by default, the project is saved in the directory where Protege is installed.
Protege-Frames will create two files: one for the schema (classes and slots) and the other for the instances. By default, these use the name of the existing .pprj file. If you wish to change the name of the schema file, type the new name in the Classes file name line of the dialog box. Make sure to give the file an .rdfs extension.
If you wish to change the name of the instances file, type the new name in the Instances file name line of the dialog box. Make sure to give the file an .rdf extension.
Click OK.
Note: You should create new RDF classes as subclasses of rdfs:Resource.
Converting a Protege-Frames Project to RDF Format
Note: Subclasses of :THING from a non-RDF project will become subclasses of rdfs:Resource when you save as RDF.
After you have chosen your format, choose the name and location for the project, as follows:
Select Convert to Format... from the File menu.
Select Resource Description Framework (RDF) in the Select Format dialog box.
When you have selected Resource Description Framework (RDF), the RDF dialog box will be displayed.
To select or change the name or location of the .pprj file, enter the information you want in the Project line of the dialog box. Be sure to give the file a .pprj extension. To browse for a new location, click the Add (
 ) button.
If you do not specify a location for the project, by default,
the project is saved in the directory where Protege is installed.
) button.
If you do not specify a location for the project, by default,
the project is saved in the directory where Protege is installed.
Protege-Frames will create two files: one for the schema (classes and slots) and the other for the instances. By default, these use the name of the existing .pprj file. If you wish to change the name of the schema file, type the new name in the Classes file name line of the dialog box. Make sure to give the file an .rdfs extension.
If you wish to change the name of the instances file, type the new name in the Instances file name line of the dialog box. Make sure to give the file an .rdf extension.
Click OK.