Difference between revisions of "File:EditorPaneWidget2.JPG"
From Protege Wiki
| Line 1: | Line 1: | ||
| − | + | Click on the ‘Instances’ tab with class ‘Article’ selected. Select any instance of class ‘Article’ and type | |
| − | + | the text in the ‘Text’ slot. | |
| − | + | (Before this, make sure to click on ‘Forms’ tab at the top and select the class ‘Article’ in the ‘Form Browser’ on the left. Select 'EditorPaneWidget' as the WidgetType for the slot in which you want to enable html and hyperlinks) | |
Latest revision as of 16:50, November 14, 2007
Click on the ‘Instances’ tab with class ‘Article’ selected. Select any instance of class ‘Article’ and type the text in the ‘Text’ slot. (Before this, make sure to click on ‘Forms’ tab at the top and select the class ‘Article’ in the ‘Form Browser’ on the left. Select 'EditorPaneWidget' as the WidgetType for the slot in which you want to enable html and hyperlinks)
File history
Click on a date/time to view the file as it appeared at that time.
| Date/Time | Thumbnail | Dimensions | User | Comment | |
|---|---|---|---|---|---|
| current | 16:14, November 14, 2007 | 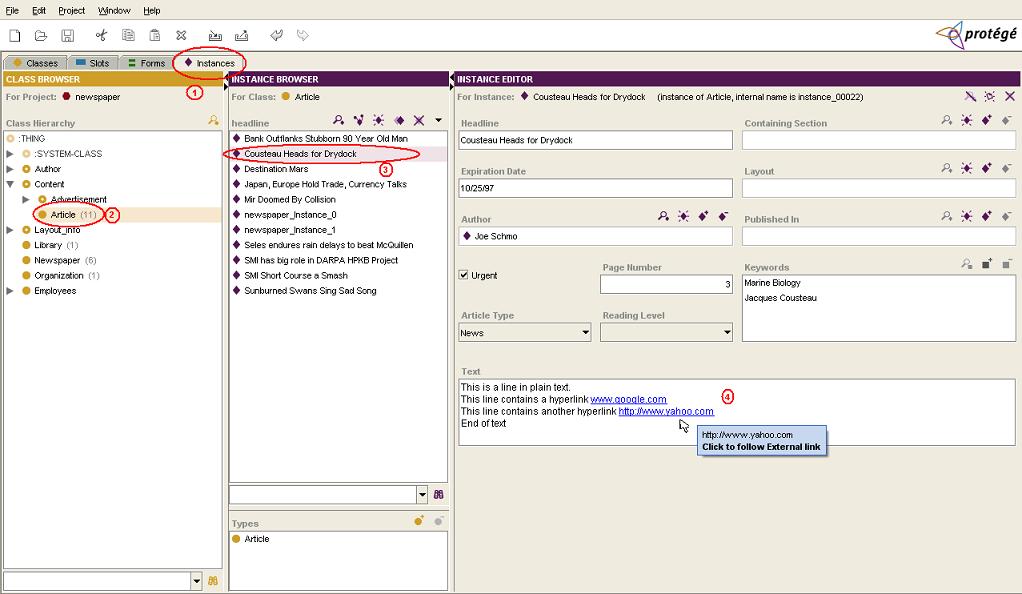 | 1,022 × 594 (77 KB) | Vivekyt (talk | contribs) | 2. Switch to the ‘Instances’ tab with class ‘Article’ selected. Select any instance of class ‘Article’ and type the text in the ‘Text’ slot. |
- You cannot overwrite this file.
File usage
There are no pages that link to this file.