Difference between revisions of "WebProtegeUsersGuide"
| Line 41: | Line 41: | ||
| + | == Lightweight editing with auto-completion support == | ||
| − | + | It is now much easier and faster to create content in the new interface of WebProtege that has support for auto-completion. | |
| + | |||
| + | [[File:WP-classes.png]] | ||
| + | |||
| + | |||
| + | == Other tabs and portlets == | ||
WebProtégé has a configurable user interface, and each user can customize the layout and save it for future sessions. The user may choose from a list of existing tabs and add portlets dynamically from the user interface. It is also possible to create a new empty tab and add the needed portlets through drag-n-drop. More information on the layout configuration can be found [[WebProtegeLayoutConfig|here]]. | WebProtégé has a configurable user interface, and each user can customize the layout and save it for future sessions. The user may choose from a list of existing tabs and add portlets dynamically from the user interface. It is also possible to create a new empty tab and add the needed portlets through drag-n-drop. More information on the layout configuration can be found [[WebProtegeLayoutConfig|here]]. | ||
Revision as of 16:46, April 25, 2013
WebProtégé User Guide
WebProtégé is an open source, lightweight, web-based ontology editor.
Contents
Go back to WebProtégé main page.
Looking for the user guide of the old WebProtege (release 1.0)? Here it is.
Home Screen
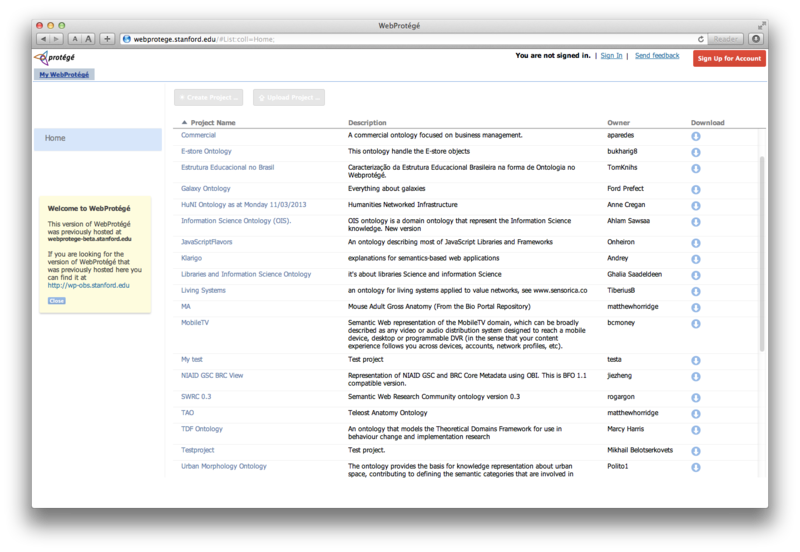
When you open http://webprotege.stanford.edu in a browser you should see the list of public projects and various links to create an account or sign in (top right). You can download the ontologies in any publicly available project by clicking the download icon in the table. To open a project click on its name in the Project Name column.
To create and upload your own projects you need to have a user account and be signed in. If you don't have a user account you can create one using the Sign Up for Account button. To sign in click the Sign In link in the top right of the browser window. Enter your user name and password in the dialog that pops up. (You can also sign in with OpenId).
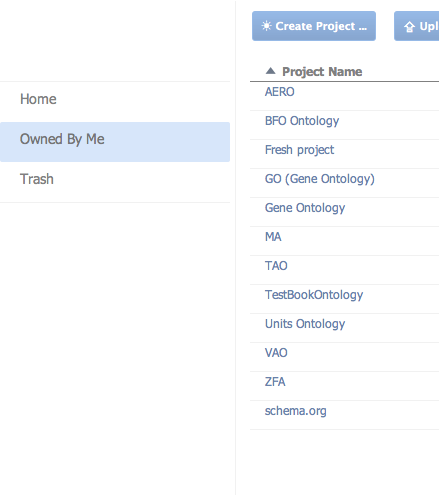
Once you are signed in you will see a side bar on the left hand side of the screen which offers different categories of projects to view. Clicking on any item in the side bar will filter the list of projects. The home item shows all projects which are owned by you and projects which you have read or write access to. The Owned By Me item filters the list of projects to show projects which you actually own. The Trash item filters the list of projects to show projects which you own that are in the trash. Projects that are in the trash do not get deleted, they just aren't visible to other users.
Creating and Uploading Projects
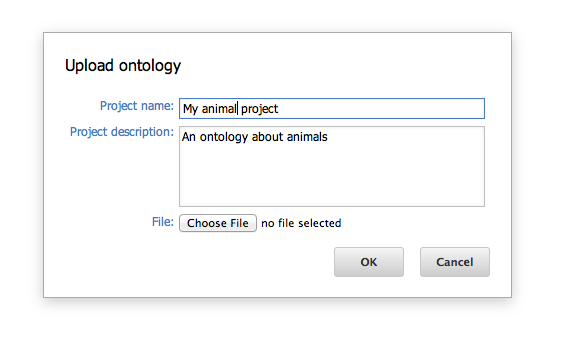
To create a new empty project press the Create Project... button. To upload an existing ontology into a new project (either an OWL ontology or an OBO ontology) press the Upload Project ... button. In both cases a dialog will appear like the one shown below. Enter the name for the project (this need not be unique) and description of the project and press o.k.
Sharing Project with Collaborators
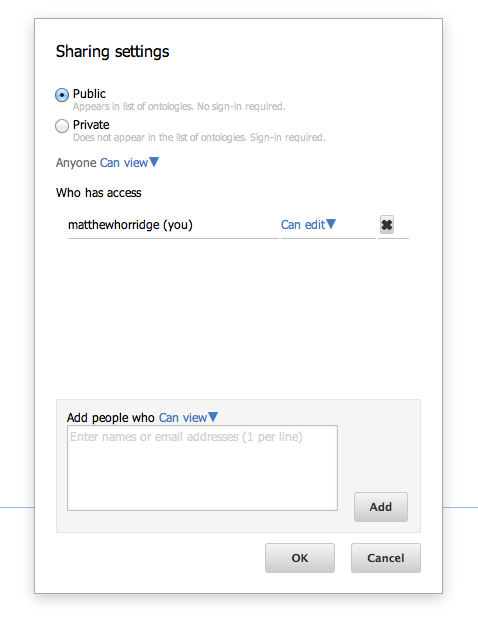
You can share your project with other people so that they can view, comment or edit it. To do this click the Share link in the top right of the browser window. The sharing settings dialog will appear as shown below.
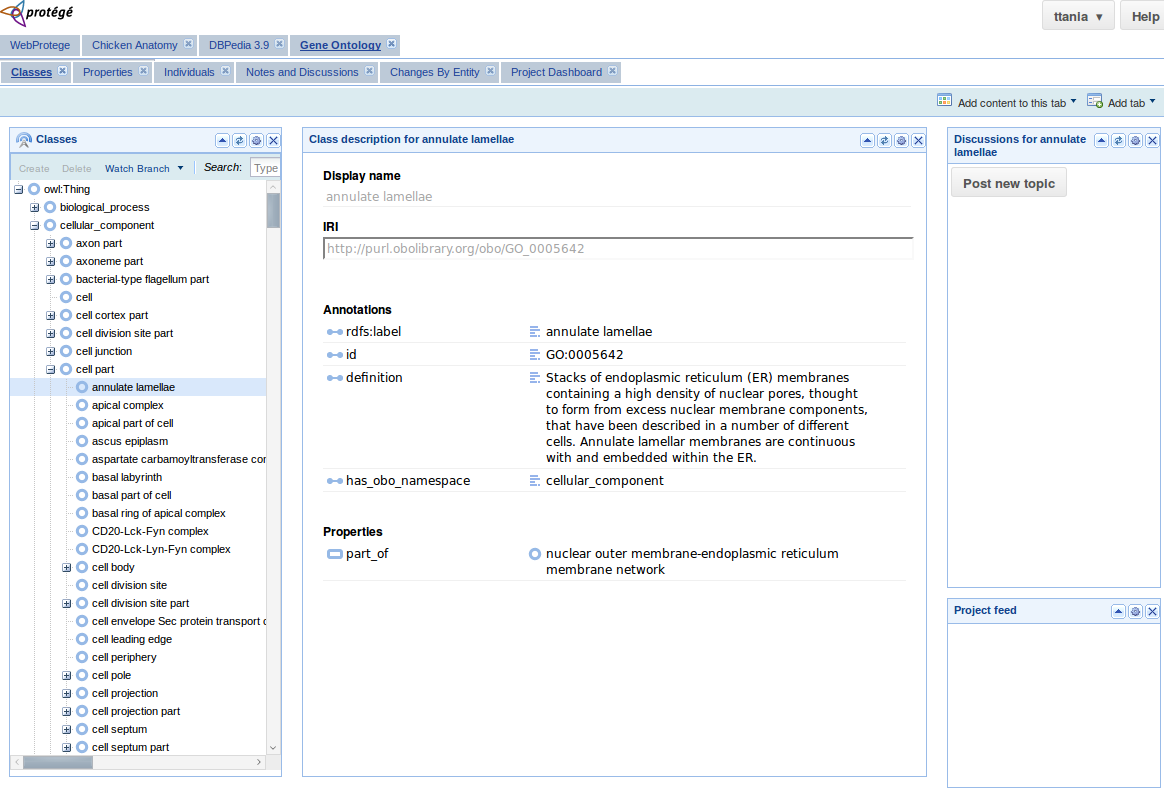
Lightweight editing with auto-completion support
It is now much easier and faster to create content in the new interface of WebProtege that has support for auto-completion.
Other tabs and portlets
WebProtégé has a configurable user interface, and each user can customize the layout and save it for future sessions. The user may choose from a list of existing tabs and add portlets dynamically from the user interface. It is also possible to create a new empty tab and add the needed portlets through drag-n-drop. More information on the layout configuration can be found here.
References
Further documentation and references on WebProtégé can be found here.
Go back to WebProtégé main page.
