Difference between revisions of "CompileProtege4InEclipseFromSvn"
(→Prerequisites) |
(→Configuring Eclipse) |
||
| Line 19: | Line 19: | ||
svn checkout http://smi-protege.stanford.edu/repos/protege/protege4/ide/eclipse/protege4.1 | svn checkout http://smi-protege.stanford.edu/repos/protege/protege4/ide/eclipse/protege4.1 | ||
</pre> | </pre> | ||
| − | This creates an eclipse workspace but some of the metadata is still missing. | + | This creates an eclipse workspace but some of the metadata is still missing. Note that when using Tortoise svn, you need to do a full recursive checkout. It may appear that there is only one file in the repository but the svn checkout needs to also checkout the external references. |
| − | '''Step 2: Install the Eclipse metadata''' Inside the directory that you just checked out is a file called metadata.zip. Extract this file into the created directory. Now the eclipse workspace is ready for eclipse. | + | '''Step 2: Install the Eclipse metadata''' Inside the directory that you just checked out is a file called metadata.zip. Extract this file into the created directory. Now the eclipse workspace is ready for eclipse. Note that on the mac, double-clicking the metadata.zip file does not do the right thing; it does not simple extract the files into the current directory. So on the mac the command line unzip is probably recommended: |
| + | <pre> | ||
| + | unzip metadata.zip | ||
| + | </pre> | ||
'''Step 3: Load the Workspace''' Start eclipse and choose the newly created directory as the workspace. You should see seven projects. Select them all, right click and select refresh. | '''Step 3: Load the Workspace''' Start eclipse and choose the newly created directory as the workspace. You should see seven projects. Select them all, right click and select refresh. | ||
Revision as of 10:37, January 8, 2010
Prerequisites
To follow these directions you will need the following tools:
- Eclipse (of course) with
- the Plugin Development tools included. As indicated here, the plugin development environment comes with the Java EE or the RCP/Plugin versions of eclipse.
- the Eclipse Subversive plugin, though this is only required if you want to do svn updates using eclipse.
- A tool for checking out a repository from subversion (e.g. tortoise or the svn command line client). NOte that there is another similar but different plugin (from Tigris I believe). I don't know if these plugins interfere with one another if they are both loaded.
- A tool for extracting a zip file into a directory.
These directions are based on a preconfigured workspace which you can use for the build.
Configuring Eclipse
Step 1: Checking out the workspace Use subversion to checkout the following workspace:
http://smi-protege.stanford.edu/repos/protege/protege4/ide/eclipse/protege4.1
If you are using command line tools you can do this with the svn command
svn checkout http://smi-protege.stanford.edu/repos/protege/protege4/ide/eclipse/protege4.1
This creates an eclipse workspace but some of the metadata is still missing. Note that when using Tortoise svn, you need to do a full recursive checkout. It may appear that there is only one file in the repository but the svn checkout needs to also checkout the external references.
Step 2: Install the Eclipse metadata Inside the directory that you just checked out is a file called metadata.zip. Extract this file into the created directory. Now the eclipse workspace is ready for eclipse. Note that on the mac, double-clicking the metadata.zip file does not do the right thing; it does not simple extract the files into the current directory. So on the mac the command line unzip is probably recommended:
unzip metadata.zip
Step 3: Load the Workspace Start eclipse and choose the newly created directory as the workspace. You should see seven projects. Select them all, right click and select refresh.
Step 4: Run Protege (The easy and better way) This step is a bit problematic on the mac but works for linux and windows machines. Click on the down arrow just to the right of the little bug (near the top of the eclipse window perhaps just under the Refactor menu). Select Protege (not Protege.From.Build). This should start Protege.
Step 5: Run Protege the Harder Way The second icon to the right of the little bug is a run icon with a suitcase. Click the little down arrow beside this icon and run the following scripts in this order:
- Build.Protege.Infrastructure
- Build.Common
- Build.Core
- Build.Owlapi.Lib
- Build.Owl.Editor
- Build.OwlViz
Now we have built a Protege distribution. This distribution is in the Protege directory in the eclipse workspace. Having created this distribution, we can run the other runnable in the bug menu. Click the down arrow beside the little bug and select run Protege from build.
Step 6: Add your plugin Just make your plugin into a plugin development project. If you are able to run protege the easy way then your plugin will be included. Hotspot replace works (some of the time as always).
If you run protege the harder way then you will need to install your plugin into the protege distribution that we have created. To do this you will need an ant build file. We have provided a template build file that can easily be filled in. We will now describe how this script is added as an eclipse build script. We will turn the fact that I forgot to install the dlquery build script in eclipse into an advantage by showing how this is added here.
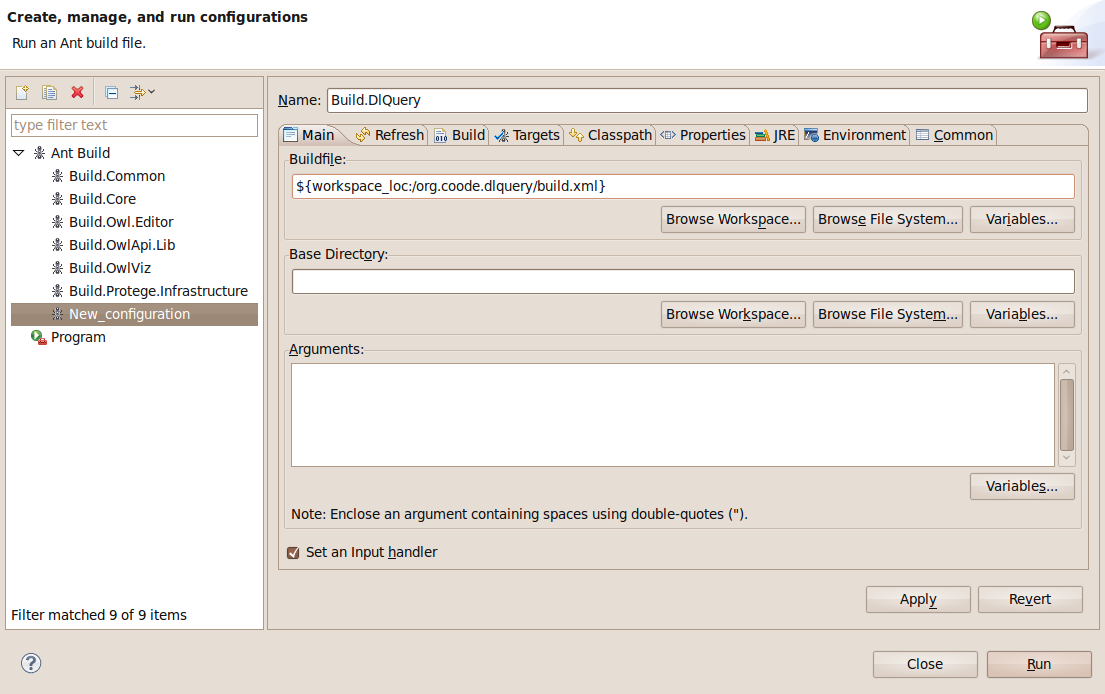
To create this new eclipse build script, click on the down arrow to the right of the suitcase runnable and click on "External Tool Configurations". Select "Ant Build" and click the "New Launch Configuration" just above the selected "Ant Build" option. In the resulting window, set the name to "Build.DlQuery" and browse the workspace for the DLQuery build.xml file. The result should look like this:
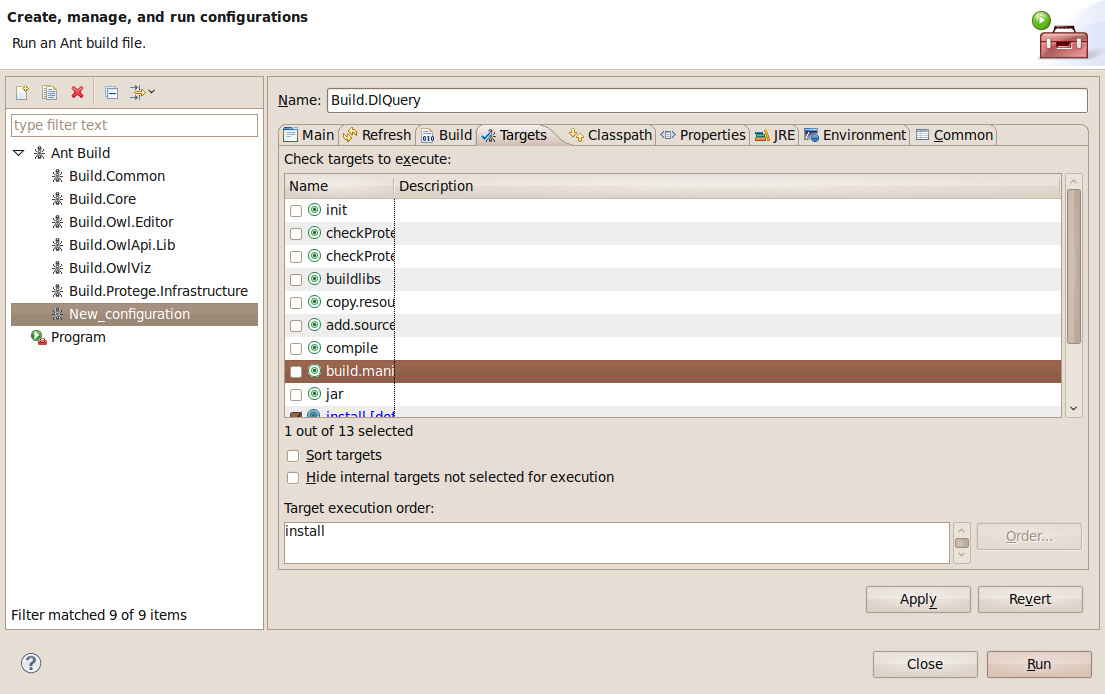
 Now go to the targets tab and make sure that the install target is chosen.
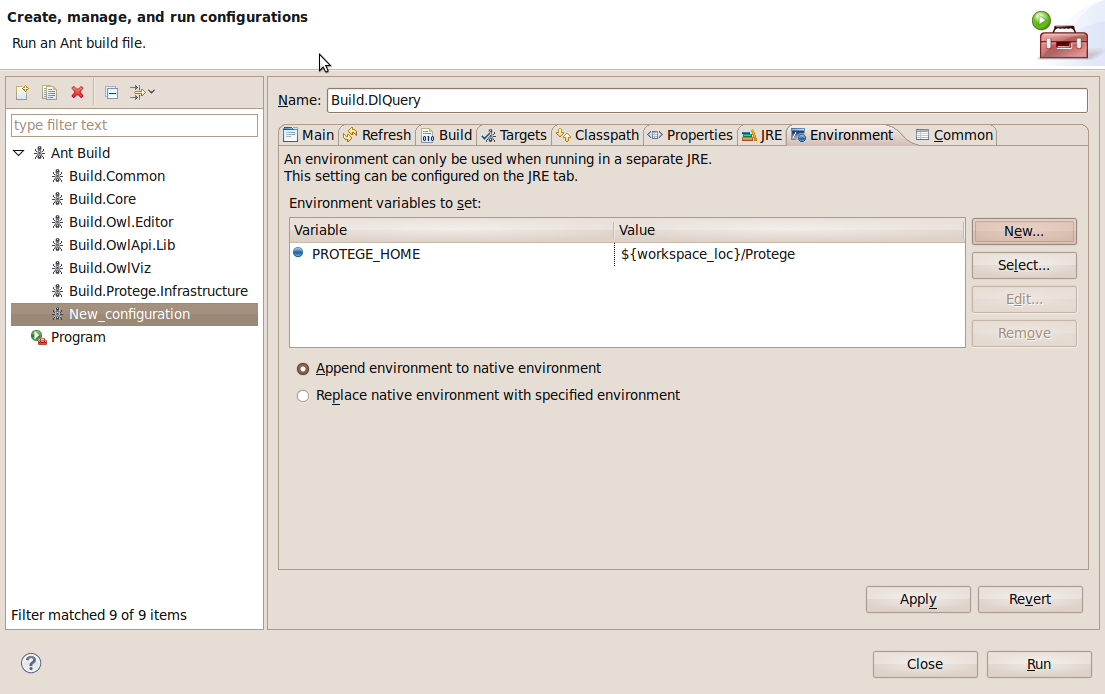
 Finally go to the Environment tab and make sure that PROTEGE_HOME is set to ${workspace_loc}/Protege.
 Now the new build script can be saved (Apply) and run. Running this script will install your plugin (DLQuery in this case) into the Protege distribution that we have been making.